Beginner’s Tutorial: Building a Custom Connector Using Fivetran Connector SDK
This tutorial walks you through building and deploying an example connector that decrypts a message using a Fernet key.
We assume you have no prior Python or SDK experience – we’ll walk through everything from installing Python to deploying your connector. By the end, you will have a custom connector running on Fivetran that writes a sample record (in this case, a decrypted message) to your destination.
Prerequisites
Before we begin, make sure you have the following:
A Fivetran account and destination. If you don’t have an account, sign up for Fivetran and set up a destination first.
Fivetran API key (base64-encoded): The Connector SDK uses Fivetran’s REST API for deployment. When you generate an API key and secret in your Fivetran account, the combined base64-encoded API key including the key and the secret is provided as well. This combined encoded key will be used for authentication when deploying. Save this base64 API key for later. See our Scoped API Key documentation or System API Key documentation for guidance on obtaining a key.
Supported Python 3 Environment: The Connector SDK supports Python version 3.10 through 3.14.0 (3.13 is the default version as of 2026). During the tutorial, we will check whether a supported Python 3 version is already installed on your machine. If not, we’ll walk you through installing Python so you’re ready to proceed.
Operating System: This guide covers instructions for macOS, Windows, and Linux. We will call out OS-specific steps as needed.
In a real scenario, your connection would pull data from an external source (an API, database, etc.). For simplicity, this tutorial uses a dummy example that generates data in code. You won’t need any external data source to complete this tutorial.
Check for Python 3 (and install if needed)
Before installing anything, check if Python 3 is already installed on your system, and if not, we will install it.
Check your current Python version
Let’s check whether Python 3 is already installed on your system and make sure it’s in the supported range.
Expand for instructions
Open your terminal or command prompt and run:
python3 --version
If that doesn't work, try:
python --version
On Windows, you can also try:
py -3 --version
Look for a version number between 3.10 and 3.14.0 (for example, Python 3.14.0). If you already have a supported version, you can skip ahead to Step 2: Set Up a Project Folder and Virtual Environment.
If Python is not installed or the version is too old, follow the steps below for your operating system.
Python installation in macOS
If you're using macOS and don’t have a supported version of Python, follow these steps to install it.
Expand for instructions
Download the latest Python 3 installer from the official Python website.
Run the installer and follow the prompts.
Open Terminal (Applications > Utilities > Terminal) and run:
python3 --versionYou should see output like
Python 3.11.x. Any version between 3.10 and 3.14.0 is supported.
Optional (Homebrew users):
If you prefer using Homebrew, you can install Python with:
brew install python3
Python installation in Windows
If you're on Windows and Python isn’t installed or not on PATH, follow these steps to install it correctly.
Expand for instructions
Download the latest Python 3 installer from the official Python website.
During installation, check the box labeled "Add Python to PATH."
Open PowerShell or Command Prompt and run:
python --versionOr run:
py -3 --versionYou should see a version like
Python 3.10.9or newer.
Python installation in Linux
If you're using a Linux distribution and Python isn’t installed or too old, follow these steps to install it using your package manager.
Expand for instructions
Open a terminal and run:
python3 --versionIf the version is below 3.10 or Python is not installed, use your package manager:
Ubuntu/Debian:
sudo apt update
sudo apt install python3 python3-venv python3-pip
Fedora:
sudo dnf install python3
Verify the installation again with:
python3 --version
(Optional) Using pyenv
If you want to manage multiple Python versions or install a very specific one, pyenv is a helpful tool for version control.
Expand for instructions
It’s often useful to manage multiple Python versions or ensure you are using a specific patch version. pyenv is a popular tool for managing Python versions on a single machine. With pyenv, you can easily install a specific Python version and switch between versions for different projects. This can be helpful if your system Python is not in the supported range or if you want to match the Fivetran SDK’s default (3.13.7 at time of writing).
To install pyenv on macOS, you can use Homebrew:
brew install pyenv. On Linux, follow the instructions on the pyenv GitHub (it typically involves cloning pyenv and updating your shell config). Windows users can usepyenv-winor simply install the needed Python versions manually since pyenv is primarily for Unix-like systems.Once pyenv is installed, you can install a specific Python version, for example:
pyenv install 3.13.7
pyenv global 3.13.7   # or `pyenv local 3.13.7` in your project directory
This ensures that when you run python3, you are using Python 3.13.7. After using pyenv to set the version, verify with python3 --version again.
Why pyenv? It matters when you need precise control over Python versions or when your OS-provided Python isn’t suitable. Fivetran’s SDK supports specific Python versions; using pyenv guarantees you’re developing with one of those versions. If you’re comfortable with your existing Python installation and it’s within the supported range, pyenv is optional.
Set up a project folder and virtual environment
Now let’s create a project folder and set up a virtual environment to keep your Python dependencies isolated.
Expand for instructions
It’s best practice to create an isolated Python environment for your connector project. This avoids dependency conflicts with other projects and ensures you know exactly which libraries are used. We’ll create a project directory and a virtual environment inside it.
Create a project directory: Choose a location (for example, your home directory or a development projects folder) and create a new folder for your connector project. In a terminal/command prompt, run:
mkdir my_fivetran_connector && cd my_fivetran_connectorThis creates a folder named
my_fivetran_connectorand navigates into it. All project files will reside here.Create a virtual environment: Inside the project directory, create a virtual environment named
venv. Run:python -m venv venvThis command uses Python’s built-in
venvmodule to create an isolated environment in a subdirectory calledvenv. You may need to usepython3instead ofpythondepending on your system.After running this, a folder
venvwill appear in your project directory. It contains a private copy of Python and pip just for this project.What is a virtual environment? It’s an isolated Python environment that allows you to manage dependencies for one project without affecting others. When activated, any packages you install (with pip) will be installed locally in this project’s
venvdirectory. This is crucial for keeping different projects’ libraries separated and avoiding version conflicts. For example, you might needcryptographyversion X for this connector, and another project might need version Y – virtual environments make that possible.Activate the virtual environment:
On macOS/Linux: run:
source venv/bin/activateOn Windows (Command Prompt): run:
venv\Scripts\activateOn Windows (PowerShell): run:
venv\Scripts\Activate.ps1
From this point on, any
pythonorpipcommand will use the Python inside thisvenv.Verify pip is up-to-date and update if needed.
i. Within your activated virtual environment
venv, always usepython -m pipto verify the version of pip so you’re sure to run thepiplinked to the active Python interpreter:python -m pip --versionThis prints the version of pip in use and the path where it’s installed. If the path points into your project’s
venv/..., you know it’s the one inside your virtual environment (not a system-wide pip).ii. To ensure you’re running the latest pip (helps avoid build/installation issues):
python -m pip install --upgrade pipThis command will either confirm you already have the latest pip, or upgrade it if a newer version exists. No need to manually check version numbers — pip compares itself against PyPI and updates when necessary.
To deactivate the virtual environment after your custom connector successfully completed the initial sync, simply run:
deactivate
This will exit the venv, and your prompt will return to normal. Reactivate later with the same activate script when you continue working on the project.
At this stage, we have an isolated environment ready to install the Connector SDK and build the connector.
PyCharm is a popular IDE for Python development. Follow the steps below to install PyCharm, create a new project, and configure a virtual environment, all from the IDE.
Expand for instructions on installing PyCharm
- Download PyCharm Community Edition from the official site.
- Install it as you would any other application for your OS:
- On macOS: Open the
.dmgfile and drag PyCharm to Applications. - On Windows: Run the installer
.exefile and follow the setup wizard. - On Linux: Extract the
.tar.gzfile and runpycharm.sh, or use a system package manager if supported.
- On macOS: Open the
- After installation, launch PyCharm. You may be prompted to customize your settings or import previous configs — feel free to use the default options.
- Once PyCharm opens, choose New Project to begin creating your Connector SDK workspace.
Expand for instructions on setting up your project and virtual environment
A virtual environment is an isolated space where Python packages are installed just for this project. This helps prevent conflicts with other Python projects and ensures reproducibility. It’s especially useful when different projects require different versions of the same package.
- Launch PyCharm and click New Project.
- In the Name field, enter
my_fivetran_connector. - In the Location field, choose where you want to save the project. PyCharm creates a new folder at this location.
- Under Interpreter type, select Project venv, the default option. This tells PyCharm to create a new virtual environment inside your project folder.
- Under Python version, select a supported Python interpreter, from 3.10 to 3.14. If none appears, install Python, restart PyCharm, and try again.
- Leave the boxes for Create Git repository and Create a welcome script unchecked, unless you need them for your workflow.
- Click Create to generate the project and virtual environment.
- Once the project opens, go to the bottom panel and click the Terminal tab. The virtual environment is already activated in this terminal — your prompt will start with
(venv). - (Optional) Verify that
pipis available and up to date:pip --version - (Optional) If needed, upgrade pip inside the environment:
python -m pip install --upgrade pip
Now you have an isolated environment ready to install the Connector SDK and build your connector. You’ll stay inside the PyCharm terminal for the remainder of this tutorial.
Install the Fivetran Connector SDK
If you are using PyCharm, run the following commands in the built-in PyCharm terminal.
With your environment ready, install the Connector SDK to get access to the CLI tools used for development and deployment.
Expand for instructions
With our environment set up, the next step is to install the Fivetran Connector SDK package, which is available on PyPI. The SDK provides the tools and CLI (Command-Line Interface) you'll use to develop and deploy connectors.
Make sure your virtual environment from Step 2 is activated, then run:
pip install fivetran-connector-sdk
This will download and install the Connector SDK package (and any of its dependencies) into your virtual environment. Once the installation finishes, it also adds a new command-line tool called fivetran that we’ll use to test and deploy connectors.
Verify the installation: Run the following to check that the SDK is installed and the CLI is working:
fivetran version
You should see a version number output, for example fivetran-connector-sdk 0.x.x. If you see a version number, the installation succeeded and the fivetran command is available in your PATH (courtesy of the activated venv).
Troubleshooting Connector SDK installation issues
If the SDK didn’t install or the fivetran command isn’t working, here are steps to fix common setup problems.
Expand for instructions
If the
fivetrancommand is not found: This might happen if the virtual environment wasn’t activated or the executable path isn’t set. Ensure you ran the activation step. You can locate where it was installed by runningwhich fivetranon macOS/Linux orGet-Command fivetranin PowerShell on Windows. If it shows a path inside the venv (for example,.../venv/bin/fivetranor...\venv\Scripts\fivetran.exe), but the command isn’t recognized, double-check that the venv is active. In rare cases, you might need to add the venv’sScripts(Windows) orbin(macOS/Linux) directory to your PATH manually, but this is usually not necessary if the environment is activated.If you encounter an error or unusual behavior when running
fivetran— for example:ValueError: No version information of fivetran_connector_sdk availableThis may mean an outdated
pipinstalled an incorrect or partial package. To fix this, upgradepipand reinstall the SDK inside your virtual environment:pip install --upgrade pip pip install --force-reinstall fivetran-connector-sdkAfter reinstalling, verify the SDK is working:
fivetran version
You should see the correct version output (for example, fivetran-connector-sdk 0.x.x).
Check for global interference
In rare cases, a globally installed SDK might interfere with your virtual environment. Follow these steps to clean that up.
Expand for instructions
If the Connector SDK verification issue persists, you might have a conflicting global installation of the SDK. Having both a system-wide and virtual environment install of fivetran-connector-sdk can cause version mismatches or incorrect CLI behavior.
To resolve this:
Deactivate your virtual environment:
deactivateRemove the global SDK installation:
On macOS/Linux:
pip3 uninstall fivetran-connector-sdkOn Windows:
pip uninstall fivetran-connector-sdk
(Optional) You may need to use
pip3orpy -m pip uninstalldepending on your system.Re-activate your virtual environment:
macOS/Linux:
source venv/bin/activateWindows CMD:
venv\Scripts\activateWindows PowerShell:
venv\Scripts\Activate.ps1
Then reinstall the SDK inside your venv (if needed):
pip install fivetran-connector-sdk
Now your virtual environment should be isolated and clean, with no interference from globally installed versions.
At this point, the SDK is set up and we’re ready to write our connector code.
Create the connector script (connector.py)
We’ll now write the core logic of your connector. This script will encrypt and decrypt a message and send it to your destination table.
Expand for instructions
Now it’s time to write the custom connector code. Fivetran’s Connector SDK expects your main connector logic to be in a file named connector.py in your project directory. We will create this file and add a simple example connector implementation that uses a configuration value to encrypt and decrypt a message and sync both the encrypted and decrypted message to the destination.
Create the file: In your project folder (
my_fivetran_connector), create a new file calledconnector.py. You can use any text editor or IDE for this. If you prefer the command line, on macOS/Linux you can runtouch connector.pyto create an empty file, or usenotepad connector.pyon Windows to open an editor.Add the following code to
connector.pyand save the file:from fivetran_connector_sdk import Connector, Logging as log, Operations as op import json from cryptography.fernet import Fernet # This is a plain text message we'll encrypt and decrypt plaintext_message = b"If you can read this, you have the correct key" # Define the schema function to specify the destination schema for the connector. def schema(configuration: dict): # Ensure the required config key is present if 'my_key' not in configuration: raise ValueError("Could not find 'my_key'") return [ { "table": "crypto", # Destination table name "primary_key": ["msg"] # Primary key column for the table # (No explicit columns defined here; types will be inferred from data) } ] # Define the main update function, called by Fivetran on each sync. def update(configuration: dict, state: dict): log.warning("Example: QuickStart Examples - Configuration") # Retrieve the encryption key from configuration key = configuration['my_key'] # Create a Fernet object for symmetric encryption using the provided key f = Fernet(key.encode()) # Encrypt the message encrypted = f.encrypt(plaintext_message) log.debug(f"Encrypted message: {encrypted.decode()}") # Decrypt the message decrypted = f.decrypt(encrypted).decode() log.debug(f"Decrypted message: {decrypted}") # An upsert operation to write both the encrypted and decrypted message to the destination op.upsert( table="crypto", data={ "msg": decrypted, # decode bytes to string for output "encrypted_msg": encrypted.decode() } ) # Save state checkpoint (in this simple example, state remains unchanged) op.checkpoint(state) # Initialize the Connector with our update (and schema) functions connector = Connector(update=update, schema=schema) # Allow running this script directly for local debugging if __name__ == "__main__": # Load configuration from file when running locally with open("configuration.json", "r") as f: configuration = json.load(f) # Run the connector in debug mode with the provided configuration connector.debug(configuration=configuration) # Example resulting table: # ┌────────────────────────────────────────────────────┬───────────────────────┐ # │ msg │ encrypted_msg │ # ├────────────────────────────────────────────────────┼───────────────────────┤ # │ If you can read this, you have the correct key │ gAAAAABl... │ # └────────────────────────────────────────────────────┴───────────────────────┘
Let’s break down what this code does:
Imports:
from fivetran_connector_sdk import Connector, Logging as log, Operations as op
import json
from cryptography.fernet import Fernet
We import the necessary classes from the SDK:
Connector– the class used to instantiate and configure the connector (linking to our functions).Logging as log– Fivetran's logging utility for connectors. We'll uselog.warning(),log.debug(), etc. The SDK supports Python-native log levels (DEBUG,INFO,WARNING,ERROR,CRITICAL). The original Java-style levels (FINE,INFO,WARNING,SEVERE) are still accepted for backward compatibility, butlog.fine()andlog.severe()are now deprecated — uselog.debug()andlog.error()/log.critical()instead. We uselog.debugfor a debug-level message that will show only in debug mode.Operations as op– provides methods likeop.upsert,op.delete,op.checkpointto create the data operations that Fivetran will ingest.
We also import Python’s built-in
jsonmodule (to handle configuration) andFernetfrom thecryptographylibrary. Fernet is a class that provides symmetric encryption; we’ll use it to decrypt a message with a key.
Plain text message we'll encrypt and decrypt:
plaintext_message = b"If you can read this, you have the correct key"- This is the original message that will be encrypted using the Fernet key from the configuration and later decrypted during the sync. It is defined as a bytes literal, which is required by the Fernet API. In this example, the message acts as a stand-in for any kind of secret or sensitive value your connector might process, such as an API token.
Schema function:
def schema(configuration: dict):
    ...
The
schemafunction tells Fivetran the structure of the data our connector will output. It returns a list of table definitions. In this simple case, we define one table:Name:
"crypto".Primary key:
["msg"]indicating the columnmsgwill act as the primary key.
We don’t explicitly list columns and types here, so Fivetran will infer themsgcolumn’s type from the data (it will end up as a text/varchar column). We also include a check: if'my_key'is not provided in the configuration, we raise an error. This ensures that when deploying, the user supplies the encryption key; otherwise, the connector should not run.
Update function:
def update(configuration: dict, state: dict):
    ...
This is the core of the connector logic. Fivetran will call this
updatefunction each time a sync runs. It receives two dictionaries:configuration: contains any configuration values (secrets, parameters) provided at deploy time. We expect our encryption key to be underconfiguration['my_key'].state: maintains state between runs (for incremental syncs). On the first ever sync or a full re-sync,statewill be empty. Our example doesn’t use state beyond checkpointing the same state back (since we’re always outputting the same data).
Inside
update:We log a WARNING-level message indicating the connector sync has started. This will appear in the Fivetran logs for each run (good for monitoring that the run began).
We retrieve the key from the configuration (
key = configuration['my_key']). This should be a string (the Fernet key in URL-safe base64 format).We create a
Fernetinstancef = Fernet(key.encode()). TheFernetclass expects a bytes key, so we.encode()the string from the config. This objectfcan decrypt (or encrypt) data with that key.First, we encrypt the plain text message using the Fernet key provided in the configuration. This produces a base64-encoded encrypted string that changes on each run due to Fernet’s use of random initialization vectors. We log the encrypted result using
log.debug, which means it will be visible when running the connector locally in debug mode but is suppressed in production (the SDK’s production logging levels show INFO, WARNING, ERROR, and CRITICAL; DEBUG is suppressed in production).We then immediately decrypt the message using the same Fernet key, restoring it to its original form. This decrypted message is also logged at the DEBUG level so you can verify that the roundtrip encryption and decryption worked as expected when testing locally. If the key is missing or incorrect, the decryption returns an error.
We then perform an upsert operation:
op.upsert(table="crypto", data={"msg": decrypted, "encrypted_msg":encrypted.decode()})This sends a row to the
CRYPTOtable containing both the decrypted and encrypted versions of the message. Themsgcolumn holds the readable plain text, while theencrypted_msgcolumn contains the base64-encoded ciphertext. The encrypted message is decoded from bytes to a string so it can be stored properly in the destination. In this case, we perform a single upsert operation each time the connector runs, writing a fixed message pair into the destination.Finally, we perform a checkpoint operation:
op.checkpoint(state)This saves the current state (we pass
stateas is, since we did not modify it). Checkpointing is important in connectors to mark progress. Even though our example doesn’t really track any incremental state (we always produce the same data), we includecheckpoint(state)as a best practice. This tells Fivetran “we’re done with this batch; you can persist this state for the next run.” If we were processing an API with pages, state might contain a page token or timestamp of last sync, for instance.
Connector initialization:
connector = Connector(update=update, schema=schema)- Here we create an instance of the
Connectorclass, passing ourupdateandschemafunctions. This object is what Fivetran will use to run the connector. It’s important that the file definesconnector = Connector(...)exactly like this so the SDK knows how to find your connector definition.
- Here we create an instance of the
Main guard for local debugging:
if __name__ == "__main__":
    with open("configuration.json", "r") as f:
        configuration = json.load(f)
    connector.debug(configuration=configuration)
This block enables the connector to be executed as a standalone Python script — for example, by running python connector.py from the terminal, or by using the Run or Debug buttons in an IDE like VS Code or PyCharm. It is not required for running the connector via the SDK CLI (fivetran debug), which works independently of this block.
When executed this way, the script opens
configuration.jsonfrom the project directory and loads it into a dictionary usingjson.load(). This configuration dictionary is then passed intoconnector.debug(), which runs the connector locally with the provided settings. This allows you to test the connector interactively without needing to deploy it.This main guard is especially useful in development environments that rely on direct script execution, as it allows your IDE to automatically provide the correct configuration during local test runs.
The call to
connector.debug(configuration=configuration)runs the connector in local debug mode using the provided configuration. It simulates how the connector would behave in Fivetran’s production environment and writes the output to a local DuckDB file (files/warehouse.db). This allows you to test the connector end-to-end — including encryption, decryption, logging, and data output — without needing to deploy it first.The comment block at the end of the file shows what the resulting table would look like in your destination: a row containing both the decrypted and encrypted versions of the message.
A few things to note about logging:
- We used
log.warningandlog.debug. In Fivetran's dashboard logs, you will see WARNING messages (for example, "Example: QuickStart Examples - Configuration"), but you will not see DEBUG messages in a deployed connector — DEBUG is a debug-only level, visible only during the localdebugrun. When runningfivetran debug, you'll see all log levels (DEBUG,INFO,WARNING,ERROR,CRITICAL) in your console, which helps during development.
The
log.fine()andlog.severe()methods are deprecated — uselog.debug()andlog.error()/log.critical()instead. The deprecated methods still work but emit deprecation warnings.- If you ever use logging in your connector, make sure to use the SDK’s
Logging(log) and not the standard Pythonloggingmodule. Only logs emitted through the SDK’s logger will be captured and sent to Fivetran’s log stream. For example, if you didimport loggingandlogging.warning("X"), it would not show up in Fivetran’s connector logs.
- We used
At this stage, our connector.py is ready. We’ve got code that expects a configuration (a key) and will encrypt and decrypt a message and output it. Next, we need to provide that configuration and any required dependencies.
Add configuration and dependencies
Next, you’ll define your connector’s configuration and install the required library (cryptography).
Expand for instructions
Our connector uses an external library (cryptography) and expects a configuration file for the encryption key. We’ll set those up now.
Create a dependency file
You can declare your connector’s Python dependencies using either requirements.txt or pyproject.toml. Both formats are supported; choose whichever fits your workflow.
Option 1: requirements.txt
In the project directory, create a file named
requirements.txt. This file will list any Python dependencies your connector needs so that Fivetran can install them in the deployment environment. For our example, we only need the cryptography library. Openrequirements.txtin an editor and add the following line:cryptography==44.0.2Save the file. This pins the cryptography package to version 44.0.2, which is a known stable version used in our example. Pinning versions (using
==) is recommended so your connector doesn’t suddenly break due to a new major version of a library. (Our connector code was tested with cryptography 44.0.2.)Why not include
fivetran-connector-sdkhere? The Fivetran runtime will automatically provide the SDK. You do not list the SDK itself in requirements.txt — only the additional libraries your code needs (in this case, cryptography). When you deploy, the Fivetran service will create an isolated environment and installcryptography==44.0.2before running your code.
Option 2: pyproject.toml
As a modern alternative, you can use a pyproject.toml file. Create it in the project directory with the following content:
[project]
name = "my-connector"
version = "0.1.0"
dependencies = [
    "cryptography==44.0.2",
]
If both requirements.txt and pyproject.toml are present, pyproject.toml takes precedence.
Generate a Fernet key
Our connector expects a configuration value my_key which should be a secret key for Fernet decryption. We need to generate a key and supply it. A Fernet key is a URL-safe base64-encoded 32-byte key.
- Install the
cryptographypackage in your virtual environment (if not already installed):pip install cryptography - Generate using Python: Activate your project virtual environment (if not already active) and open a Python REPL by running
pythonin the terminal. A Python REPL (Read-Evaluate-Print Loop) is an interactive way to execute Python code. It allows users to enter commands, which are then evaluated, and the results are printed immediately. This process loops, allowing for continuous interaction. Then run the commands one by one, omitting>>>:This will print a string of 44 characters (ending in>>> from cryptography.fernet import Fernet >>> key = Fernet.generate_key() >>> print(key.decode())=). That is your Fernet key. For example, it might output something like:Your Fernet key will be different each time, since it’s random.XZ2K6Bs7wVd-pW-n5wF5uX1L4mqw7g1LbNbe4KqhYGc= - Copy the generated key string (do not include the quotes, just the characters). This is the value to put in our configuration file.
- Exit the REPL:
exit()
Alternatively, you could write a short script to generate a key, or use any other method – but using the Python REPL as above is quick. Make sure you have installed cryptography in your venv (running connector.py or fivetran debug will install it automatically via your dependency file, but in the REPL you might need to pip install cryptography first if not already present).
Fernet encryption is non-deterministic: every run will produce a different encrypted value for the same plaintext.
Create configuration.json
- In the project directory, create a file named
configuration.json. This will hold any configuration parameters for your connector, such as API keys or, in our case, the encryption key. For our example, the configuration file should look like this:{ "my_key": "<YOUR_FERNET_KEY_HERE>" } - Replace
<YOUR_FERNET_KEY_HERE>with the key string you generated in step (b). Keep the quotes around it, since JSON requires the value to be a string. For example, after replacement the file might be:{ "my_key": "XZ2K6Bs7wVd-pW-n5wF5uX1L4mqw7g1LbNbe4KqhYGc=" } - Save the file. This JSON format is simply key-value pairs of configuration settings. We use
"my_key"as the key because our code expectsconfiguration['my_key'].
The configuration.json file is used for local testing and deployment, but it should not be checked into version control if it contains sensitive info (just like you wouldn’t commit real API secrets). Fivetran does not store this file; it’s only read during deployment. In production, Fivetran securely stores the values you provide (like the key) in their system. After deploying, you can actually delete this local file to avoid keeping secrets on disk.
Now we have everything in place: our code, a requirements file, and a configuration file with the necessary key. Before deploying to Fivetran, we should test the connector locally to make sure it runs as expected.
Test the connector locally
Run your connector locally with the SDK’s debug tool to verify that it works as expected before deploying it.
Expand for instructions
Fivetran provides a local testing command (fivetran debug) that simulates the Fivetran runtime and runs your connector code on your machine. This is extremely useful for development and debugging.
Make sure you are in the project directory (the one containing
connector.py, your dependency file (requirements.txtorpyproject.toml), etc.) and your virtual environment is activated. Also ensureconfiguration.jsonis present with your key.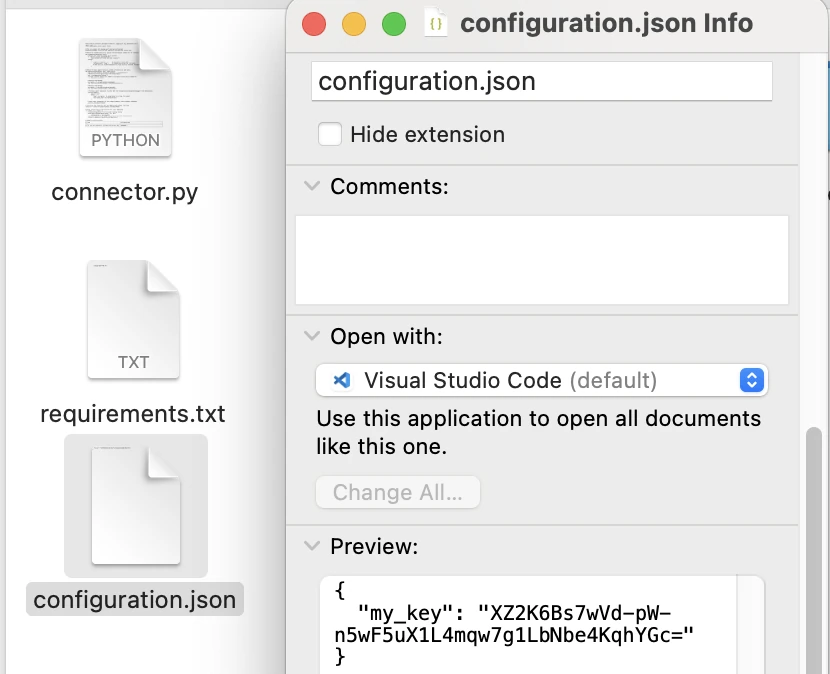
For debugging, install the packages required for your connector (a single
cryptographypackage for our example):If using
requirements.txt:pip install -r requirements.txtIf using
pyproject.toml:pip install -e .Run the local debug:
fivetran debug --configuration configuration.jsonLet’s break down this command:
fivetran debugtells the SDK to execute the connector in debug mode locally.--configuration configuration.jsonoption points the CLI to use our configuration file for any config values. This ensures that when our code callsconfiguration['my_key'], it’s populated from the JSON file.
When you run this, the SDK will do the following:
It will read your dependency file (
requirements.txtorpyproject.toml) and install the listed packages in a temp environment (so that your system or venv packages don’t interfere; the local debug uses an isolated environment to mimic production).Then it will execute
connector.pywith the provided configuration and an empty initial state.
You should see output in the console from our
logcalls. For example:WARNING - Example: QuickStart Examples - Configuration DEBUG - Decrypted message:(Plus some additional info the SDK prints, for example, about writing to DuckDB.)
If all goes well, the run should end with a message like INFO ⚡ debugger Sync SUCCEEDED, and no errors. The local tester creates a file files/warehouse.db in your project directory – this is a DuckDB database file that represents the data that would be sent to your destination.
Inspect the output data
After running the connector, let’s inspect the output using DBeaver or another DuckDB-compatible tool.
Expand for instructions
After a successful fivetran debug, your connector will create a local database file at files/warehouse.db.
This file is a DuckDB database that simulates what Fivetran would send to your real destination. You can use either a command-line or graphical tool to inspect the data inside.
Option 1: Use DBeaver (recommended for most users)
DBeaver is a cross-platform database UI that supports DuckDB files.
The actual workflow may vary slightly depending on your OS and DBeaver version. The steps below are based on DBeaver 25.2.0 on macOS, but the general process is similar on Windows or Linux.
If you don’t have DBeaver installed, download and install it from dbeaver.io.
Open DBeaver.
Select Window > Database Navigator. This opens the database navigator panel.
Click the New Database Connection button (a plug icon with a plus sign).
Search for DuckDB in the driver list and select it.
Click Next.
On the Main tab of the Connect to a database configuration window, make sure the Connect by:Host option is selected.
Click Open... and select
<your_project_directory>/files/warehouse.db.Click Open.
Click Finish to connect. DBeaver should display the DuckDB
warehouseschema, including the table created by your connector (in this case,crypto).To inspect the data, expand the schema (warehouse>tester>Tables>crypto)
Double-click the
cryptotable. DBeaver will show the table contents, which should include the decrypted message in themsgcolumn and its encrypted counterpart in theencrypted_msgcolumn.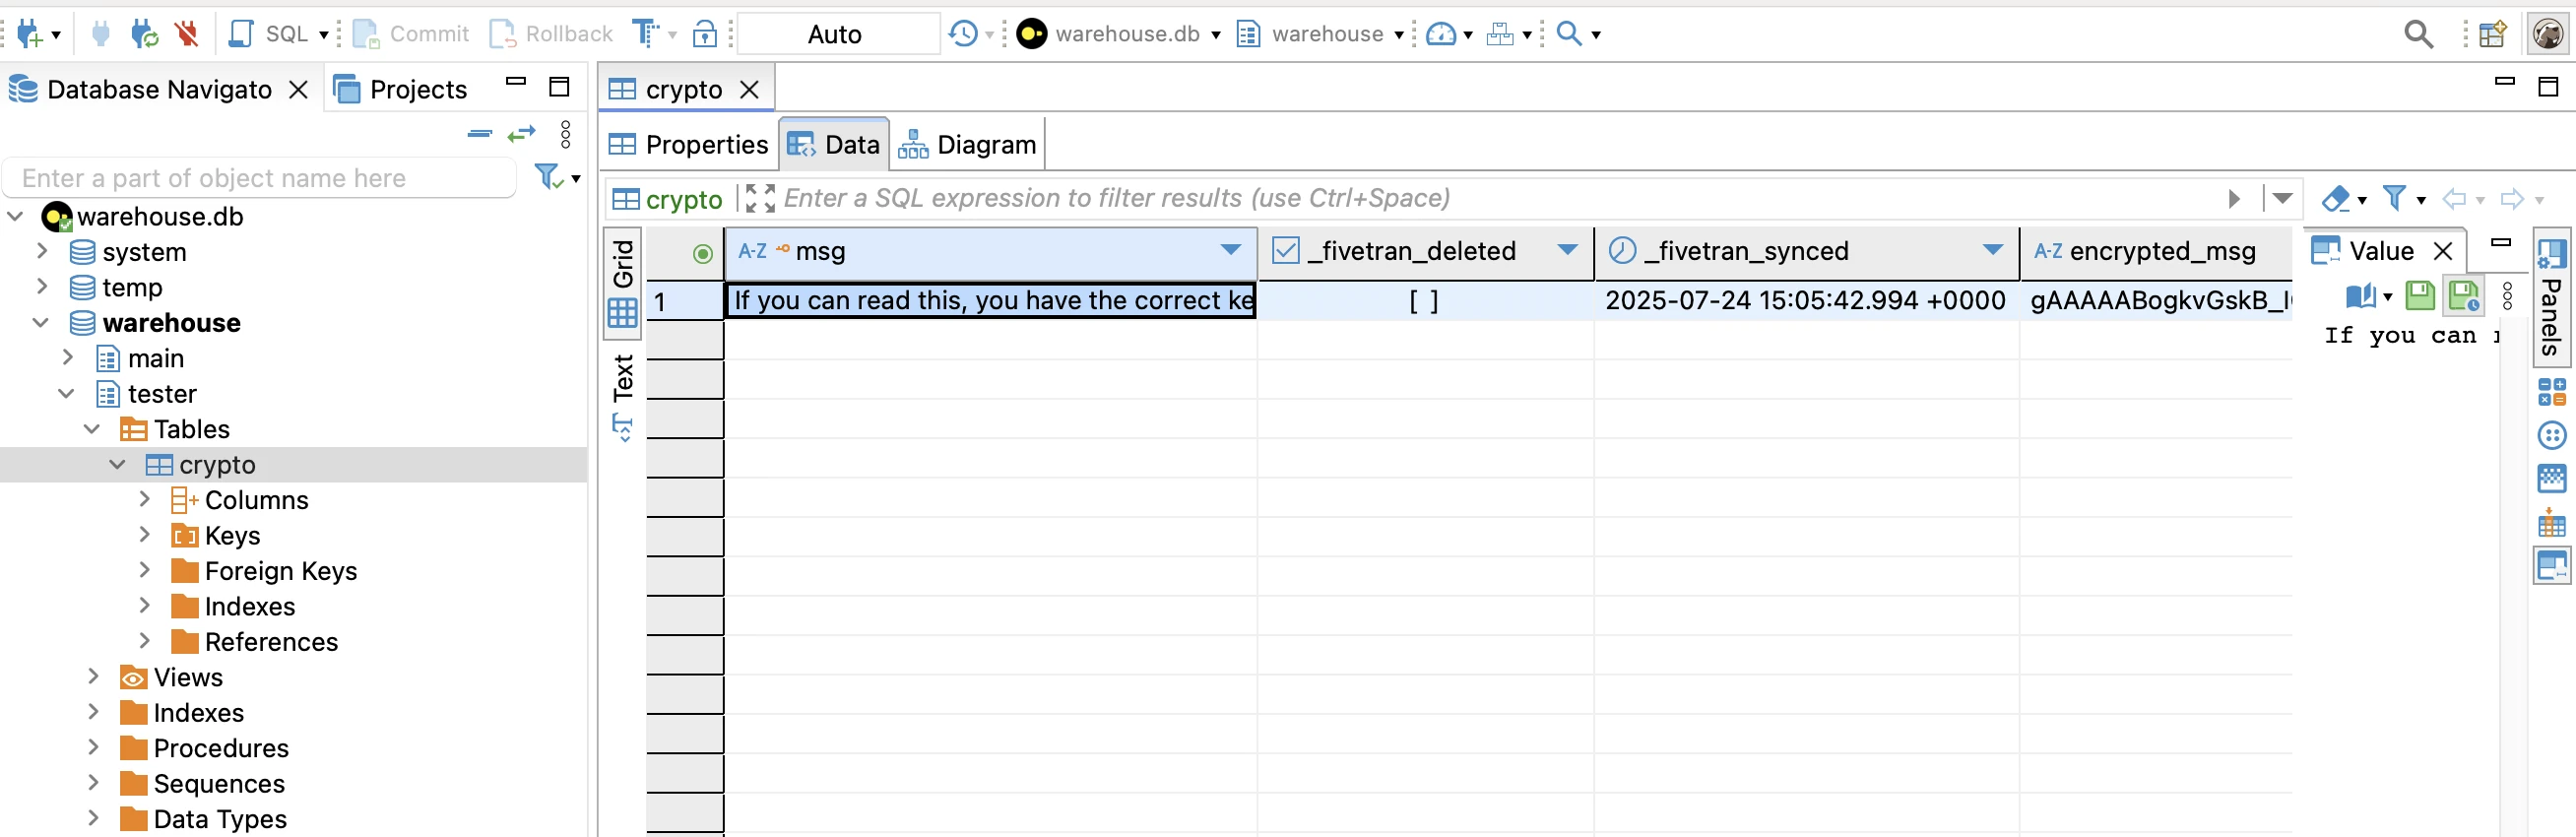
Before running fivetran debug again, make sure to close DBeaver's connection to the file by right-clicking it and selecting Disconnect. DuckDB allows only one process to access the database file at a time. If DBeaver is connected while fivetran debug tries to write to it, the sync may fail with a file lock error.
Option 2: Use DuckDB CLI (advanced / terminal users)
See our Using DuckDB CLI documentation page for details.
Troubleshooting local runs
If something didn’t work during local testing, here’s how to diagnose and resolve the most common issues.
Expand for instructions
If the debug command fails with an error like “Could not find 'my_key'”, check that your
configuration.jsonis present and formatted correctly, and that you ranfivetran debugwith the--configurationflag. This error indicates the code didn’t get the key in config.If it fails with a cryptography error (for example,
InvalidTokenor similar) during decryption, that means the key provided was wrong for the encrypted message. Make sure you used the exact key that was used to encrypt (in our example, use the one you generated).If you change your code’s schema or primary key and run debug again, you might see an error about schema changes (for example, “schema definition changes detected... please try again after running fivetran reset”). As mentioned, just run
fivetran resetin the project directory and then tryfivetran debugagain. This resets the local test state so it won’t conflict with previous schema.If you don’t see your log messages in the console, ensure your import statement is
Logging as logfrom the SDK. The local debug prints all log levels, so you should seeDEBUG,INFO,WARNING,ERROR, andCRITICALlogs in your terminal. If you used Python’s built-in logging by mistake, those logs might not appear. Stick with the SDK’slogobject. Note: the deprecatedlog.fine()andlog.severe()methods also still print during debug but emit deprecation warnings.If you run into an error like ”No module named cryptography” or similar, ensure that your dependency file (
requirements.txtorpyproject.toml) is correct and thatfivetran debugactually installed the dependencies. It should handle that automatically, but if something was off, you can manuallypip install -r requirements.txt(orpip install -e .forpyproject.toml) in your venv and try again.
Once fivetran debug runs without errors and you’ve verified the connector logic works, congratulations – your connector code is working locally! The final steps are to deploy it to Fivetran’s service and run it in the cloud.
Deploy the connector to Fivetran
Once verified, you can now deploy the connector code and config to Fivetran using the CLI.
Expand for instructions
Deploying will send your code (and dependency requirements) to Fivetran and create a new Connector SDK connection in your Fivetran account. Make sure you have the following information handy from the prerequisites:
Your base64-encoded API key.
Your destination name (the name of the destination in your Fivetran account where you want this data to land).
A name for your new connection. After the connection has been deployed, this name will appear in Connection name column of the connection list in the Fivetran dashboard.
Before deploying, double-check that your project directory has only the necessary files: typically just connector.py, your dependency file (requirements.txt or pyproject.toml), and (if needed) other Python modules your connector uses. Avoid leaving other Python files or unused scripts in the folder, as the deploy process might try to inspect them and add unexpected dependencies. (The configuration.json file is not uploaded, it’s just used to send the config values during deploy.)
To deploy, run the following command in the project directory:
fivetran deploy --api-key <YOUR_BASE64_API_KEY> --destination <YOUR_DESTINATION_NAME> --connection <YOUR_CONNECTION_NAME> --configuration configuration.json
Replace the placeholders:
<YOUR_BASE64_API_KEY>– with the encoded key from prerequisites. (This is a long string ending in=that represents your API key and secret.)You can avoid exposing your API key on the command line by using environment variables. For example, on Mac/Linux you might do
export FIVETRAN_APIKEY=abcdef==and then use--api-key $FIVETRAN_APIKEYin the command. On Windows PowerShell, use$Env:FIVETRAN_APIKEY = "abcdef=="then--api-key $Env:FIVETRAN_APIKEY. This prevents the API key from showing up in your shell history.<YOUR_DESTINATION_NAME>– with the exact name of your destination in Fivetran. You can find this in the Fivetran dashboard (for example, the name of your warehouse, like “MySnowflake” or “redshift_cluster”). If your account has only one destination, this flag is optional, but it’s good practice to include it to be explicit.<YOUR_CONNECTION_NAME>– a name you choose for this connection and set during the first deploy. For example,"hello_connection".Connection names must follow Fivetran’s naming conventions:
- Only lowercase letters, numbers, and underscores are allowed (a–z, 0–9, _).
- It must start with a letter or underscore (not a number).
- No spaces or hyphens or uppercase letters. If you use an invalid name, the deployment may fail or the connection might not be created properly. Example valid name:
hello_connection. Example invalid name:Hello Connection(has uppercase and space).
Let’s say your base64 API key is abcdef==, your destination is MyWarehouse, and you want to name the connection hello_connection. The command would be:
fivetran deploy --api-key abcdef== --destination MyWarehouse --connection hello_connection --configuration configuration.json
When you run this, the CLI will:
Package up your
connector.pyand dependency file (requirements.txtorpyproject.toml).Upload them to Fivetran, along with the configuration values from
configuration.json.Fivetran will set up a new connection in your account with the specified name and destination, and install the required packages (
cryptography, etc.) in their managed environment.
In this example, the packages specified in requirements.txt (in our case, cryptography) are checked for the latest version at deploy time. If a newer compatible version is available, you are prompted to update the requirements.txt file:
We recommend using the current stable version for the following libraries: {'cryptography': 'cryptography==45.0.6'} Would you like us to update requirements.txt to the current stable versions of the dependent libraries? (Y/N):
Typing either Y or N is fine. If you type Y, the CLI will automatically update your local requirements.txt to the recommended version (in this case, cryptography==45.0.6). This helps ensure your connector uses stable and secure library versions. You can always manually edit requirements.txt later if you want to pin a different version.
If a connection with the name you provided already exists (perhaps from a previous attempt), the CLI will prompt you to confirm if you want to overwrite it. You can also use the --non-interactive flag to overwrite without prompting. (Be cautious with --non-interactive in case you accidentally overwrite a different connection – always double-check the name.)
If successful, you’ll see an output from the CLI including the URL with the ID of the created connection. At this point, the connection exists in your Fivetran dashboard, but it is in a paused state (not actively syncing yet). Fivetran generally creates new custom connections as paused to allow you to review and then start the sync manually.
After deploying, check your Fivetran account in the browser. You should see a new connection on the Connections page with the name you chose.
Run the connection in Fivetran (initial sync)
Now let’s switch to your Fivetran dashboard to run the connector and verify the sync in your destination.
Expand for instructions
Now that the connector code is deployed to Fivetran, we need to start the connection so it actually performs a sync in the cloud and delivers data to your destination.
Locate the connection in your Fivetran dashboard:
- Log in to your Fivetran account and go to Connections, which lists all connections in your account. Find the connection with the name you gave (for example,
hello_connection). - Alternatively, click or copy-paste the connection URL in the SUCCESS message in the terminal
The connection status will be “Paused”.
- Log in to your Fivetran account and go to Connections, which lists all connections in your account. Find the connection with the name you gave (for example,
Configuration in the dashboard (if applicable): If your connection required any configuration input that wasn’t fully provided in
configuration.json, the Fivetran UI prompts you to enter those details now. In our case, we providedmy_keyvia thedeploycommand (configuration file), so there are no additional setup steps. (For a real connection that needed, say, an API token or a start date, the dashboard would show a setup form to fill those in if you hadn’t provided them via the CLI.)Start the initial sync: On the connection’s detail page in the Fivetran dashboard, do any of the following:
- Unpause the connection by switching the toggle in the top-right corner from Paused to Enabled
- Click Sync.
- Click Start Initial Sync.
Monitor the sync: After starting, the connection runs on Fivetran’s servers. Because our example connection doesn’t pull external data and only generates a small in-memory record, this sync should complete quickly (about a minute). The status in the dashboard should be Active.
Verify data in your destination: Check your destination for a new table. The table name should be
CRYPTO(as defined in theschemafunction). There should be one row in it, with the columnmsgcontaining the text “If you can read this, you have the correct key”, and the columnencrypted_msg- the Fernet-encrypted message. You can query your destination, for example:SELECT * FROM <destination_schema>.crypto;You should see the messages. The destination schema name is always the same as the connection name. For example, a connection named
hello_connectionwill create a schema namedhello_connectionin the destination.Because we set
primary_key: ["msg"]in the schema, Fivetran knows thatmsgis the primary key for deduplication. If you run multiple syncs, it will upsert the same key and not create duplicates. If we had not specified a primary key, Fivetran would have added a hidden_fivetran_idkey and treated each sync as adding potentially new rows (which for idempotent static data like this isn’t ideal). Specifying primary keys is important for proper merge behavior in real connectors.Subsequent syncs: By default, after the initial sync, Fivetran will run the connection on a schedule (typically every 15 minutes for most accounts, though this can be configured in the connection settings). Since our connection always produces the same data, subsequent syncs won’t add new data — they’ll just upsert the same row again (which results in no change, because the row already exists with the same primary key and content). Fivetran is smart about this and will not count it as new records – you won’t be charged for the same unchanged data on repeated syncs. This example is static, but in a real scenario your connection would fetch new or changed data on each run.
Congratulations, your connection is now deployed and running on Fivetran!
Monitoring and troubleshooting your connection
With the connection live, it’s important to know how to monitor its execution and troubleshoot any issues that arise. The following sections outline some common practices and issues to be aware of.
Monitoring logs in Fivetran
Here’s how to monitor connector logs from the Fivetran dashboard so you can track what’s happening during syncs.
Expand for instructions
In the Fivetran dashboard, go to your connection’s detail page. There will be a Connector SDK logs tab. Here you can see the output logs from your connection’s runs on Fivetran’s servers. For our example, you should see at least:
A log entry “WARNING Example: QuickStart Examples - Configuration” for each sync (since we log that at the start of
update).You will not see the “Encrypted message:” and “Decrypted message:” fine logs, because that is below the default log level in production.
If an error occurred, you would see error logs or stack traces here.
Checking these logs is the first step in troubleshooting if something goes wrong. For instance, if the connection didn’t produce data, the logs might show an error like InvalidToken (which would mean the decryption failed due to a wrong key). Always inspect the logs for clues.
Verifying destination data
Check your destination to confirm that your decrypted message was delivered successfully.
Expand for instructions
The ultimate confirmation of success is seeing the expected data in your destination. If the logs show the connection ran without errors but you don’t see data in the destination, double-check the destination schema and table naming. Our example writes to table crypto. Make sure you’re looking at the correct destination (especially if you have multiple or if you specified a different schema). If data still isn’t there, the logs might indicate why (for example, perhaps the upsert didn’t happen due to a primary key issue).
Most issues can be resolved by carefully reading the error logs and using the tips above.
Troubleshooting
If the connector fails to deploy or sync, this section covers common fixes and debugging tips.
Expand for instructions
Now, let’s cover some common issues and troubleshooting tips for Connector SDK connectors:
Connection not appearing in dashboard / Deployment failed: If after running
fivetran deployyou don’t see the connection in your Fivetran UI, or the CLI indicated a failure:Double-check the destination and connection name you provided. A typo in destination name could cause the deploy to fail (if the destination isn’t found). If you have only one destination in your account, you can omit the
--destinationflag entirely.If the CLI said the connection already exists and you meant to update it, use a different name or add
--non-interactiveto overwrite. (Use--non-interactivewith caution to not overwrite unintended connections.)
fivetrancommand not found (after installation): If you get “command not found” forfivetraneven after installing:Make sure the virtual environment is activated (the
fivetrantool is installed inside it).If you activated and it still says not found, the Scripts directory might not be on PATH. This is uncommon on Unix when using
source activate, but on Windows, if you used PowerShell without enabling execution of the activate script, it might not have fully activated. Try the alternative activation (Activate.ps1vsactivate.batif one fails).Run
which fivetran(orGet-Command fivetranon Windows) to see where it resides. If it points to the venv path but your shell can’t run it, you might manually add that path to PATH as a workaround. But usually re-activating the venv properly solves it.
Errors during deployment (package installation issues): When you deploy, Fivetran will attempt to install the packages from your dependency file (
requirements.txtorpyproject.toml) in their environment. If that fails, the deploy will error out. Some reasons this can happen:A library in requirements needs system-level dependencies that aren’t present in Fivetran’s environment. For example, if you required a database driver that needs native binaries (like
psycopg2or an ODBC driver), the installation could fail or the connection might error at runtime due to missing libraries. Fivetran’s environment does include many common drivers (for MySQL, Postgres, etc.), but not everything. If you see errors like “cannot open shared object file... library not found”, it indicates a missing system dependency. In such cases, you should contact Fivetran support – they may be able to install the necessary driver in their environment or provide guidance. (Often, they’ll ask you for the error details, so deploying your connector and letting the connection fail is the way to get that info, then share the logs with support.)An incorrect package version. For instance, perhaps a version is not available for the Python version you chose. Check the error message; it might suggest using a different version. The Fivetran deploy process sometimes can auto-correct certain package versions (you might see a message recommending a change). Follow those if prompted.
In our example,
cryptographyis a pure-Python wheel (as of modern versions) and should install fine. But if you were using something likepyodbc, you might encounter the need for driver installation.
Package version incompatibilities: Sometimes two libraries don’t work together (for example, certain versions of
pandasandnumpycan cause a runtime warning or error about binary incompatibility). If your connector uses such libraries, you might run into errors. The solution is to pin versions known to work together. For example, ifnumpy==1.xandpandas==1.yare a compatible pair, use those. If unsure, often installing without version pins will grab a compatible set. For custom connectors, try to use mature, stable versions of libraries to avoid these problems. (This is more for advanced connectors; our simple one doesn’t have this issue.)JSON data appears with escape characters in destination: This is a general tip – if your connector returns JSON strings and you notice in the destination that they have a bunch of backslashes (escaped quotes, etc.), it might mean you double-encoded JSON. For example, doing
data={'info': json.dumps(obj)}will send a string of JSON, which the destination might store as text, showing all the quotes and slashes. Instead, if your destination supports a native JSON type and you want to load data as JSON, just dodata={'info': obj}(whereobjis a Python dict). The SDK will serialize it to actual JSON in transit, and the destination can store it properly. In short: send JSON as actual JSON data, not as a pre-stringified JSON, to avoid escape clutter in the warehouse.Connection keeps getting “rescheduled” or never completes (memory issues): If your connection attempts to process a huge amount of data in one go (for instance, reading a massive payload and fetching millions of records without upserting periodically), you might hit memory or time limits. Fivetran’s environment has resource constraints. If a connection uses too much memory or runs too long, Fivetran might terminate and reschedule the sync. To fix this, implement batching/pagination: read and output data in chunks rather than all at once. After each chunk, use
checkpoint(state)so that the next sync can continue where it left off. This way, each sync handles a manageable amount of data. Our example only upserts one record, so it’s fine. But a real connector pulling thousands of rows from an API should upsert in a loop rather than all at end. This pattern prevents out-of-memory situations and keeps each sync timely.Keeping the SDK up to date: Fivetran regularly updates the Connector SDK for improvements and bug fixes. It’s a good idea to update the
fivetran-connector-sdkpackage once in a while (you can dopip install --upgrade fivetran-connector-sdkin your dev environment). If you update it, run your local tests again to ensure nothing broke, then redeploy if needed. The Fivetran runtime will always have a matching or compatible version of the SDK to run your connector.
Next steps and best practices
With your connector working, here are best practices and ideas for expanding and improving it for production use.
Expand for instructions
Congratulations on deploying your first custom Fivetran connector! We walked through a basic example that demonstrated using a configuration and outputting a simple piece of decrypted data. Here are some next steps and best practices as you move on to building more complex connectors:
Integrate with a real data source - Now that you have the skeleton in place, try modifying the
update()function to connect to an actual data source. For example, you could use therequestslibrary to call a REST API endpoint, or use a database client (likepymysqlfor MySQL,psycopg2for Postgres, etc.) to fetch data from a database. Then parse that data and transform it intoop.upsertorop.deleteoperations. Make sure to add any new libraries to your dependency file (requirements.txtorpyproject.toml) and import them in your code. Test locally with sample responses.Use configurations for flexibility - The way we used
configuration.jsonfor the encryption key can be extended to any runtime parameters your connector needs. For example, you could add fields like"api_key": "...","start_date": "2023-01-01", etc., and use them in your code via theconfigurationdict. This allows you to avoid hardcoding values. When deploying, you’d include these in the JSON or input them via the UI. The Connector SDK will store them securely (Fivetran encrypts these config values at rest).Implement incremental
UpdateswithState- In our example, we always output the full data (just one row). In real scenarios, you’ll want your connector to only fetch new or updated records after the first sync. Thestatedictionary is how you track what’s been seen. For instance, if pulling from an API that supports pagination or timestamp filtering, you could store the last record timestamp or page number instateusingop.checkpoint. On the next run, that value will be available in thestateargument, so you know where to continue from. Design your connector to update state meaningfully (for example, state = {"last_run": current_timestamp} or {"page": 3} etc.). This way, each sync only processes incremental data. Be sure to checkpoint the state after processing each batch or at end ofupdate().Error handling and retries - Wrap your external data calls in try/except blocks to handle transient errors. If an API call fails, you can log an error and either raise an exception (which will fail the sync and cause Fivetran to retry it automatically after a backoff) or handle it gracefully (skip that batch, etc.). If you anticipate certain errors (like a 429 Too Many Requests), you might implement a delay or partial backoff in your code. Keep in mind Fivetran has a max time for a sync (generally a couple of hours); if your connection consistently fails or hangs, Fivetran might mark the sync as failed.
Testing with different scenarios - Use
fivetran debugfrequently during development. Test edge cases: no data available, lots of data, invalid config (to see your error handling), etc. You can also write unit tests for your functions by simulatingconfigurationandstateinputs.Performance considerations - If your connector fetches large data, upsert records in batches instead of one giant list. Each upsert operation doesn’t get sent to Fivetran immediately; they’re buffered, but upserting periodically helps manage memory. For example, if reading a 10,000-row API response, you might loop through and perform an upsert for each row (or for each small chunk of rows). This way, you’re not building a huge Python list of 10k items in memory before upserting – you stream it out.
Keep connector idempotent per sync - Each run of
update()should ideally produce the same results if run again with the same state. Avoid operations with side effects that could double-create data if a sync is retried. For example, don’t generate random data without using state to ensure uniqueness (unless that’s intended). Fivetran might retry a sync if it fails midway, so design such that a retry doesn’t produce duplicate records in the destination. Using primary keys on upserts helps (duplicates become updates to the same key), and using state to only move forward helps too.Security - Never print sensitive info in logs. Our example key is just for demo, but in real connectors, if you have API secrets, don’t log them. Also, be mindful that whatever is in
configurationwill be stored by Fivetran – don’t put things there that aren’t needed or that you wouldn’t want in a cloud service (API keys are fine; Fivetran encrypts them). Treat theconfiguration.jsonlocally as sensitive: don’t commit it to Git, etc.Documentation and comments - Maintain clear comments in your code (sans actual secrets) for future maintainers. If someone else picks up your connector later, understanding the schema and state logic is crucial. Document any non-obvious behavior or assumptions.
By following these practices, you can build reliable and efficient custom connectors. For more best practices, refer to the Best Practices guide. You’ve now got the foundation: a Python environment, knowledge of how to use Fivetran’s SDK, and a working example connector. Happy coding, and good luck with your custom data pipelines!