Proxy Agent
You must have Standard, Enterprise, or Business Critical plan to use Proxy Agent.
The Fivetran Proxy Agent enables Fivetran to securely connect to data sources that are not publicly accessible, such as databases in private networks or on-premises environments. The Proxy Agent runs inside your network and establishes an outbound-only connection to the Fivetran Managed SaaS. This design allows Fivetran to communicate with your destination without opening inbound firewall ports or exposing the source to the public internet.
Each Proxy Agent is uniquely identified by an agent ID in its configuration file (config.json). Only one Proxy Agent process can be active for a given agent ID at a time.
Do not run multiple Proxy Agent processes using the same configuration file or agent ID. Doing so can disconnect the agent and cause connection sync failures and other unexpected behavior.
System requirements
Proxy Agent requires the following system resources:
- CPU: Minimum 4 vCPUs with x86-64 processors
- Memory: Minimum 5 GB of RAM
- Storage: Minimum 2 GB allocated disk space for the executables and logs
- Java: The Proxy Agent includes a bundled Java Runtime Environment (JRE) based on open-source Azul Zulu JDK. You do not need to install or purchase any additional Java licenses.
Network requirements
Before installing the Proxy Agent, ensure the host can make the following outbound connections to Fivetran on port 443. For the full list of Proxy Server wildcard hostnames and IP addresses to safelist in your firewall, see Fivetran Proxy users.
| Connection | Hostname | Protocol | Security |
|---|---|---|---|
| Proxy Broker | orchestrator.fivetran.com | gRPC | mTLS |
| Proxy Server | Region-specific wildcard hostname, for example *.us-east-1.aws.proxy.prod.fivetran.com | TLS | TLS-encrypted |
Both connections are outbound only. You do not need to open inbound ports on the Proxy Agent host.
During normal operation, the Proxy Agent establishes and maintains an outbound gRPC control connection to Fivetran over port 443, secured with mutual TLS (mTLS). The agent may also open additional outbound TLS-encrypted connections over port 443 as needed.
The Proxy Agent supports TLS 1.3 and earlier versions. Versions before v1.1.0, bundled with High-Volume Agent version 6.1.0_79 and earlier, use WebSockets over TLS instead of gRPC to communicate with the Fivetran Proxy Server.
If your network requires outbound traffic to pass through an intermediate network proxy to reach Fivetran, configure it when you generate the Proxy Agent settings.
Region scope
Proxy Agents bundled with High-Volume Agent version 6.1.0/80 and later use the newer proxy infrastructure and are no longer strictly limited to a single region. They can route syncs through Proxy Servers in the region where each sync runs, so a single Proxy Agent can support connections across multiple regions.
Proxy Agents bundled with High-Volume Agent versions earlier than 6.1.0/80 are region-scoped and can only handle connections that run in the same region as the agent.
Although newer Proxy Agents can support multiple regions, we recommend deploying a Proxy Agent in the same region as, or a physically close region to, the Fivetran infrastructure it serves to improve latency and reliability.
Supported destinations
We support Proxy Agent for the following destinations:

- A Proxy Agent can support multiple connections. However, we recommend that you use a maximum of 30 connections per Proxy Agent.
- A Proxy Agent can only be used for connections within a single Fivetran cloud processing region, but it can be used by any connection in your account that runs in that region. For example, a Proxy Agent configured for the
AZURE_EASTUS2region cannot be used by a connection that runs in theGCP_US_EAST4region. In that case, you must use a separate Proxy Agent that is configured for theGCP_US_EAST4region.
Configure Proxy Agent
Follow the instructions below to configure a destination through the Proxy Agent.
Proxy Agents configured after June 10, 2025 must use the Proxy Agent bundled with High-Volume Agent version 6.1.0/79 or later.
Certificate management options
The Proxy Agent uses a client certificate and private key to authenticate to Fivetran. You can manage these credentials using one of the following methods:
Embedded certificate method (default): Fivetran generates the client certificate and private key and embeds them directly inside the Proxy Agent configuration file (
config.json). This is the simplest and recommended method for most deployments.KeyStore method (advanced): You store the Fivetran-generated client certificate and private key in a secure PKCS12 KeyStore file. This method is available in Proxy Agent version 1.1.4 or later, which is bundled with High-Volume Agent version 6.1.0_90 and later.
Using a KeyStore provides the following benefits:
- Encrypted, password-protected storage for the certificate and private key
- Separation of configuration (
config.json) and sensitive credentials (certificate and private key)
Both methods require generating the Proxy Agent configuration file (config.json). If you plan to use the KeyStore method, you will extract the embedded certificate and private key from this file for use in your KeyStore. See Configure Proxy Agent to use KeyStore.
Generate Proxy Agent settings
Follow the instructions below to generate the Proxy Agent configuration file (config.json), which contains the settings and authentication parameters required to establish secure communication between the Proxy Agent and Fivetran. This file is also required to install the Proxy Agent.
In Fivetran's setup form, do the following:
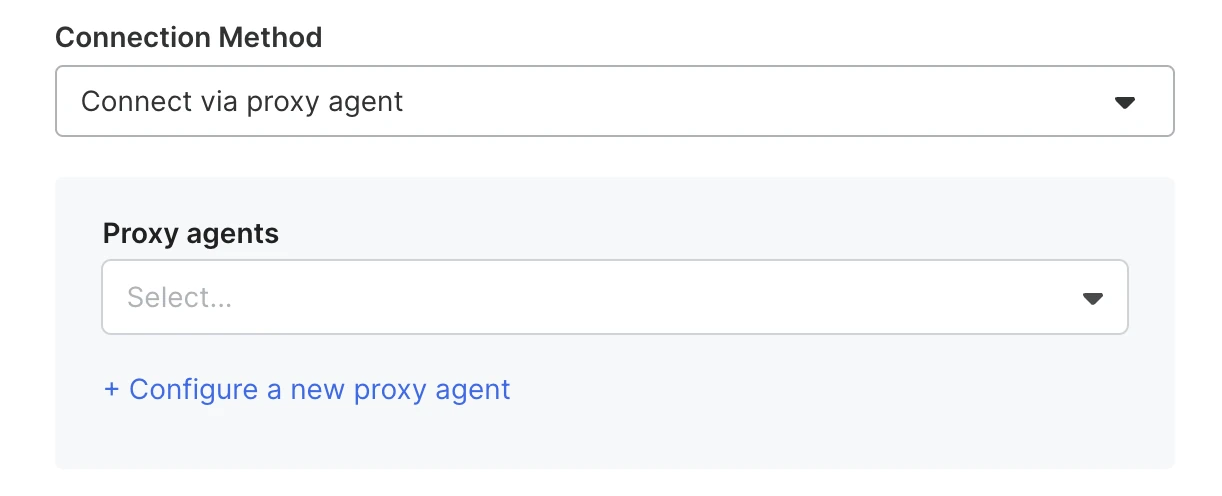
In the Connection Method drop-down menu, select Connect via proxy agent.
Click Configure a new proxy agent.
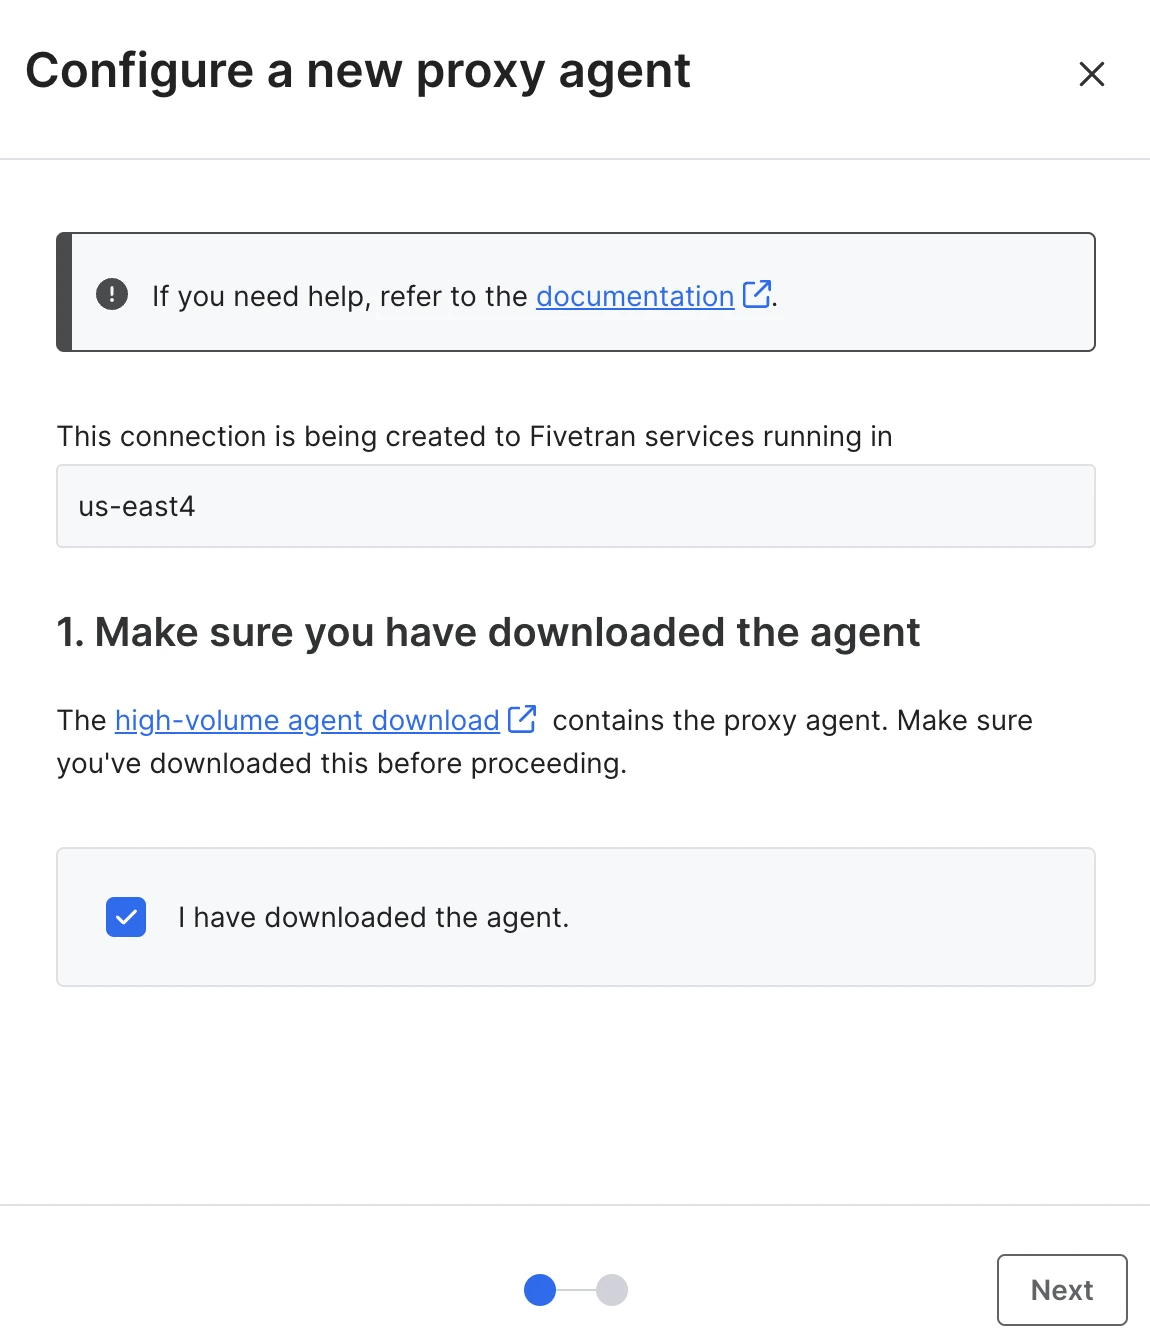
Proceed to the Configure a new proxy agent dialog.
Download High-Volume Agent if you have not already. Then, select the I've downloaded the agent checkbox and click Next.
Enter a name for your Proxy Agent and click Generate proxy agent config to generate a Proxy Agent configuration file.
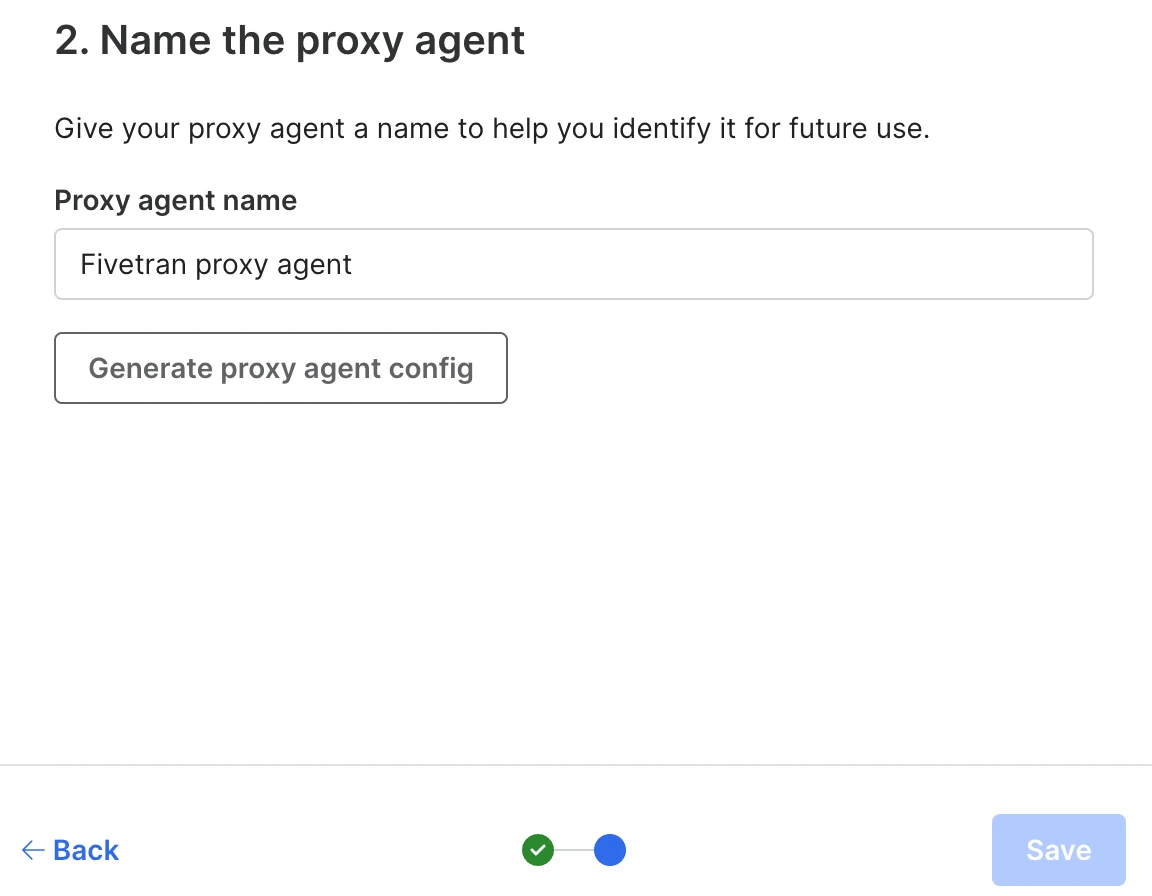
Download the generated Proxy Agent configuration file (
config.json) and save it in a location that is easy to access. You will need this file for the installation of the Proxy Agent.The configuration file contains the settings and authentication parameters required to establish secure communication between the Proxy Agent and Fivetran.

Select the I have downloaded the file checkbox and click Save to finalize the Proxy Agent configuration.
(Optional): If the Proxy Agent needs to forward traffic through an intermediate network proxy to reach Fivetran, add the
proxy_hostandproxy_portfields to yourconfig.jsonfile.Do not include
http://orhttps://in the<proxy_host>value.Example
config.jsonwith intermediate proxy settings:{ "agent_id": "<your_agent_id>", "auth_token": "...", "orchestrator_host": "orchestrator.fivetran.com", "client_cert": "-----BEGIN CERTIFICATE-----\n...\n-----END CERTIFICATE-----\n", "client_private_key": "-----BEGIN RSA PRIVATE KEY-----\n...\n-----END RSA PRIVATE KEY-----\n", "proxy_host": "<proxy_host>", "proxy_port": <proxy_port> }
Configure Proxy Agent to use KeyStore (optional)
If you are using the KeyStore method for certificate management, follow the steps in this section. Skip this step if you are using the default Embedded certificate method.
Configure the Proxy Agent to use a KeyStore
Prerequisites:
- Proxy Agent version 1.1.4 or later (bundled with High-Volume Agent version 6.1.0_90 and later)
- On Linux, the Proxy Agent service runs as
root - On Windows, the Proxy Agent service runs under the
LocalSystemaccount - OpenSSL version 1.0.1 or later installed (which is required to convert PEM files into a PKCS12 KeyStore)
Perform the following steps to prepare and configure the KeyStore:
Extract the certificate and private key from the generated
config.jsonfile into PEM files. Run the following commands in the directory where theconfig.jsonfile is located:Ensure you have
jqinstalled on your system. If not, follow the instructions in the jq installation guide.jq -r .client_cert < config.json > certificate.pem jq -r .client_private_key < config.json > private_key.pemConvert the PEM certificate and private key into a PKCS12 KeyStore file.
OpenSSL is required to convert the PEM certificate and private key into a PKCS12 KeyStore file. Ensure that OpenSSL version 1.0.1 or later is installed. Earlier versions do not support the SHA-256 algorithms required for PKCS12 keystores. If OpenSSL is not installed already, install it using either your operating system’s package manager or by downloading the source from the OpenSSL project website.
Linux:
sudo openssl pkcs12 -export \ -in certificate.pem \ -inkey private_key.pem \ -out keystore.p12 \ -name orchestrator.fivetran.com \ -passout pass:<your_secure_password>Windows:
openssl pkcs12 -export -in certificate.pem -inkey private_key.pem -out keystore.p12 -name orchestrator.fivetran.com -passout pass:<your_secure_password>
Ensure the KeyStore file is readable by the account that runs the Proxy Agent service:
On Linux, the Proxy Agent service runs as
root. Creating the KeyStore file withsudoensures thatrootcan read the file.On Windows, the Proxy Agent service runs under the
LocalSystemaccount.Grant read access to the KeyStore file for
LocalSystem. Replace<path_to_keystore>with the full path to your KeyStore file:icacls <path_to_keystore> /grant:r "NT AUTHORITY\SYSTEM":R "BUILTIN\Administrators":F /C
(Optional) Validate that the KeyStore was created correctly using the JRE bundled with the Proxy Agent:
Linux:
$HVR_HOME/jre/bin/keytool -list -keystore keystore.p12 -storetype PKCS12 -storepass <your_secure_password>Windows:
%HVR_HOME%\jre\bin\keytool -list -keystore keystore.p12 -storetype PKCS12 -storepass <your_secure_password>Expected output:
Keystore type: PKCS12
Keystore provider: SUN

Your keystore contains 1 entry

orchestrator.fivetran.com, Jan 15, 2025, PrivateKeyEntry,
Certificate fingerprint (SHA-256): AA:BB:CC:...
Remove the embedded certificate fields from your configuration file. This ensures that the Proxy Agent relies only on the KeyStore for the certificate and private key.
For Windows EXE installations, the installer requires embedded certificates for validation. Do not remove the
client_certandclient_private_keyfields before installation. Remove these fields after the installation completes, as described in Configure KeyStore settings for Windows EXE installation.Before (embedded certificates):
{
  "agent_id": "<your_agent_id>",
  "auth_token": "...",
  "orchestrator_host": "orchestrator.fivetran.com",
  "client_cert": "-----BEGIN CERTIFICATE-----\n...\n-----END CERTIFICATE-----\n",
  "client_private_key": "-----BEGIN RSA PRIVATE KEY-----\n...\n-----END RSA PRIVATE KEY-----\n"
}
After (using KeyStore):
{
  "agent_id": "<your_agent_id>",
  "auth_token": "...",
  "orchestrator_host": "orchestrator.fivetran.com"
}
Network configuration and validation
Before installing the Proxy Agent, safelist the hostnames of the Proxy Broker and the appropriate Proxy Server in your firewall so that the Proxy Agent can connect to our server. After configuring your firewall, do the following to verify connectivity from the machine on which the Proxy Agent will be installed.
Verify connectivity to the Proxy Broker
- Using Telnet:
telnet orchestrator.fivetran.com 443 - Using Netcat:
nc orchestrator.fivetran.com 443 -v
Verify connectivity to the Proxy Server
Replace <proxy server hostname> with a valid hostname for your region. For example, if your region's wildcard hostname is *.us-east-1.aws.proxy.prod.fivetran.com, replace the leading * with any valid string, such as primary.us-east-1.aws.proxy.prod.fivetran.com. For the full list of wildcard hostnames, see Fivetran Proxy users:
- Using Telnet:
telnet <proxy server hostname> 443 - Using Netcat:
nc <proxy server hostname> 443 -v
Verify connectivity to the database
Replace <host> and <port> with your database's hostname and port. The Proxy Agent host's IP address must be allowlisted in your database's firewall or security group before running these checks.
- Using Telnet:
telnet <host> <port> - Using Netcat:
nc <host> <port> -v
Install Proxy Agent
Follow the Proxy Agent installation instructions for your operating system.
You can install the Proxy Agent on any host in your network that has network access to your database. If a separate virtual machine isn't available, you can install the Proxy Agent directly on the database server.
Install Proxy Agent on Windows using EXE file (Installer)
When installing the Proxy Agent as a service, the user who installs the Proxy Agent must have permission to manage Windows services. We recommend that you install the Proxy Agent as an Administrator user.
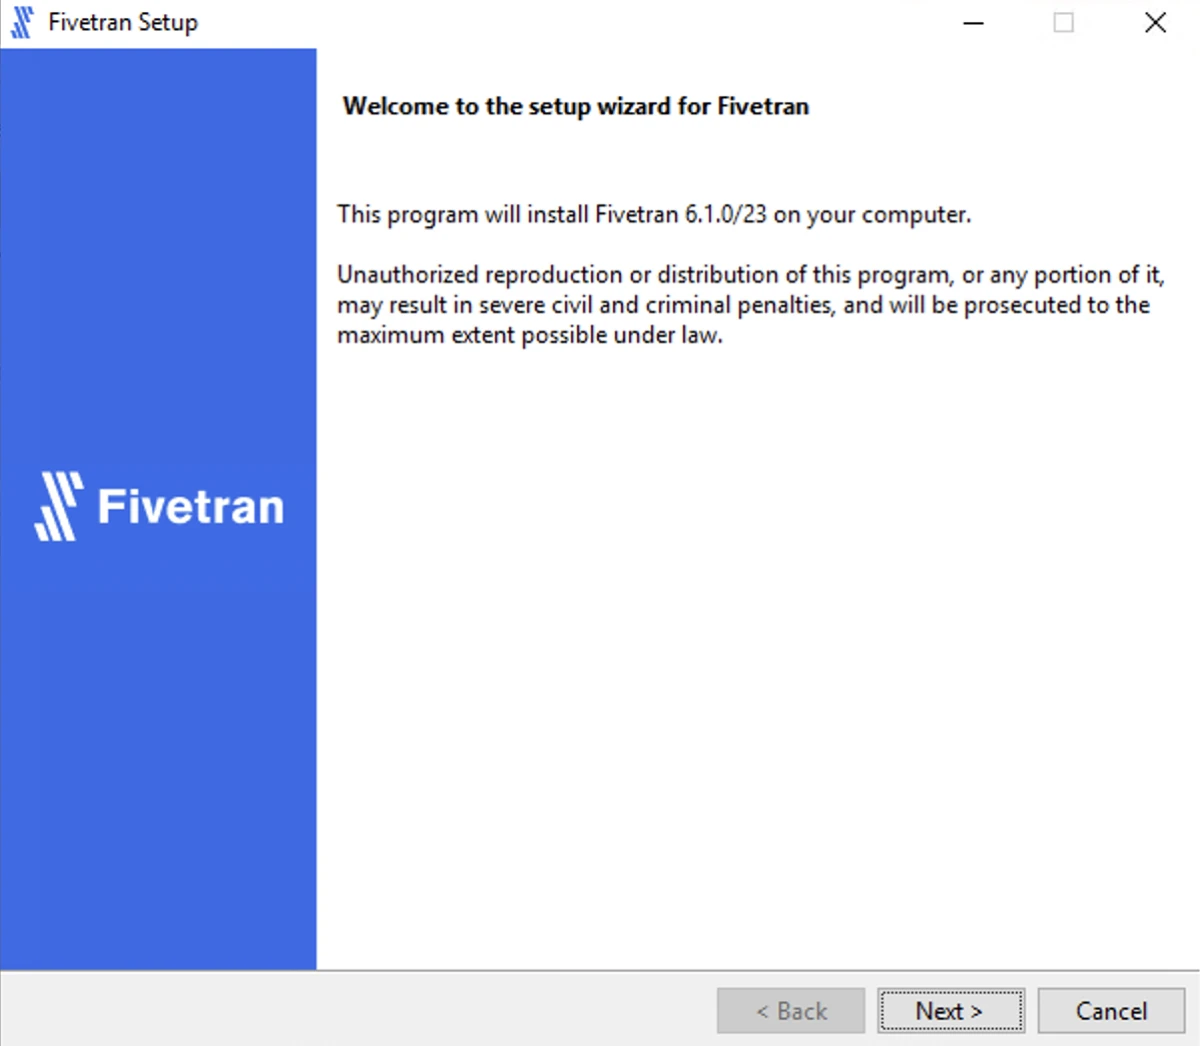
Run the downloaded
.exefile (for example,fivetran-6.1.0_23-hub_and_agent-windows-x64-64bit_ga_patch-setup.exe).In the installation wizard dialog, click Next.
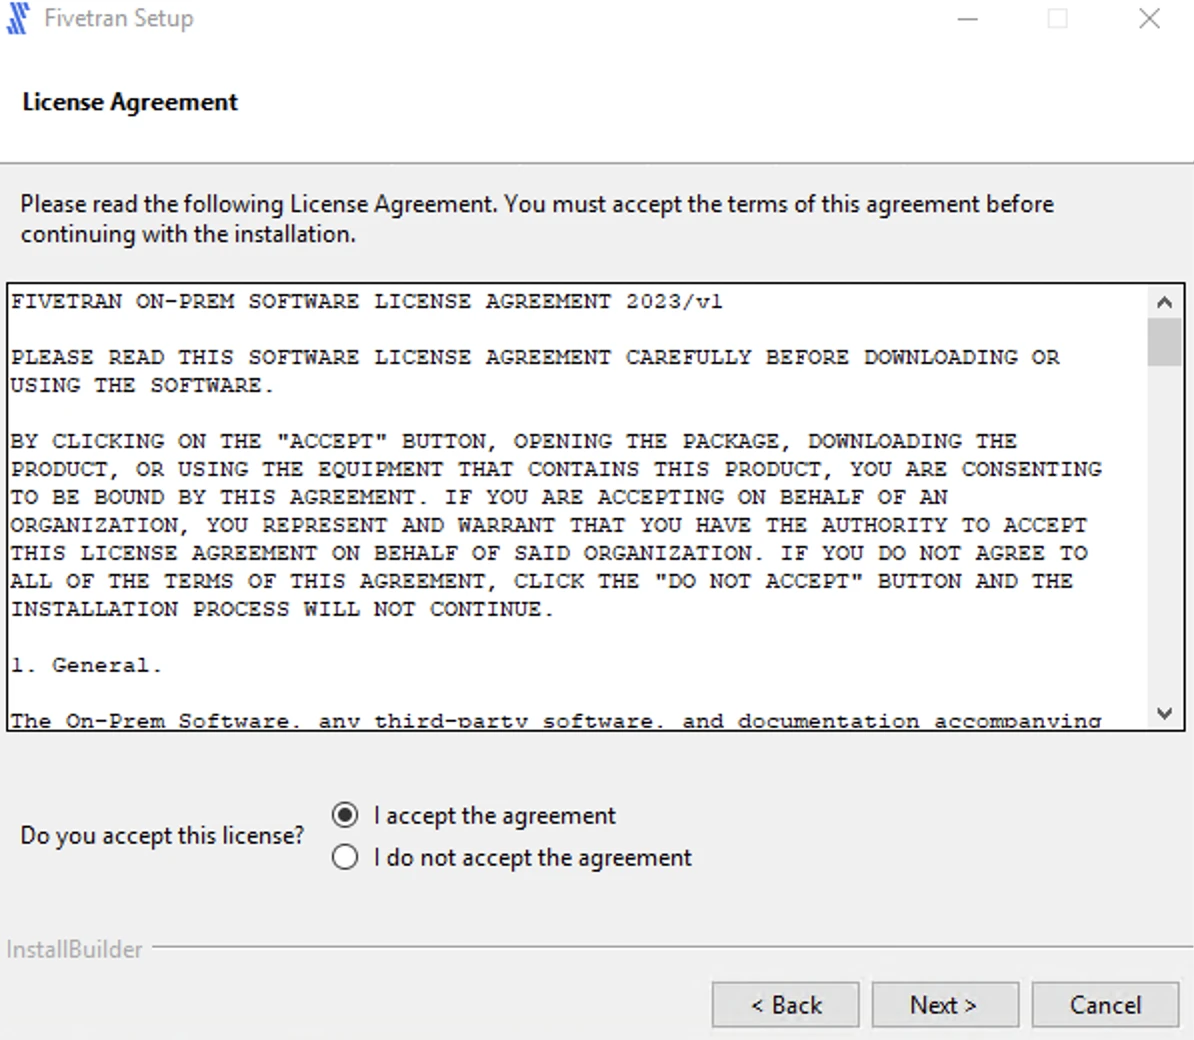
Read the License Agreement, select I accept the agreement and click Next.
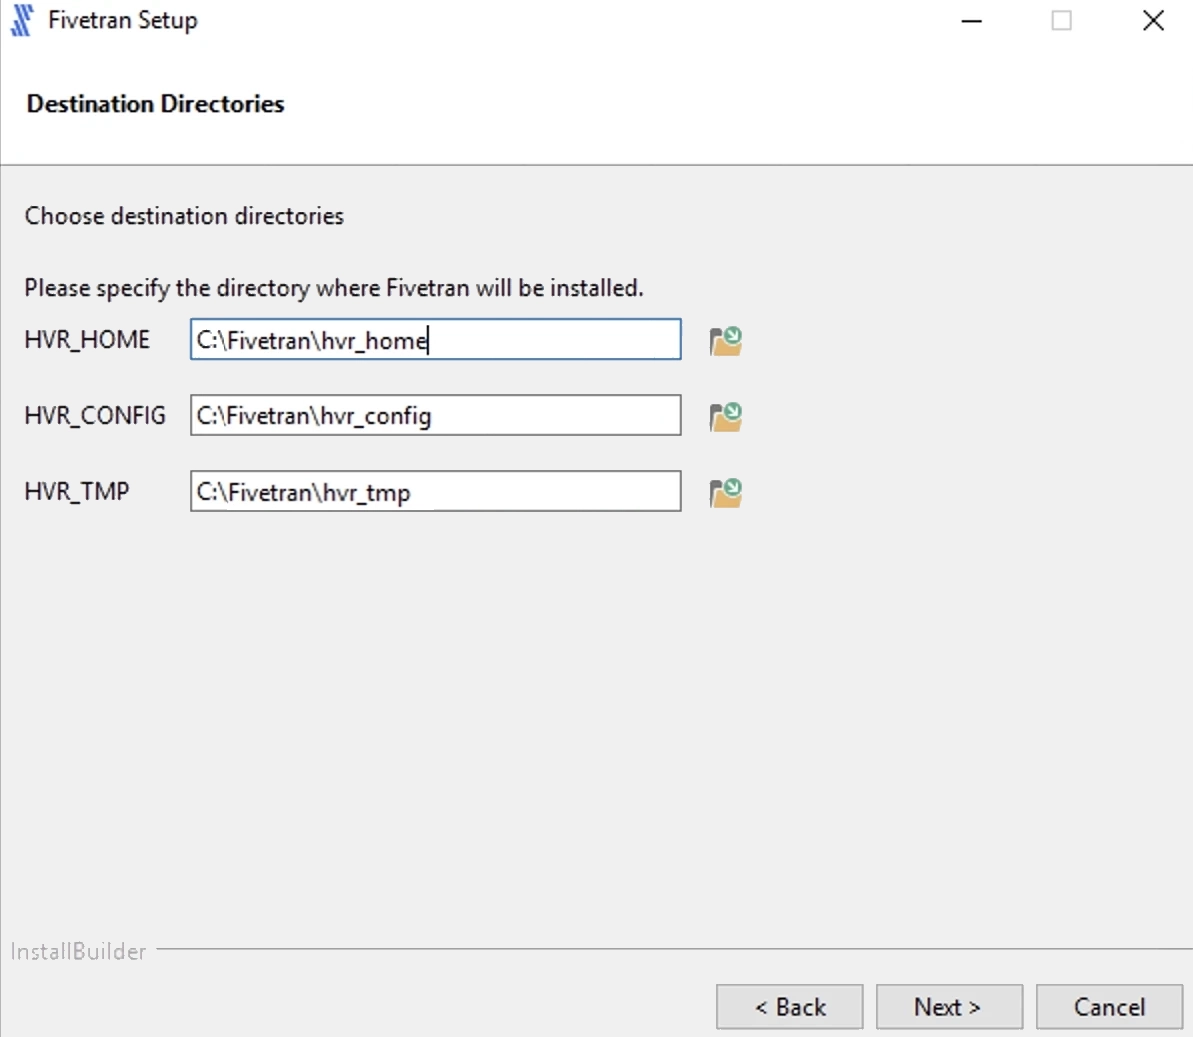
Specify the installation directories (for example,
C:\Fivetran\hvr_home,C:\Fivetran\hvr_config, andC:\Fivetran\hvr_tmp) and click Next.If this is a first-time installation, the High-Volume Agent (HVA) and Proxy Agent can be installed in the same directory. Otherwise, you can either install the Proxy Agent in a different directory than the HVA or manually install the Proxy Agent using a ZIP file.
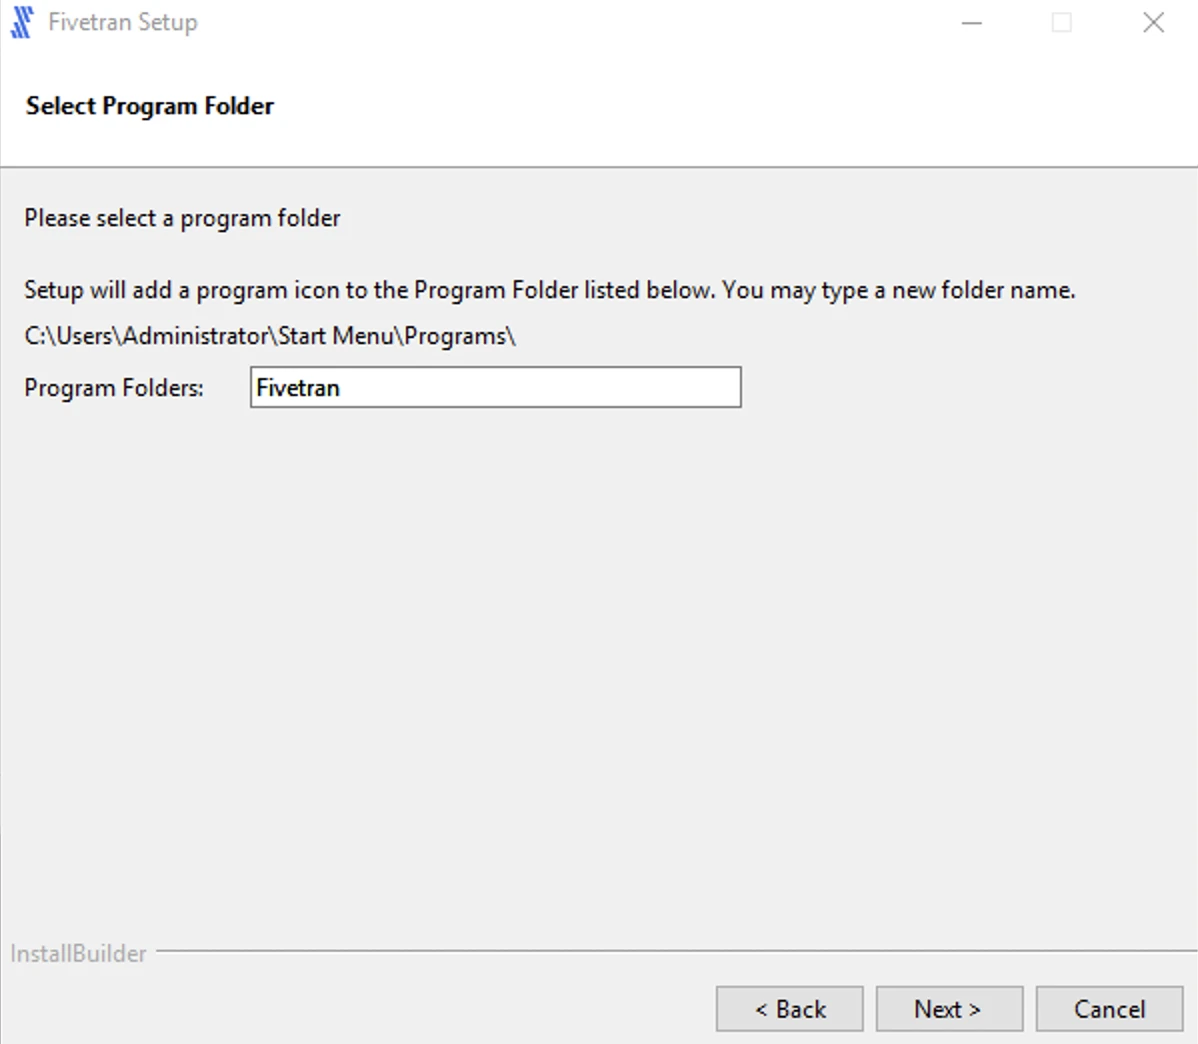
Specify the name for the program folder and click Next.
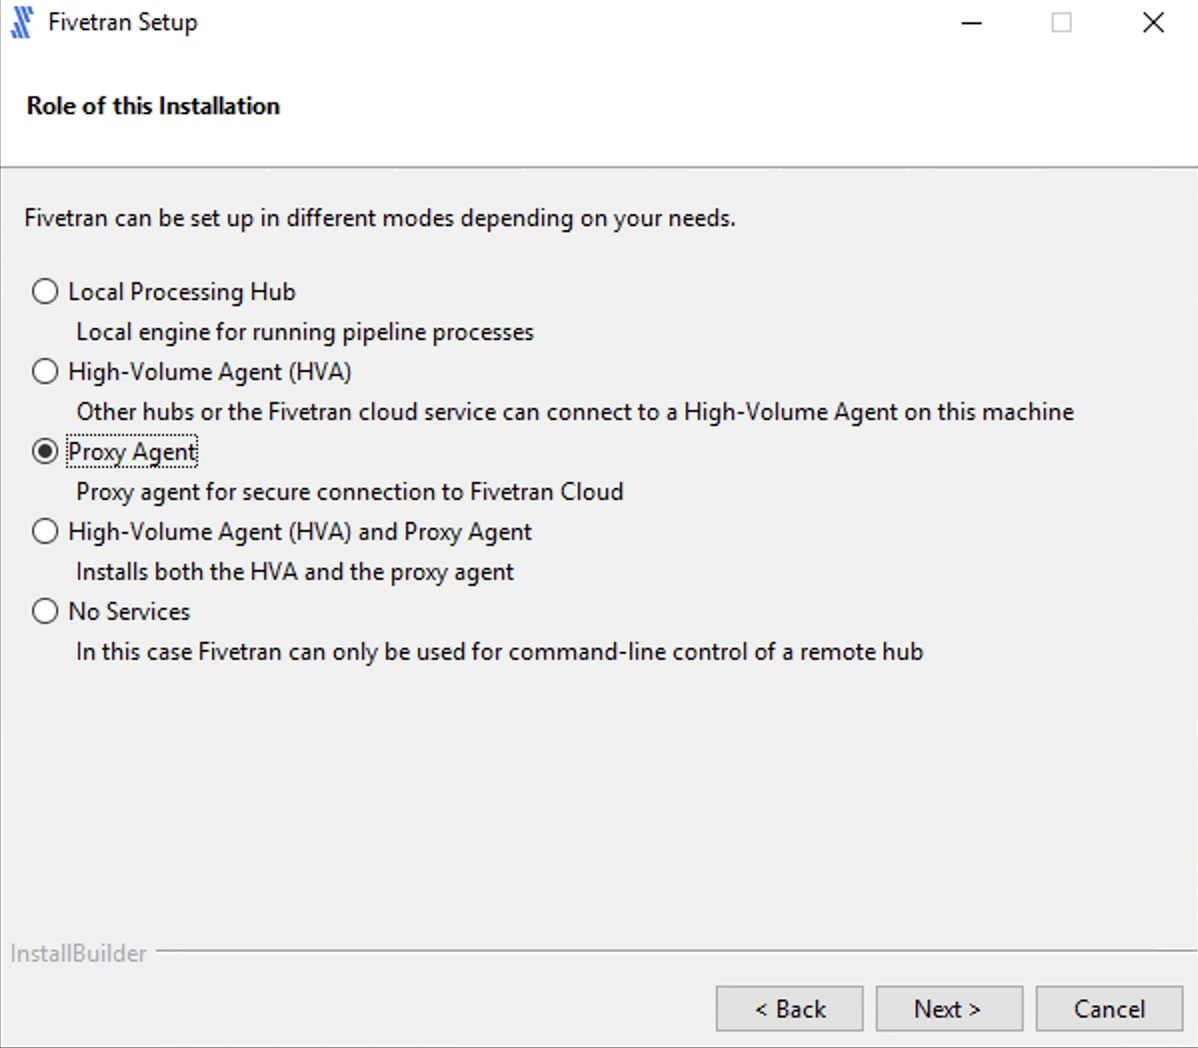
Select the role of the installation:
- Proxy Agent to install only the Proxy Agent or
- High-Volume Agent (HVA) and Proxy Agent to install both the Proxy Agent and HVA.
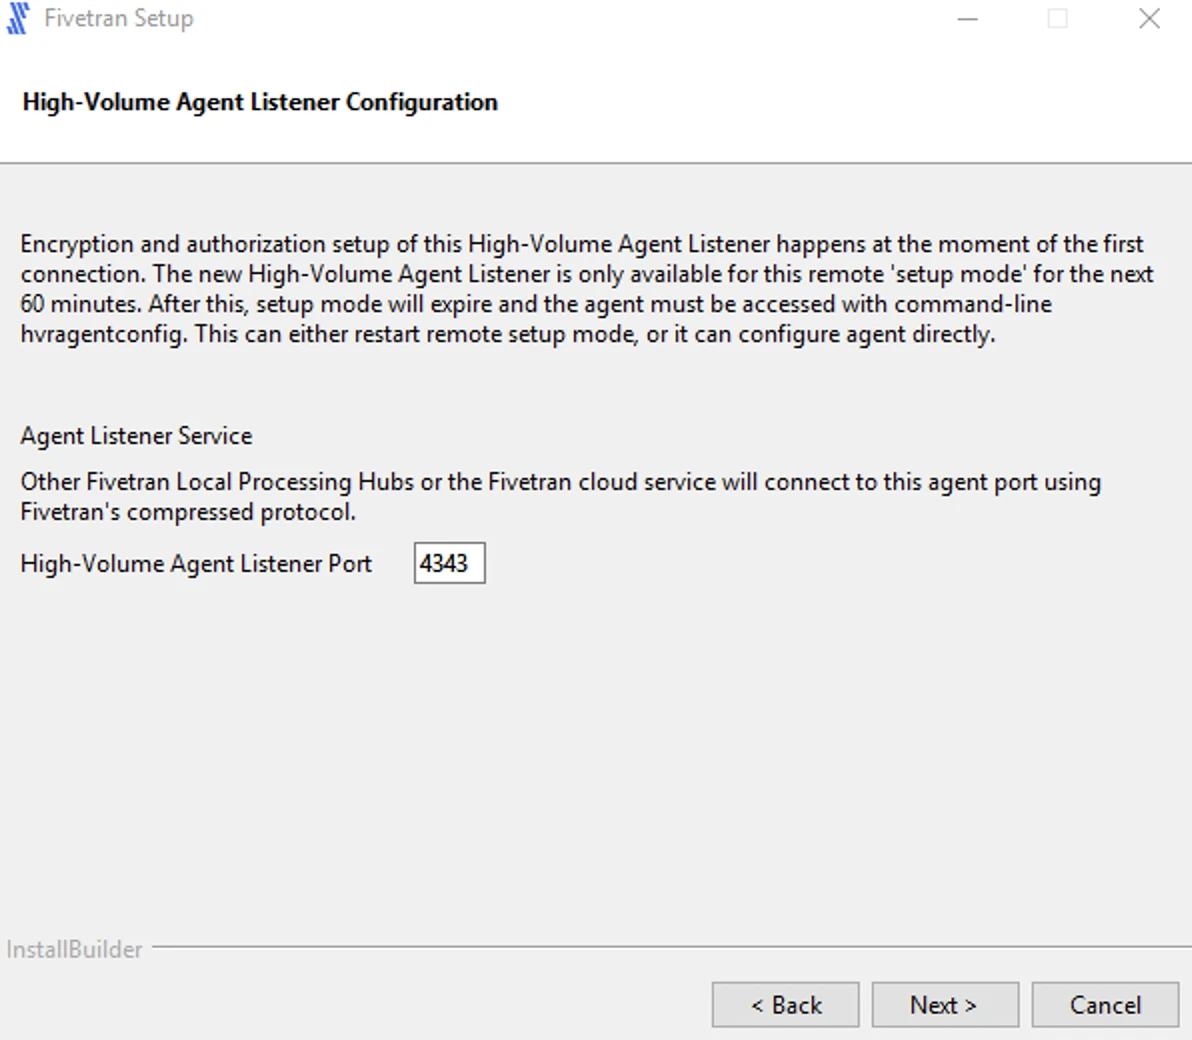
If you selected High-Volume Agent (HVA) and Proxy Agent in the previous step, enter value for the High-Volume Agent Listener Port and click Next.
Paste the Proxy Agent settings from the configuration file (
config.json) you've generated and click Next.The configuration file contains the settings and authentication parameters required to establish secure communication between the Proxy Agent and Fivetran.

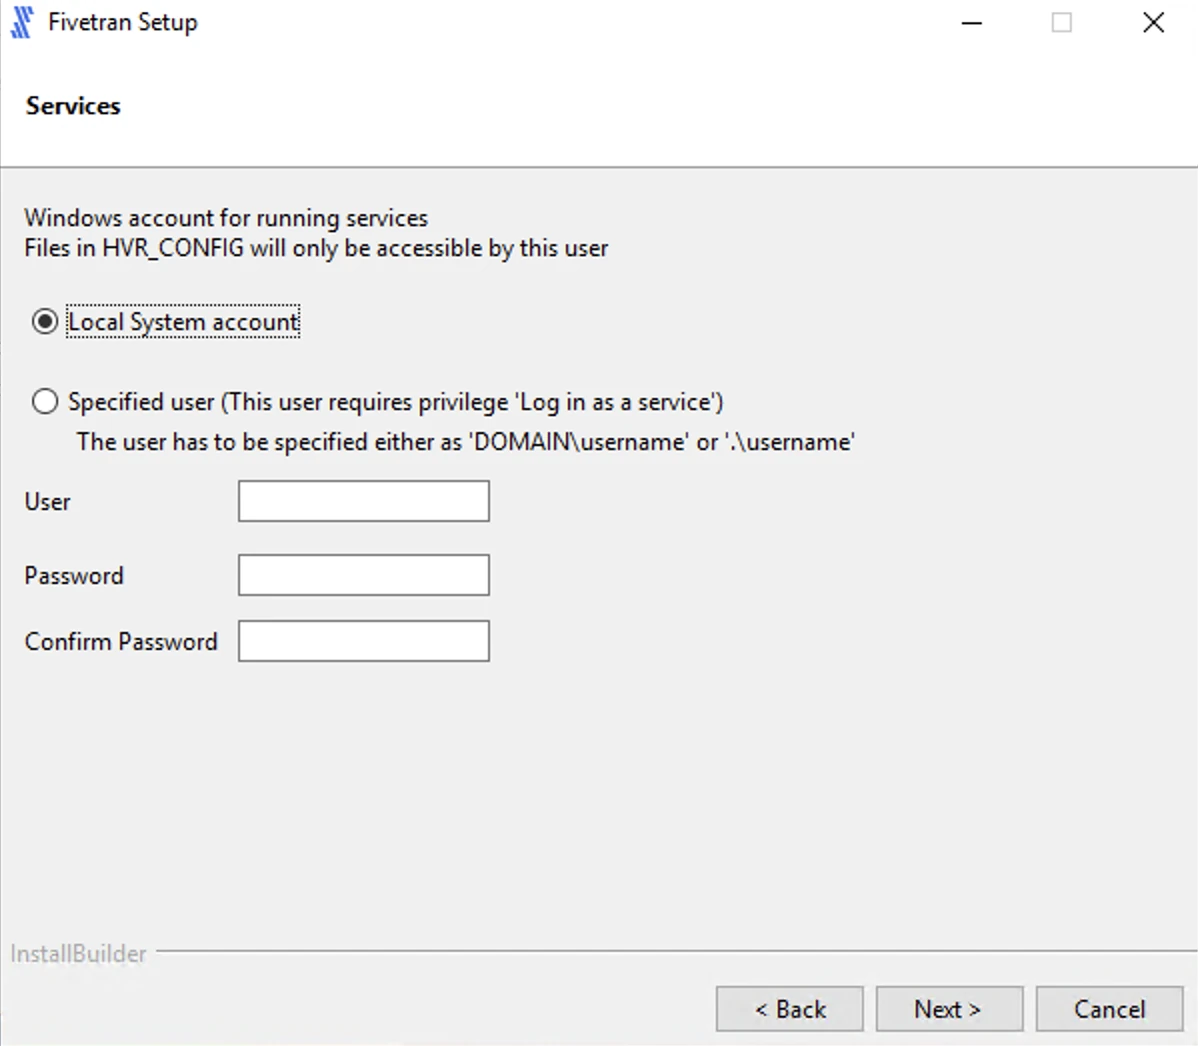
Select Local System account for running the Proxy Agent service and click Next.
Select Add HVR_HOME, HVR_CONFIG, and HVR_TMP (if required) and click Next. If you are only installing the Proxy Agent, we recommend that you skip this step.
This is to set the environment variables
HVR_HOME,HVR_CONFIG, andHVR_TMPin your operating system. These variables point to the corresponding installation directories you've created above.
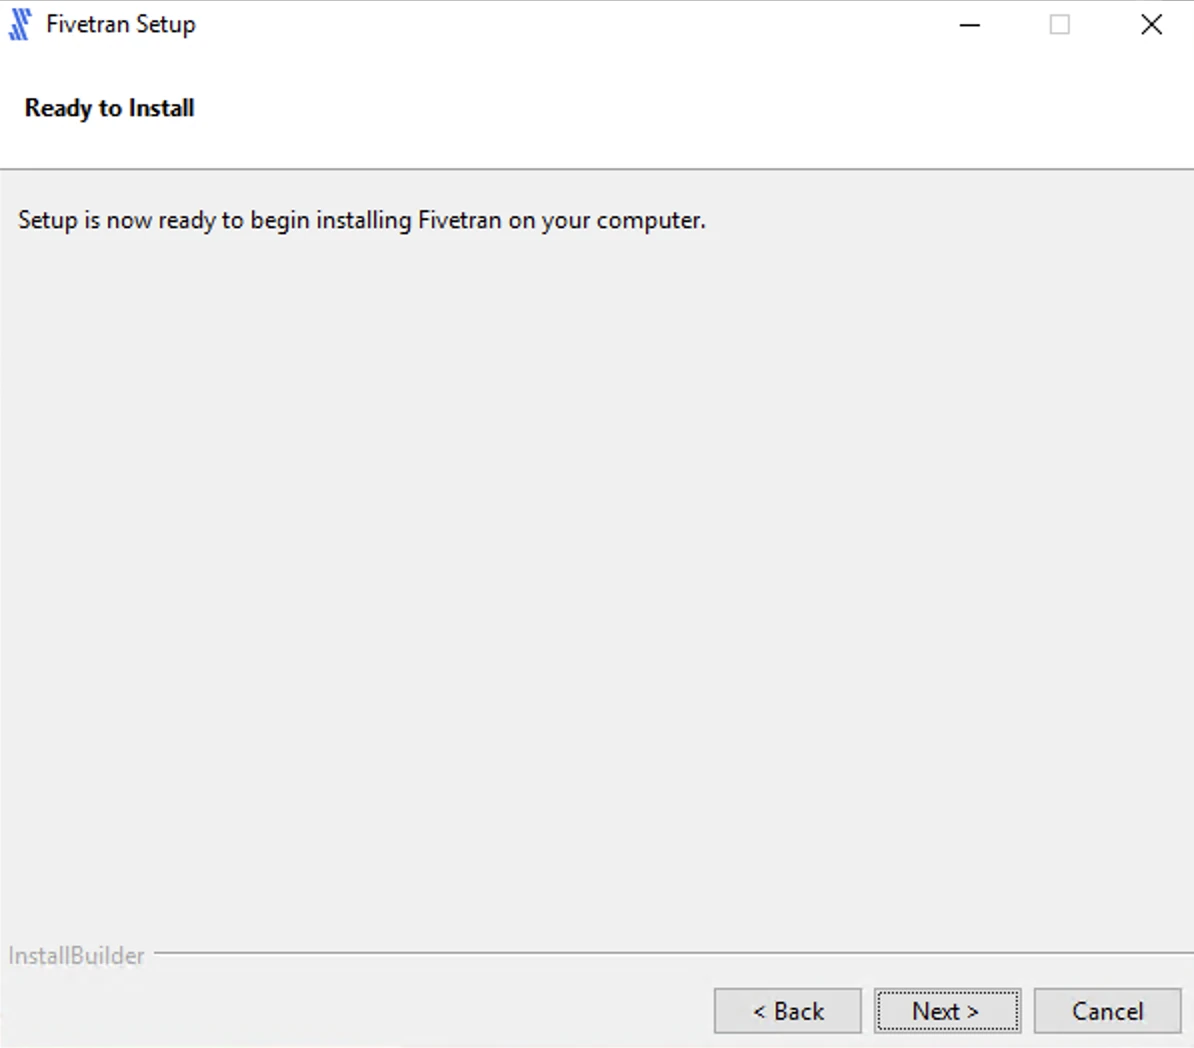
Click Next to initiate the installation.
If you selected High-Volume Agent (HVA) and Proxy Agent in step 6, this will install both the Proxy Agent and High-Volume Agent under the same installation directory.
Click Finish to start the Proxy Agent. Once installed, the Proxy Agent service appears running in Windows Services.
If you selected High-Volume Agent (HVA) and Proxy Agent in step 6, this will start both the Proxy Agent and High-Volume Agent services.
(Optional) If you are using a KeyStore for certificate management, configure the Proxy Agent to load the KeyStore by setting the required JVM system properties.
Expand for instructions
Configure KeyStore settings for Windows EXE installation
The Windows EXE installer creates the Proxy Agent as a Windows service using
prunsrv.exe. The installer requires embedded certificates during installation for validation. After installation completes, you must remove the embedded certificates from the Proxy Agent configuration and then configure the service to load credentials from the KeyStore.Stop the Proxy Agent service:
net stop "Fivetran Proxy Agent"Remove the embedded certificate fields from the Proxy Agent configuration file.
a. Open the
%HVR_CONFIG%\proxy\proxyagent.conffile.b. Remove the
client_certandclient_private_keyfields.Before (embedded certificates):
{
"agent_id": "<your_agent_id>",
"auth_token": "...",
"orchestrator_host": "orchestrator.fivetran.com",
"client_cert": "-----BEGIN CERTIFICATE-----\n...\n-----END CERTIFICATE-----\n",
"client_private_key": "-----BEGIN RSA PRIVATE KEY-----\n...\n-----END RSA PRIVATE KEY-----\n"
}
After (using KeyStore):
{
"agent_id": "<your_agent_id>",
"auth_token": "...",
"orchestrator_host": "orchestrator.fivetran.com"
}
c. Save the file after removing the fields.
Identify the actual service name created by the installer:
sc query | findstr /i "FivetranProxy"Note the service name in the output. It has the format
FivetranProxyPrunsrv_<HASH>(for example,FivetranProxyPrunsrv_ABCD1234).Update the service to include the KeyStore JVM system properties:
"%HVR_HOME%\proxy\prunsrv.exe" //US//FivetranProxyPrunsrv_<HASH> ++JvmOptions "-Djavax.net.ssl.keyStore=<path_to_keystore>" ++JvmOptions "-Djavax.net.ssl.keyStorePassword=<your_secure_password>"Replace:
FivetranProxyPrunsrv_<HASH>with the service name you identified<path_to_keystore>with the full path to your KeyStore file<your_secure_password>with the KeyStore password
Using ++JvmOptions appends options without removing existing JVM configuration required by the Proxy Agent.
Start the Proxy Agent service:
net start "Fivetran Proxy Agent"Check the Proxy Agent logs to confirm that the KeyStore was loaded successfully. By default, the log file is located at
%HVR_CONFIG%\proxy\log\agent-out.log. Look for entries similar to:INFO: Certificates not found in config, attempting to load from KeyStore INFO: Using KeyStore from javax.net.ssl.keyStore: <path_to_keystore> INFO: Successfully loaded certificates from KeyStore for alias: orchestrator.fivetran.com
Install Proxy Agent on Windows using ZIP file
Perform the following steps as an Administrator user.
Configure the environment variables
HVR_HOME,HVR_CONFIG, andHVR_TMPfor your operating system using commandsetxorset. Each of these environment variables should be pointed to the installation directories -hvr_home,hvr_config, andhvr_tmp:Environment variables set using
setxcommand are available in the future command windows only and the environment variables set usingsetcommand are available in the current command window only.setx HVR_HOME C:\fivetran\hvr_home setx HVR_CONFIG C:\fivetran\hvr_config setx HVR_TMP C:\fivetran\hvr_tmpset HVR_HOME=C:\fivetran\hvr_home set HVR_CONFIG=C:\fivetran\hvr_config set HVR_TMP=C:\fivetran\hvr_tmpAlso, add the executable directory path (for example,
C:\fivetran\hvr_home\bin) to the environment variablePATH.setx PATH "%PATH%;C:\fivetran\hvr_home\bin"set PATH=%PATH%;C:\fivetran\hvr_home\binAlternatively, environment variables can be configured using Windows GUI.
Navigate to Control Panel ▶ System and Security ▶ System ▶ Advanced system settings
Alternatively, use the command
sysdm.cplto open System Properties.In the Advanced tab, click Environment Variables...
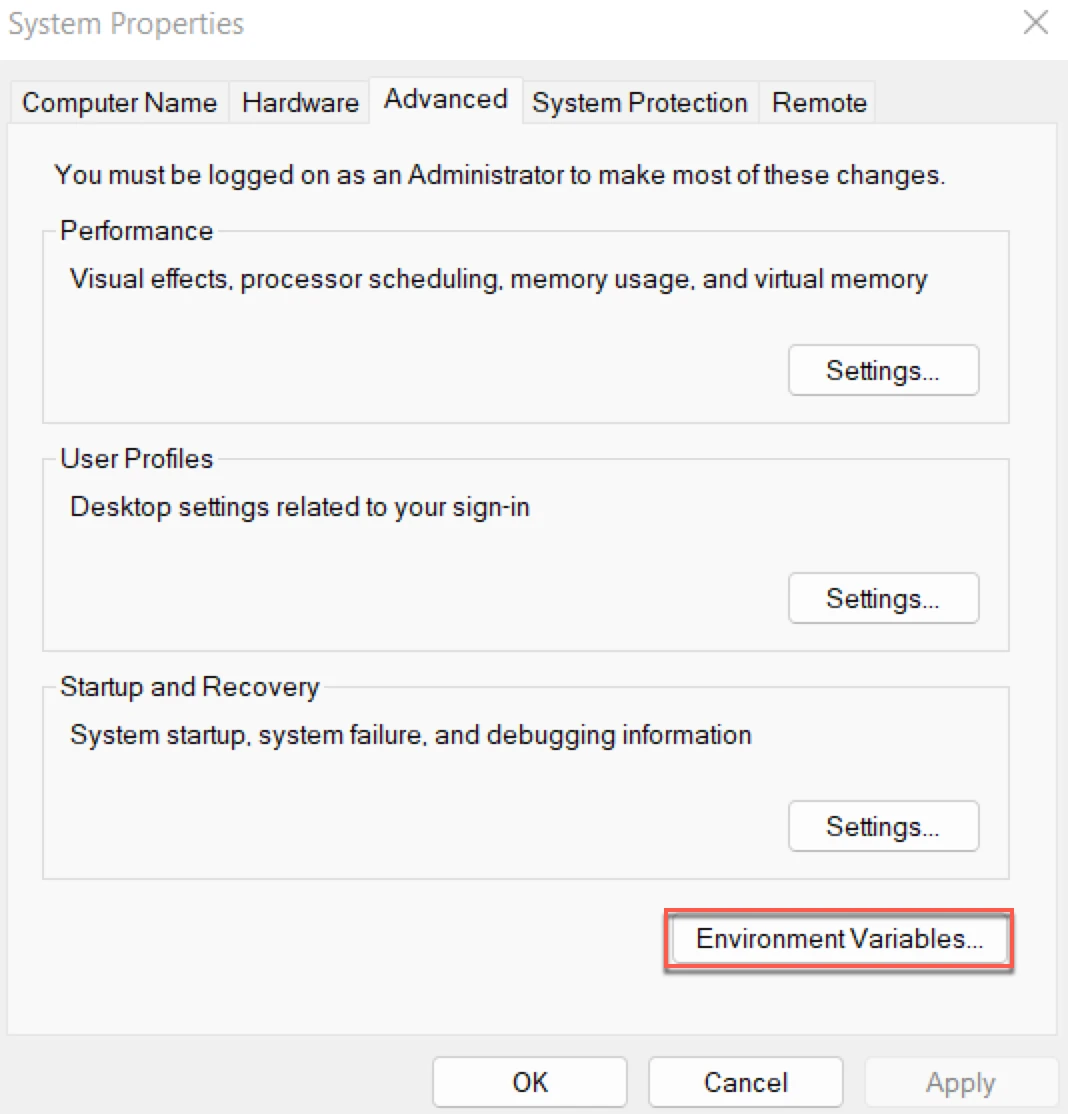
In section System variables, click New.
- Enter Variable name (for example,
HVR_HOME) and Variable value (for example,C:\fivetran\hvr_home).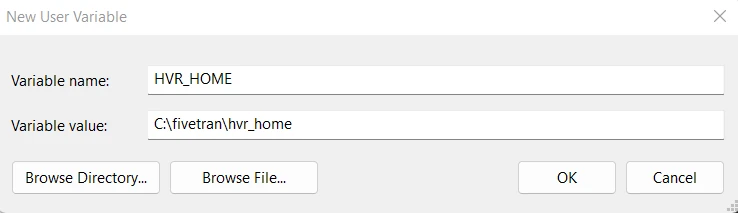
- Click OK.
- Repeat the above steps for each environment variable.
- Enter Variable name (for example,
Add the executable directory path to the environment variable
Path.- In section System variables or User Variables for user_name, from the list of variables, select Path and click Edit....
- Click New and enter the path for the Proxy Agent executable.
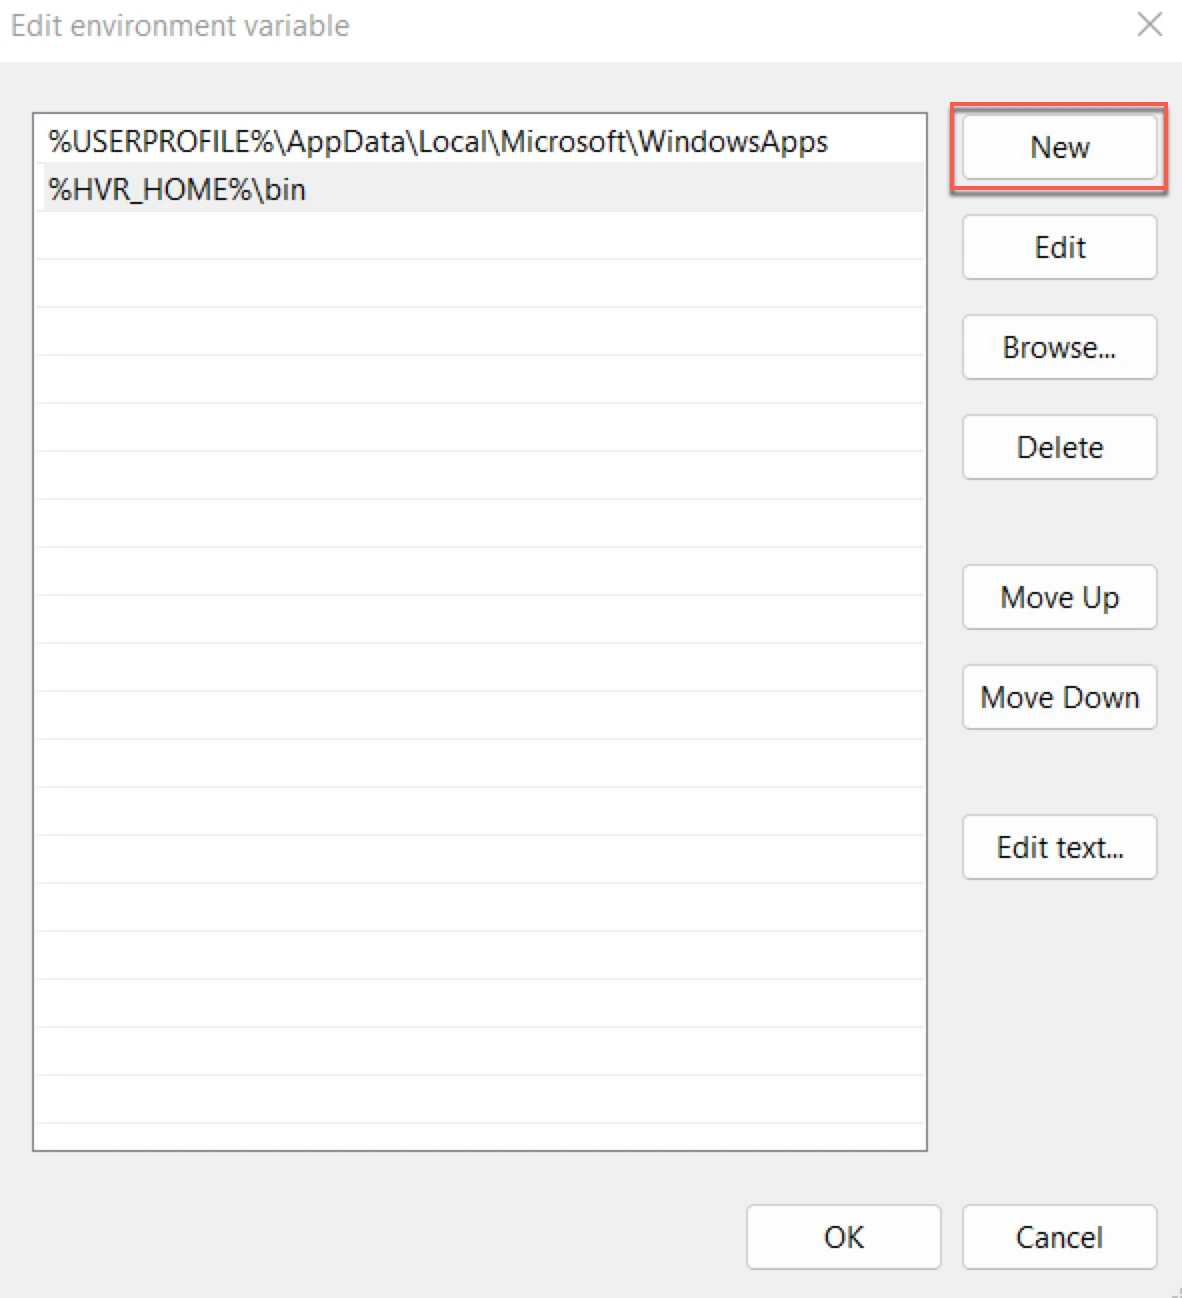
- Click OK.
Create the installation directory -
hvr_home(for example,C:\fivetran\hvr_home):md %HVR_HOME%- Other directories (
hvr_configandhvr_tmp) will be created automatically as needed. hvr_homeis regarded a read-only directory.
- Other directories (
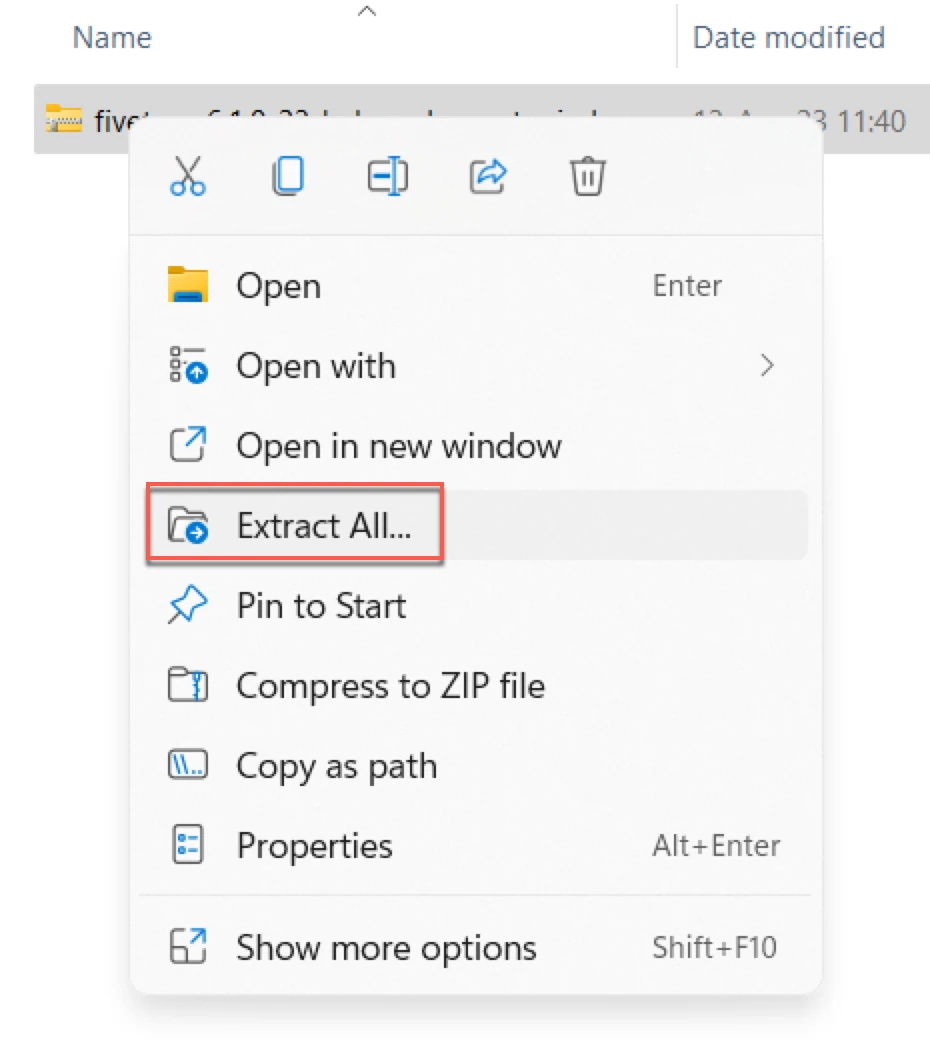
Extract the installation file (for example, fivetran-6.1.0_23-hub_and_agent-windows-x64-64bit_ga_patch.zip) into the
hvr_homedirectory:cd %HVR_HOME% C:\fivetran\hvr_home>tar -xf C:\Users\Admin\Downloads\fivetran-6.1.0_23-hub_and_agent-windows-x64-64bit_ga_patch.zipAlternatively, files can be extracted using the 'Extract All' option in Windows GUI.
Paste the Proxy Agent settings from the configuration file (
config.json) you've generated to theproxyagent.conffile located in theHVR_CONFIG/proxydirectory.The configuration file contains the settings and authentication parameters required to establish secure communication between the Proxy Agent and Fivetran.
If the
proxyagent.conffile is missing, create the file manually.Run the following command to validate the Proxy Agent settings:
%HVR_HOME%/jre/bin/java -jar %HVR_HOME%/proxy/proxyagent.jar -v %HVR_CONFIG%/proxy/proxyagent.confIf the configuration file is valid, the command prints:
Config is valid: {"agent_id":"<your_agent_id>","auth_token":"***","orchestrator_host":"orchestrator.fivetran.com","client_cert":"-----BEGIN CERTIFICATE-----\n...","client_private_key":"***"}The
auth_tokenandclient_private_keyvalues are masked in the output. If the command returns an error such asConfig has invalid contentsorConfig has unexpected contents, check that yourproxyagent.conffile contains valid JSON and all required fields.Create a
.batfile (for example,install_and_run_proxy_service.bat) with the following contents.FOR /F "delims=" %%i IN ('CALL "%HVR_HOME%/bin/hvr" hvrhubserversvc -s') DO SET HvrHubServerSvcOutput=%%i REM We use a normalized HVR_CONFIG path hash to guarantee a unique service name SET HubConfigHash=%HvrHubServerSvcOutput:~13,8% REM In the CLI below use "DomainName\UserName" for --ServiceUser and specify --ServicePassword parameter if needed REM Adjust the other parameters as necessary REM Ensure to have unique service name (in //IS//<ServiceName>) and display name %HVR_HOME%/proxy/prunsrv.exe //IS//FivetranProxy_%HubConfigHash% ^ --StartParams "%HVR_CONFIG%/proxy/proxyagent.conf" ^ --ServiceUser "LocalSystem" ^ --DisplayName "Fivetran Proxy Agent [%HubConfigHash%]" ^ --Description "Fivetran Proxy Agent installed into %HVR_HOME%\proxy" ^ --Jvm "%HVR_HOME%/jre/bin/server/jvm.dll" ^ --JavaHome "%HVR_HOME%/jre" ^ --Classpath "%HVR_HOME%/proxy/proxyagent.jar" ^ --StartPath "%HVR_HOME%/proxy/" ^ --Startup=auto ^ --StartMode=jvm ^ --StartClass=com.fivetran.proxy.agent.ProxyAgent ^ --StartMethod=main ^ --StopMode=jvm ^ --StopClass=com.fivetran.proxy.agent.ProxyAgent ^ --StopMethod=stop ^ --JvmOptions "-XX:+HeapDumpOnOutOfMemoryError" ^ --StdOutput "%HVR_CONFIG%/proxy/logs/agent-out.log" ^ ++Environment "HVR_CONFIG=%HVR_CONFIG%" ^ ++Environment "HVR_HOME=%HVR_HOME%" ^ ++Environment "HVR_TMP=%HVR_TMP%" %HVR_HOME%/proxy/prunsrv.exe //ES//FivetranProxy_%HubConfigHash%Run the
.batfile to configure and start the Proxy Agent:install_and_run_proxy_service.bat(Optional) If you are using a KeyStore for certificate management, configure the Proxy Agent to load the KeyStore by setting the required JVM system properties.
Expand for instructions
Configure KeyStore settings for Windows ZIP installation
Stop the Proxy Agent service:
%HVR_HOME%\bin\hvrproxy.bat stopUpdate the Proxy Agent service definition to include the required JVM system properties for loading the KeyStore. Open the
install_and_run_proxy_service.batfile you created earlier and modify the--JvmOptionsline:--JvmOptions "-XX:+HeapDumpOnOutOfMemoryError; -Djavax.net.ssl.keyStore=<path_to_keystore>; -Djavax.net.ssl.keyStorePassword=<your_secure_password>"Rerun the updated install script to update the service definition:
install_and_run_proxy_service.batStart the Proxy Agent service:
%HVR_HOME%\bin\hvrproxy.bat startCheck the Proxy Agent logs to confirm that the KeyStore was loaded successfully. By default, the log file is located at
%HVR_CONFIG%\proxy\logs\agent-out.log.If you configured a custom log directory using the
log_folder_pathsetting inproxyagent.conf(located in%HVR_CONFIG%\proxy), the logs are written to that directory instead, for example,<log_folder_path>/agent-out.log.Look for entries similar to:
INFO: Certificates not found in config, attempting to load from KeyStore
INFO: Using KeyStore from javax.net.ssl.keyStore: <path_to_keystore>
INFO: Successfully loaded certificates from KeyStore for alias: orchestrator.fivetran.com
Install Proxy Agent on Linux
Perform the installation steps as a regular user (for example, fivetran). Use sudo only for steps that create system users, modify files under /etc, or manage the systemd service.
The Proxy Agent service runs as root. The examples below use the fivetran home directory for installation paths. Ensure that the installation directories and files are readable by root so the service can access the binaries and configuration.
The commands to set the environment variables depend on the shell you use to interface with the operating system. This procedure lists examples that can be used in Bourne Shell (sh) and KornShell (ksh).
Create a regular user account to set up the install directories and environment variables (for example,
fivetran):sudo useradd -m fivetranSwitch to the
fivetranuser:sudo su - fivetranConfigure the environment variables
HVR_HOME,HVR_CONFIG, andHVR_TMPfor your operating system. Each of these environment variables should be pointed to the installation directories -hvr_home,hvr_config, andhvr_tmp.export HVR_HOME=/home/fivetran/hvr_home export HVR_CONFIG=/home/fivetran/hvr_config export HVR_TMP=/home/fivetran/hvr_tmpAlso, add the executable directory path to the environment variable
PATH.PATH=$PATH:$HVR_HOME/binAdd the environment and the executable directory path into the startup file (for example,
.profile).export HVR_HOME=/home/fivetran/hvr_home export HVR_CONFIG=/home/fivetran/hvr_config export HVR_TMP=/home/fivetran/hvr_tmp export PATH=$PATH:$HVR_HOME/binCreate the installation directory -
hvr_homeusing the following commands:umask 022mkdir $HVR_HOMEumask 022is used so that the files and directories created in the following commands are readable by everyone (other Linux users and groups), but only writable by the owner. Other directories (HVR_CONFIGandHVR_TMP) will be created automatically as needed. TheHVR_HOMEdirectory is regarded as read-only.Download the High-Volume Agent installation file from the Downloads page in your Fivetran dashboard. One way to do this is to copy the download URL and run the following
wgetcommand:cd /tmp wget "<download_url_from_fivetran>"Extract the installation file (for example,
fivetran-6.1.0_23-hub_and_agent-linux_glibc2.17-x64-64bit_ga.tar.gz) into theHVR_HOMEdirectory:cd $HVR_HOMEtar xzf /tmp/hvr-6.1.0_23-hub_and_agent-linux_glibc2.17-x64-64bit_ga.tar.gzOnce installed, the
jreandproxyfolders are created in yourHVR_HOMEdirectory.Create a new directory for the
proxyagent.conffile inhvr_config(/home/fivetran/hvr_config/proxy). Paste the Proxy Agent settings from the configuration file (config.json) you've generated to theproxyagent.conffile located in the newly created directory.The configuration file contains the settings and authentication parameters required to establish secure communication between the Proxy Agent and Fivetran.
Run the following command to verify if the Linux machine is ready for the setup. The output of the command should be
systemd.ps -p 1 -o comm=Using
sudo, update thefivetran_proxy.servicefile in the/etc/systemd/systemdirectory with the correct path to the Java executable,proxyagent.jar, andproxyagent.conffiles.If missing, create the
fivetran_proxy.servicefile manually. The contents of the file should be as follows:[Unit] Description=Fivetran Proxy Agent #<agent_id> [Service] Type=simple Environment="HVR_HOME=/home/fivetran/hvr_home" Environment="HVR_CONFIG=/home/fivetran/hvr_config" Environment="HVR_TMP=/home/fivetran/hvr_tmp" ExecStart=/home/fivetran/hvr_home/jre/bin/java \ -XX:+HeapDumpOnOutOfMemoryError \ -XX:HeapDumpPath=${HVR_CONFIG}/proxy/ \ -jar ${HVR_HOME}/proxy/proxyagent.jar \ /home/fivetran/hvr_config/proxy/proxyagent.conf # Restart this service after a crash Restart=always # The number of seconds to wait before attempting a restart RestartSec=5s [Install] WantedBy=multi-user.targetUsing
sudo, execute the following commands to start the Proxy Agent service.a. Enable the service:
sudo systemctl enable fivetran_proxy.serviceb. Start the service:
sudo systemctl start fivetran_proxy.servicec. Verify the status of the service:
sudo systemctl status fivetran_proxy.service(Optional) If you are using a KeyStore for certificate management, configure the Proxy Agent to load the KeyStore by setting the required JVM system properties.
Expand for instructions
Configure KeyStore settings for Linux installation
Update the
systemdservice definition to include the required JVM system properties for loading the KeyStore. Edit the/etc/systemd/system/fivetran_proxy.servicefile and add the following line under the[Service]section:Environment="JAVA_OPTS=-Djavax.net.ssl.keyStore=/path/to/keystore.p12 -Djavax.net.ssl.keyStorePassword=<your_secure_password>"Reload the
systemddaemon and restart the Proxy Agent service:sudo systemctl daemon-reload sudo systemctl restart fivetran_proxy.serviceCheck the Proxy Agent logs to confirm that the KeyStore was loaded successfully. By default, the log file is located at
$HVR_CONFIG/proxy/log/agent-out.log.If you configured a custom log directory using the
log_folder_pathsetting inproxyagent.conf(located in$HVR_CONFIG/proxy), the logs are written to that directory instead (for example,<log_folder_path>/agent-out.log).Look for entries similar to:
INFO: Certificates not found in config, attempting to load from KeyStore
INFO: Using KeyStore from javax.net.ssl.keyStore: <path_to_keystore>
INFO: Successfully loaded certificates from KeyStore for alias: orchestrator.fivetran.com
Proxy Agent directory structure
The following directories are created during the installation of the Proxy Agent. Each directory may contain files and subdirectories:
hvr_home: Contains executables and files essential for running the Proxy Agent.Expand to see the directories and files in
hvr_home📁 hvr_home │ ├─ 📁 api -- REST API documentation │ ├─ 📁 bin -- Executable files and shared libraries (dynamic-link │ libraries on Windows) for running the Proxy Agent │ ├─ 📁 dbms -- Database-specific SQL files and templates │ ├─ 📁 etc -- Configuration files and other miscellaneous files │ │ │ ├─ 📁 cert -- Bundled certificates, such as root CAs │ │ │ ├─ 📁 snmp -- SNMP MIB file │ │ │ ├─ 📁 xml -- DTD of XML-serialized data streams │ │ │ ├─ 📄 constsqlexpr.pat -- SQL expressions treated as constants to │ │ optimize replication performance │ │ │ ├─ 📄 hvrosaccess_example.conf -- Sample configuration for allowing HVR to │ │ run plugins from non-standard directories │ │ │ └─ 📄 purge.manifest -- Manifest file (see hvrstrip -m) │ ├─ 📁 examples -- Sample channel definitions │ ├─ 📁 lib -- Shared libraries and database drivers │ ├─ 📁 plugin -- Plugins shipped (installed) with the Proxy Agent │ │ │ ├─ 📁 agent │ │ │ └─ 📁 transform │ ├─ 📁 plugin_examples -- Sample plugins. To use a sample plugin, save │ │ it in the 'hvr_config/plugin' directory │ ├─ 📁 agent │ │ │ ├─ 📁 authentication │ │ │ ├─ 📁 rewrite │ │ │ └─ 📁 transform │ ├─ 📁 sbin -- Manually created trusted executables │ ├─ 📁 script -- Internal Proxy Agent script files │ ├─ 📁 www -- HVR UI-related files │ ├─ 📄 hvr.3rdparty -- License agreements, copyrights, versions, and notices │ for third-party software used by the Proxy Agent │ ├─ 📄 hvr.rel -- Proxy Agent Release Notes │ └─ 📄 hvr.ver -- Proxy Agent version numberhvr_config: Contains directories and files associated with the Proxy Agent configuration.Expand to see the directories and files in
hvr_config📁 hvr_config -- Directories and files for the Proxy Agent configuration │ ├─ 📁 etc -- Configuration files for the Proxy Agent │ ├─ 📁 intermediate -- Temporary files for Compare/Refresh jobs │ ├─ 📁 logs -- Proxy Agent-level log files │ ├─ 📁 plugin -- User-installed plugins (see 'hvr_home/plugin_examples/') │ │ │ ├─ 📁 agent │ │ │ └─ 📁 transform │ ├─ 📁 public -- Log file retention information │ ├─ 📁 run -- Runtime state, such as `.pid` files │ └─ 📁 tmp -- Temporary files (default, if HVR_TMP is not defined)hvr_tmp(optional): Contains temporary files associated with the Proxy Agent.
Making any changes to the hvr_home directory or its subdirectories is strictly prohibited. This directory must remain unchanged to ensure security and integrity during updates or upgrades. User-specific configurations and runtime data is stored in the hvr_config directory.
Configure Proxy Agent recovery (recommended for Windows)
Expand for instructions
If your Proxy Agent is installed on a Windows system, you can set up a recovery configuration for the agent by performing the following steps:
This process is not required on Linux systems.
Go to Control Panel > Administrative Tools > Computer Management > Services and Applications > Services or use the
services.msccommand to open the Services console.In the Services console, locate the Fivetran Proxy Agent service. Ensure the service description matches the installation directory.
Right-click the service and select Properties.
Go to the Recovery tab.
Set your preferred recovery options for the failure scenario.
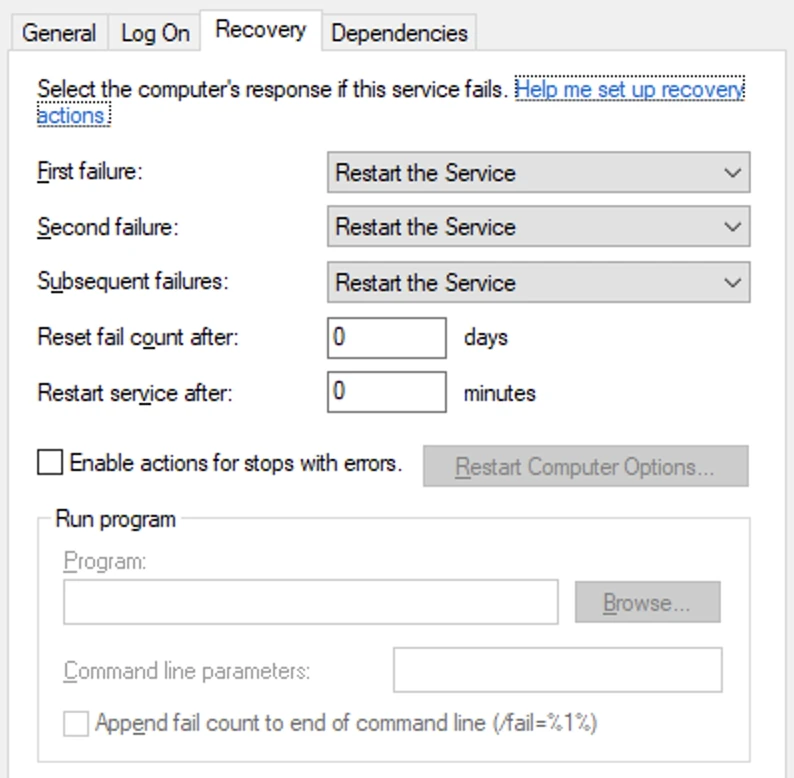
The SC failure command-line utility is also available for more advanced configurations. This tool allows you to automate recovery actions directly through the command line.
Upgrade Proxy Agent
Steps for upgrading the Proxy Agent depend on how it was installed.
If you're upgrading from a Proxy Agent version older than 1.1.0, confirm that you've safelisted the updated Fivetran Proxy hostnames for both the Proxy Broker and the appropriate Proxy Server. This helps ensure that the Proxy Agent can connect after the upgrade.
Before upgrading the Proxy Agent, we recommend making a copy of the Proxy Agent configuration file (hvr_config/proxy/proxyagent.conf) located on the Proxy Agent machine. Backing it up preserves the existing Proxy Agent configuration, including the certificates used to establish secure communication with Fivetran. This lets you quickly restore the configuration if you need to revert to an earlier Proxy Agent version after an upgrade or reinstall, without having to generate a new Proxy Agent configuration file.
When you upgrade to HVA Agent/Proxy Agent bundle 6.1.0_80/1.1.0 or later, Fivetran uses different IP addresses than in older versions. If your outbound network policy uses IP addresses resolved from our domains, you will need to re-resolve and update them. We recommend using domain names rather than IP addresses in your outbound network policy.
Proxy Agent Installed on Windows using EXE file (Installer)
The Installer will automatically detect the existing Proxy Agent installation and upgrade it. Perform the following steps:
Download the latest High-Volume Agent Installer from the downloads page.
Run the Installer.
Proxy Agent Installed on Windows using a ZIP file or on Linux (Installer)
The Proxy Agent installed using a ZIP file or on Linux requires manual upgrade steps. Perform the following steps:
Download the latest High-Volume Agent for the desired operating system from the downloads page.
Uninstall the existing proxy agent using the Uninstall Proxy Agent instructions.
Follow the instructions for installing the Proxy Agent using the appropriate section of the installation instructions.
Uninstall Proxy Agent
Follow the instructions below to uninstall the Proxy Agent.
If you are uninstalling the Proxy Agent to perform an upgrade, we recommend making a copy of the Proxy Agent configuration file (hvr_config/proxy/proxyagent.conf) located on the Proxy Agent machine. Backing it up preserves the existing Proxy Agent configuration, including the certificates used to establish secure communication with Fivetran. This lets you quickly restore the configuration if you need to revert to an earlier Proxy Agent version after an upgrade or reinstall, without having to generate a new Proxy Agent configuration file.
Uninstall Proxy Agent from Windows
The steps to uninstall the Proxy Agent depend on whether you used an EXE file (Installer) or a ZIP file to install it.
Ensure that no Windows Services management console applications (opened via services.msc) are running.
Uninstall Proxy Agent that was installed using an EXE file
Navigate to the
uninstallfolder in the Proxy Agent installation directory%HVR_HOME%(for example,C:\fivetran\hvr_home\uninstall).Double-click the
uninstall.exefile to initiate the uninstallation process.
Uninstall Proxy Agent that was installed using a ZIP file
Create a
.batfile (for example,delete_proxy_agent_service.bat) with the following contents:FOR /F "delims=" %%i IN ('CALL "%HVR_HOME%/bin/hvr" hvrhubserversvc -s') DO SET HvrHubServerSvcOutput=%%i REM We use a normalized HVR_CONFIG path hash to guarantee a unique service name SET HubConfigHash=%HvrHubServerSvcOutput:~13,8% %HVR_HOME%/proxy/prunsrv.exe //DS//FivetranProxy_%HubConfigHash%Run the
.batfile as an Administrator to remove all Proxy Agent service entries.
Uninstall Proxy Agent from Linux
Stop the Proxy Agent service:
sudo systemctl stop fivetran_proxy.serviceDisable the service from auto-starting at boot:
sudo systemctl disable fivetran_proxy.serviceRemove the service configuration file:
sudo rm /etc/systemd/system/fivetran_proxy.serviceReload the systemd manager configuration:
sudo systemctl daemon-reloadClear the systemd state for any failed services:
sudo systemctl reset-failed