Row Filtering
Row filtering enables you to only sync rows that meet user-defined criteria based on a selected table, column, and operator. We support row filtering for initial syncs, re-syncs, and incremental syncs.
When you block a table or column or hash a column that is specified as a filtering criterion in your row filter, you are prompted to confirm your decision because we delete row filters that use that table or column.
Use cases
The primary use cases for row filtering are as follows:
- Filtering historical data - For a given table, you can define a filter to sync or exclude rows from a specific time period. For incremental syncs, the filters are applied starting from the next sync after the filters are created.
- Limiting data scope - Since row filters are also applied during incremental syncs, you only sync data that matches the set filtering criteria.
- Syncing or excluding a specific ID value - If your tables are multitenant or you have a specific ID value you explicitly want to or don’t want to sync, you can use filters to select only relevant rows.
- Syncing or excluding records containing a matching string - Similar to filtering by IDs, you can include or exclude rows where a column's string value matches a specified string.
For most connections, row filtering does not reduce how much data Fivetran retrieves from your source or how long the sync takes. Only MySQL, MariaDB, PostgreSQL, SQL Server, and SAP ERP on HANA connectors apply the filter at the source. For all other connections, we retrieve the full table from the source before filtering, so sync duration reflects the full data volume in your source. Learn more in Limitations.
How row filtering works
When you add a filter, we evaluate every sync step against your criteria so that only matching rows continue through the pipeline. Historical operations - such as initial syncs or table re-syncs- respect the filter from the moment the data is queued for processing, ensuring that previously stored records stay aligned with your rules. Incremental syncs honor the same criteria on every run, so any new or updated rows that don’t meet the filter are skipped before they land in your destination.
How Fivetran applies your filter depends on the connection type. MySQL, PostgreSQL, SQL Server, and SAP ERP on HANA connections — including all cloud-hosted and managed variants such as Amazon RDS, Aurora, Azure, and Google Cloud SQL — apply the filter at the source, so only the rows that match your criteria are retrieved. For all other connections, Fivetran retrieves the complete table from the source and applies the filter before writing to your destination. In both cases, only the rows that meet your filter conditions are written to your destination.
When you change a filter, we queue a table re-sync so the destination reflects the latest rules. Until that re-sync finishes, the rows that you previously allowed remain in place. Once the re-sync completes, we reconcile any mismatches: in soft delete mode, rows that no longer satisfy the filter are marked as deleted, and if you later broaden the filter, the re-sync repopulates those rows as active records. In history mode, the re-sync closes out the versions that no longer qualify and adds fresh, active versions for the rows that still pass the filter, so you retain a full audit trail while keeping current data aligned with your criteria.
The re-sync also updates the relevant system columns. In soft delete mode, we set _fivetran_deleted to TRUE and refresh the _fivetran_synced timestamp for every row that the new filter excludes; rows that qualify again have _fivetran_deleted reset to FALSE with an updated _fivetran_synced value. In history mode, we flip _fivetran_active to FALSE and populate _fivetran_end for versions that fall out of scope, while rows that stay in scope retain _fivetran_active = TRUE (or receive a new active version) with refreshed _fivetran_synced timestamps and, when a new version is written, an updated _fivetran_start so you can see exactly when the change took effect.
For connectors that can produce partial row updates, row filtering may cause some later update events to be ignored if the original insert was filtered out. A partial row update contains only some of the row’s columns, so we may not have enough data to reconstruct the full row or convert the update into an upsert. Learn more in Limitations.
Supported data types
Row filtering is supported for columns with the following data types:
- Integer
- Serial
- Date and Datetime/Timestamp
- String
- Boolean
Supported operators
Row filtering supports the following operators:
- Equal To
- Not Equal To
- Greater Than
- Less Than
- Greater Than Or Equal To
- Less Than Or Equal To
- Is
NULL - Is not
NULL - In (for String, Integer and Serial only)
- Contains (for String only)
- Starts With (for String only)
For Boolean columns, we only support the Equal To, Not Equal To, Is NULL, and Is not NULL operators.
Ignore trailing spaces
When applied for Strings, the following operators ignore trailing spaces:
- Equal To
- Not Equal To
- Greater Than
- Less Than
- Greater Than Or Equal To
- Less Than Or Equal To
- In
Exception for this rule is the SAP ERP on HANA connector.
Supported connectors
All Fivetran connectors support row filtering.
Limitations
- Row filtering does not reduce sync duration or the volume of data transferred from the source for most connections. Only MySQL, PostgreSQL, SQL Server, and SAP ERP on HANA connections (including all cloud-hosted and managed variants) apply the filter at the source and retrieve only the rows that match your criteria. For all other connections, Fivetran retrieves the complete table from the source before filtering. For large tables, this means initial syncs and re-syncs take as long as they would without a filter. See Connectors that filter at the source for a comprehensive list.
- You can only create up to 10 conditions per filter.
- You can only create one filter per table.
- You can specify dates for filtering operations on DATE, DATETIME, and TIMESTAMP types only if the year falls within the range 1000 to 9999 (inclusive).
- You can specify integer values for filtering operations on INTEGER and SERIAL types only if they fall within the range -9007199254740991 to 9007199254740991 (inclusive).
- The sync metric Loaded Rows might behave unexpectedly with row filtering. In some cases, filtered out rows will be included in this metric.
- Row filters applied to a parent table are not applied to its child tables.
- For connectors that can produce partial row updates, if rows are filtered out during insert, later partial update events might not add them to the destination, even if those updates would make the row satisfy the filter condition. Learn more in Partial row updates.
For connector-specific limitations, see the relevant connector documentation.
Partial row updates
Some source connectors can produce partial row updates. A partial row update is an update event that contains only the columns that changed, rather than the complete row.
When you use row filtering with a connector that can produce partial row updates, some update events may become no-ops in your destination. This can happen when all of the following are true:
- The source emits an
INSERTevent for a row. - The row does not satisfy your row filter condition, so Fivetran does not write the row to your destination.
- The source later emits an
UPDATEevent for the same row. - The update event is a partial row and does not contain all column values required to reconstruct the complete row.
In this case, we cannot convert the partial update into an upsert because the destination does not contain the original row and the update event does not contain the complete row state. As a result, the update is ignored in the destination.
For example, suppose you define a row filter that syncs only rows where status = 'active'. The following sequence of source events for the same row illustrates this behavior.
| Source event | Event contents | Row filter result | Destination result |
|---|---|---|---|
INSERT | id = 1, status = 'inactive', name = 'Example' | Does not match | Row is not written |
UPDATE | id = 1, status = 'active' | Matches the filter condition | No-op, because the destination row does not exist and the update does not contain the full row |
UPDATE | id = 1, name = 'Updated example' | Cannot reconstruct full row | No-op, because the destination row still does not exist |
This behavior can prevent rows from appearing in your destination even after later source updates would make them satisfy the filter condition.
This limitation applies only to connectors that can produce partial row updates. Review connector-specific documentation for additional row filtering limitations.
Connectors that filter at the source
The following connectors apply the filter at the source and retrieve only the rows that match your criteria:
MySQL and MariaDB
- Amazon Aurora MySQL
- Amazon Aurora Serverless V2
- Amazon RDS for MariaDB
- Amazon RDS for MySQL
- Azure Database for MySQL
- Generic MariaDB
- Generic MySQL
- Google Cloud SQL for MySQL
PostgreSQL
- Amazon Aurora PostgreSQL
- Amazon RDS for PostgreSQL
- Azure Database for PostgreSQL
- Generic PostgreSQL
- Google Cloud SQL for PostgreSQL
- Heroku PostgreSQL
SQL Server
- Amazon RDS for SQL Server
- Azure SQL Database
- Azure SQL Managed Instance
- Generic SQL Server
- Google Cloud SQL for SQL Server
- HVA SQL Server
SAP
Enabling row filter
For existing connections
To create and apply a row filter, do the following:
Open the Schema tab of your Connection Details page.
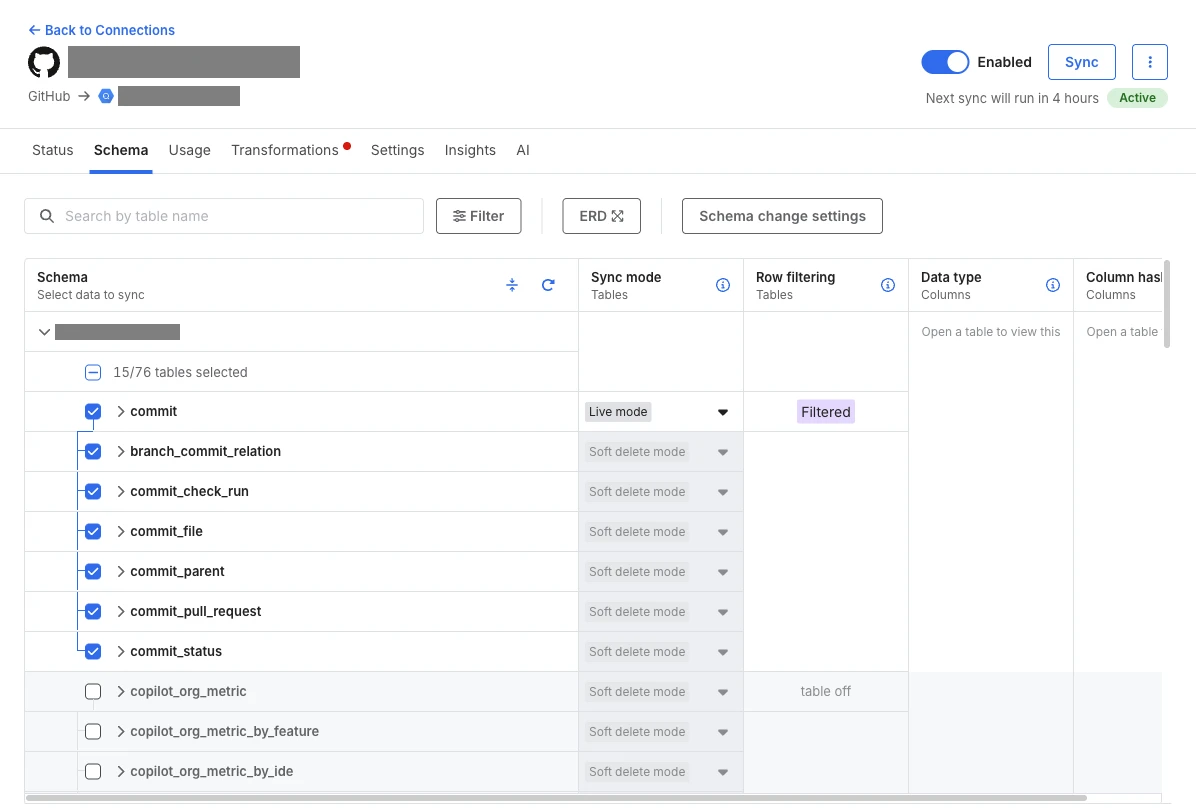
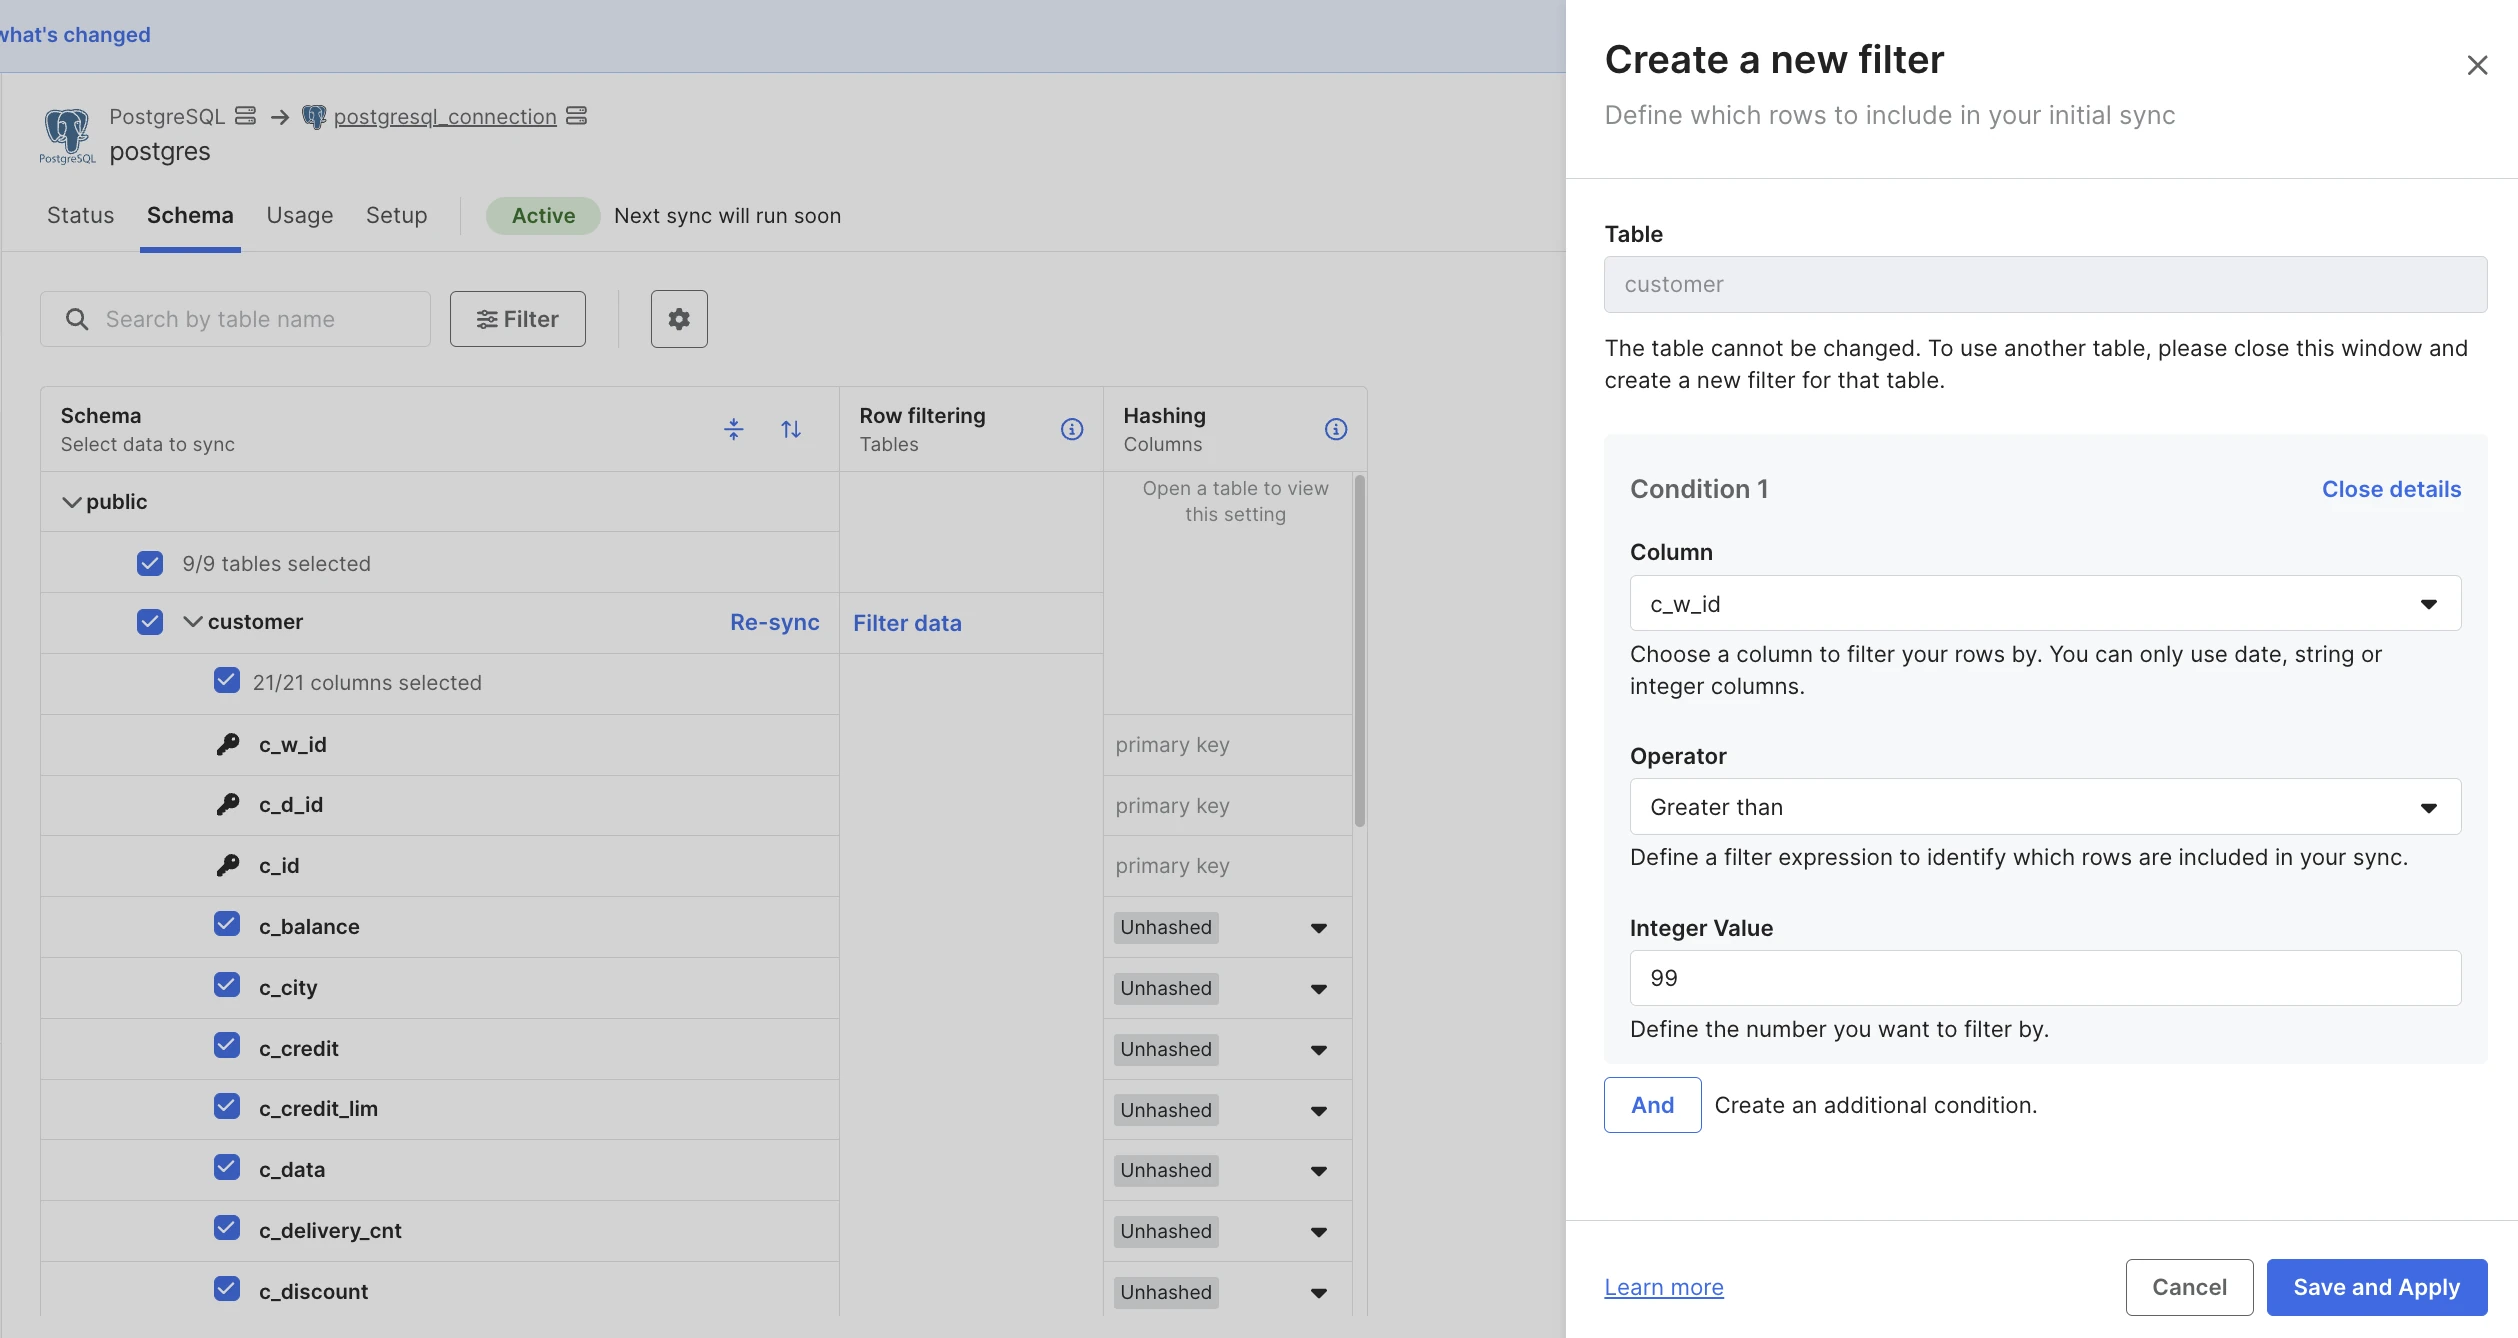
Click Filter Data. The Create a new filter sidebar opens on the right side of the Connection Details page.
If the table you want to apply the filter to does not have columns of supported types, the message No filterable data will be displayed in the table's row.
Select the Column you want to filter by.
Select the Operator. See the list of supported operators.
Specify the Value as integer, date(time), string, or boolean (
true/false), depending on the column type.(Optional) Click Add to add another condition. Repeat steps 3 to 5 for each condition.
You can create up to 10 conditions per filter.
Click Save and Apply. Fivetran stages the filter as a pending change and a Pending changes bar appears at the bottom of the page.
(Optional) Click Review changes in the bar to open a summary panel on the right showing all pending schema changes, including the row filter you added. Click View next to any entry to scroll the schema list to that table.
Click Save changes. The Apply row filter changes dialog opens, listing the affected tables and warning that a historical re-sync is required. If the connection supports table-level re-syncs, only the affected tables are re-synced; otherwise, a full connection re-sync is triggered.
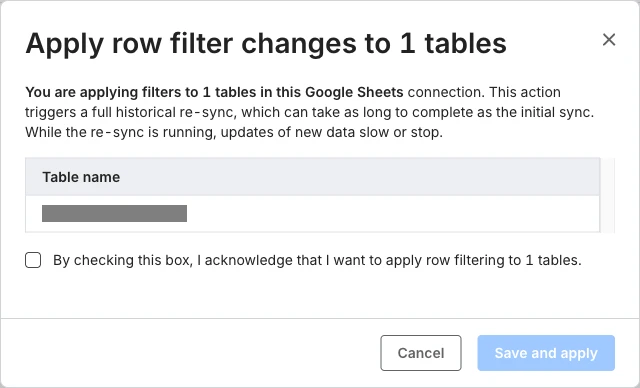
Select the acknowledgment checkbox, then click Save and apply. The re-sync starts.
A filtered table has a Filtered badge.

For newly created connections
To create and apply a row filter, do the following:
On the Schema tab of the Connector Details page, hover over the table you want to apply the row filter to.
Click Filter Data. The Create a new filter sidebar opens on the right side of the Connection Details page.
If the table you want to apply the filter to does not have columns of supported types, the message No filterable data will be displayed in the table's row.
Select the Column you want to filter by.
Select the Operator. See the list of supported operators.
Specify the Value as integer, date(time), string, or boolean (
true/false) depending on the column type.(Optional) Click Add to add another condition. Repeat steps 3 to 5 for each condition.
You can create up to 10 conditions per filter.
Click Save and Apply.
Click Save and Continue. You are navigated to the Schema Change Handling Strategy step of the setup guide. The filter is applied during the initial sync.
A filtered table has a Filtered badge.
Editing row filter
To edit a row filter, do the following:
On the Schema tab of the Connection Details page, click Filtered in the relevant table's row. The Filter applied to this table box opens.
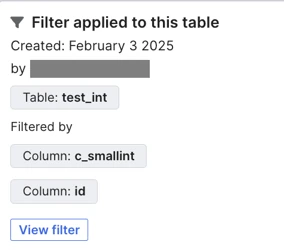
Click View filter. The Edit filter sidebar opens on the right side of the Connection Details page.
You can select to Show details or Close details for each condition.
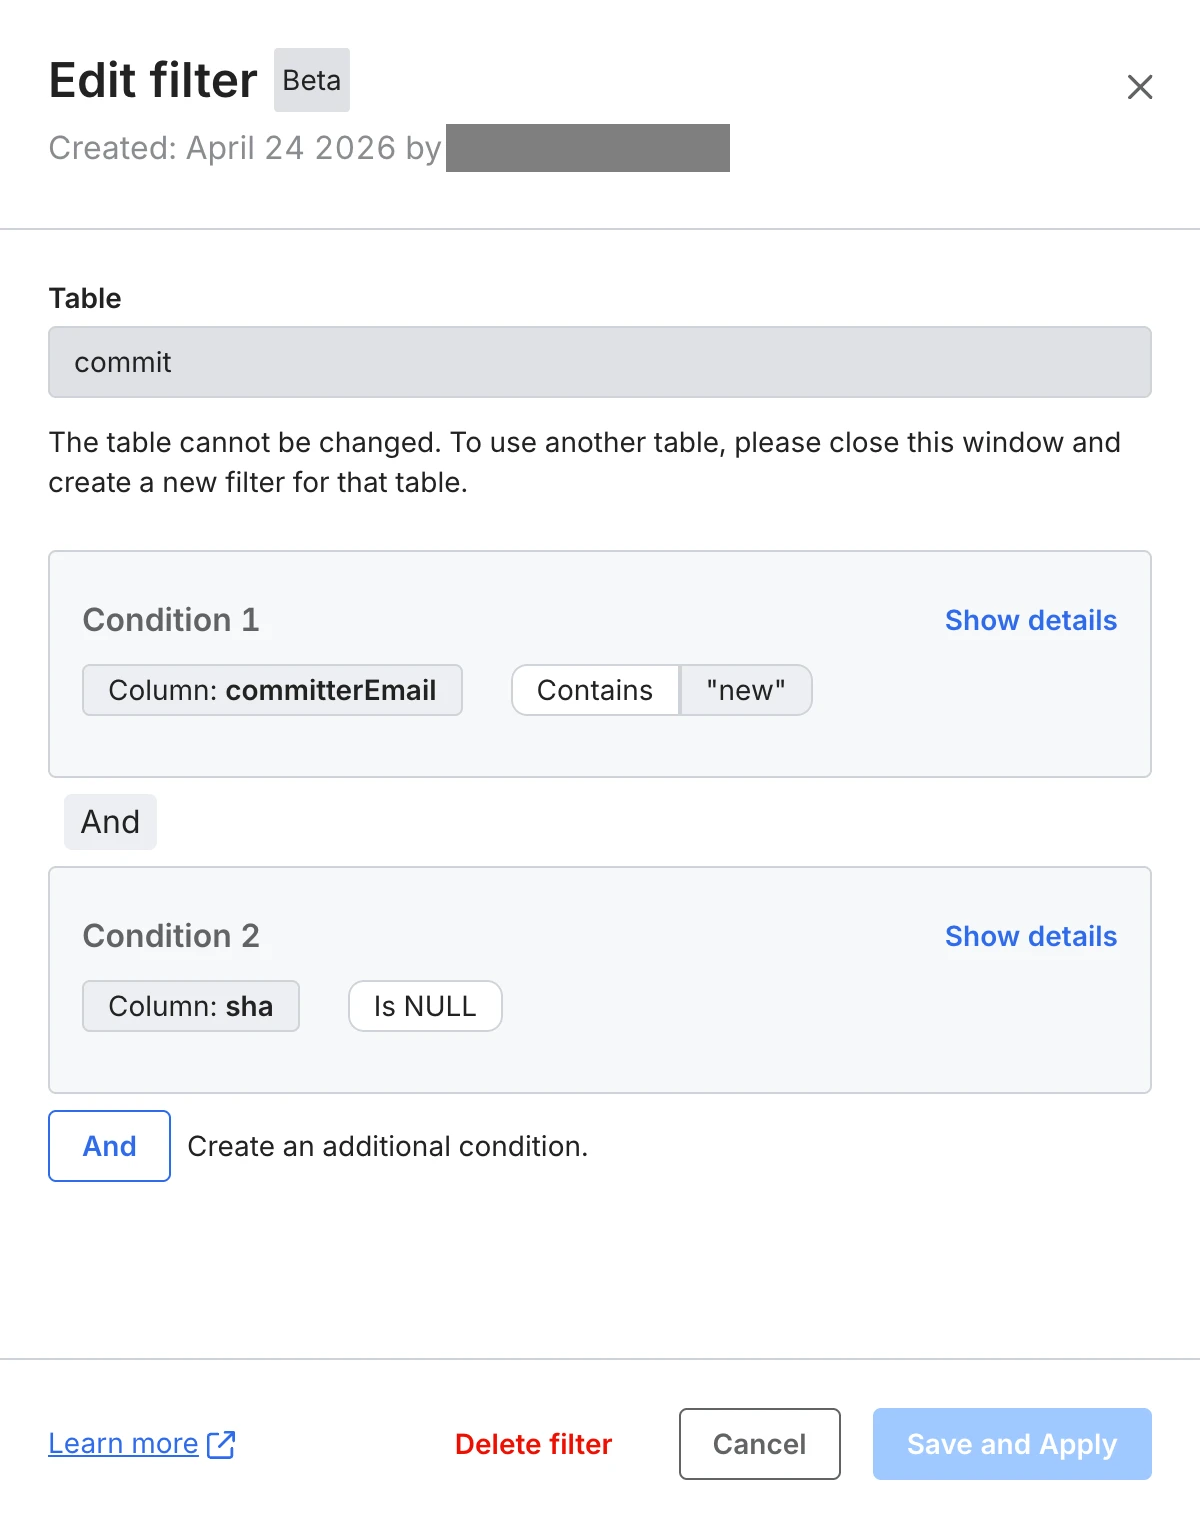
(Optional) You can edit a condition by modifying one or more of the following parameters:
- (Optional) Select the new Column you want to filter by.
- (Optional) Select the new Operator. See the list of supported operators.
- (Optional) Specify the new Value as integer, date, string, or boolean, depending on the column type.
(Optional) You can click Add to add another condition. Follow the instructions in the previous step to define the table column, operator, and value for each added condition.
You can create up to 10 conditions per filter.
(Optional) You can click Remove condition to remove an existing condition.
Click Save and Apply. Fivetran stages the filter as a pending change and a Pending changes bar appears at the bottom of the page.
(Optional) Click Review changes in the bar to open a summary panel on the right showing all pending schema changes, including the updated row filter. Click View next to any entry to scroll the schema list to that table.
Click Save changes. The Apply row filter changes dialog opens, listing the affected tables and warning that a historical re-sync is required. If the connection supports table-level re-syncs, only the affected tables are re-synced; otherwise, a full connection re-sync is triggered.
Select the acknowledgment checkbox, then click Save and apply. The re-sync starts.
Deleting row filter
To delete a row filter, do the following:
On the Schema tab of the Connection Details page, click Filtered in the relevant table's row. The Filter applied to this table box opens.
Click View filter. The Edit filter sidebar opens on the right side of the Connection Details page.
Click Delete filter.
In the Delete data filter and re-sync popup, type DELETE and click Delete filter and re-sync. The table re-sync starts.