SSH Tunnel
You can connect Fivetran to your database using an SSH tunnel when direct port access is not available or when you want an additional layer of security. With this method, Fivetran establishes an outbound SSH connection to a bastion (jump-box) server that you control. The bastion forwards traffic securely to your database, allowing Fivetran to sync data without exposing the database to the public internet. This approach is commonly used to keep databases inside private networks while still enabling Fivetran access through a controlled, encrypted channel.
To connect using an SSH tunnel, you must set up a tunnel server that can reach your database port. The server’s SSH port must be accessible from Fivetran’s IP addresses. You also need to create a dedicated SSH user account for Fivetran.
Fivetran generates a unique public SSH key for each destination. We support multiple connectors on a single SSH tunnel depending on the data volume and network bandwidth.
Follow the SSH tunnel setup instructions for your operating system:
Linux
Expand for instructions
Create SSH user
Log in to your SSH tunnel host and run the following commands:
Create group
fivetran:sudo groupadd fivetranCreate user
fivetran:sudo useradd -m -g fivetran fivetranSwitch to the
fivetranuser:sudo su - fivetranCreate the
.sshdirectory:mkdir ~/.sshSet permissions:
chmod 700 ~/.sshChange to the
.sshdirectory:cd ~/.sshCreate the
authorized_keysfile:touch authorized_keysSet permissions:
chmod 600 authorized_keysUsing your favorite text editor, add the public SSH key from the database setup page in your Fivetran dashboard to the
authorized_keysfile. The key must be all on one line. Make sure that you don’t introduce any line breaks when cutting and pasting. The public SSH key is generated uniquely for each Fivetran destination.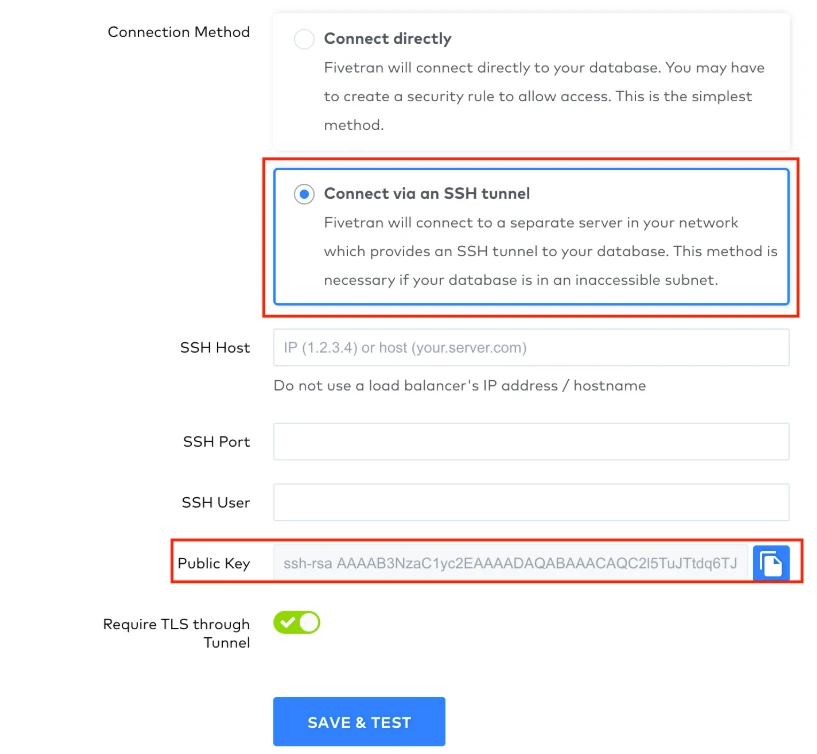
Fivetran supports only the SHA-2 RSA public key signature scheme for SSH connections. Ensure that your SSH server supports SHA-2 connectivity. The SHA-1 signature scheme is deprecated and no longer supported. For more information about the vulnerability, see the OpenSSH release notes.
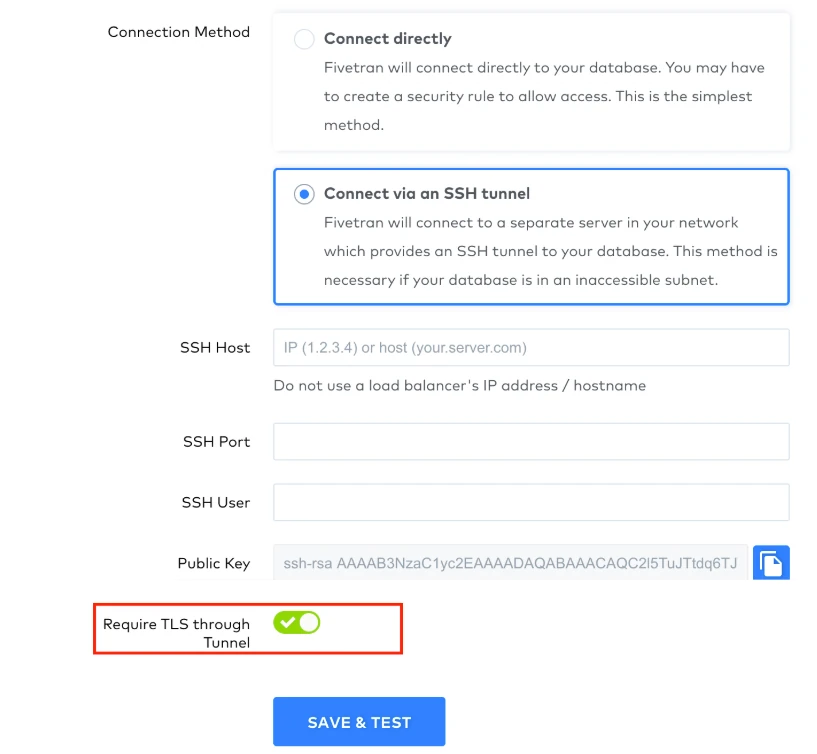
As an extra layer of security, Fivetran enables TLS on your SSH connection by default. We recommend that you keep TLS enabled unless you know it is safe to forgo it. To disable TLS, set the Require TLS through Tunnel toggle to OFF.
If you set the Require TLS through Tunnel toggle to OFF, Fivetran first attempts to connect over TLS inside the SSH tunnel. If this fails, Fivetran automatically retries the connection in clear text inside the SSH tunnel. You are responsible for configuring this option as per your corporate security policies.
Once the user is created, you'll need to allow port access.
Allow port access
Make sure that port access is allowed from:
- Fivetran's IP to your tunnel server's SSH port
- Your SSH tunnel server to your source database port
If your SSH server and database are hosted in AWS, you can use the following steps to configure port access.
AWS configuration steps
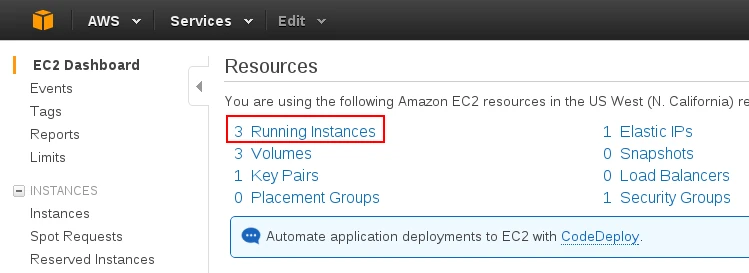
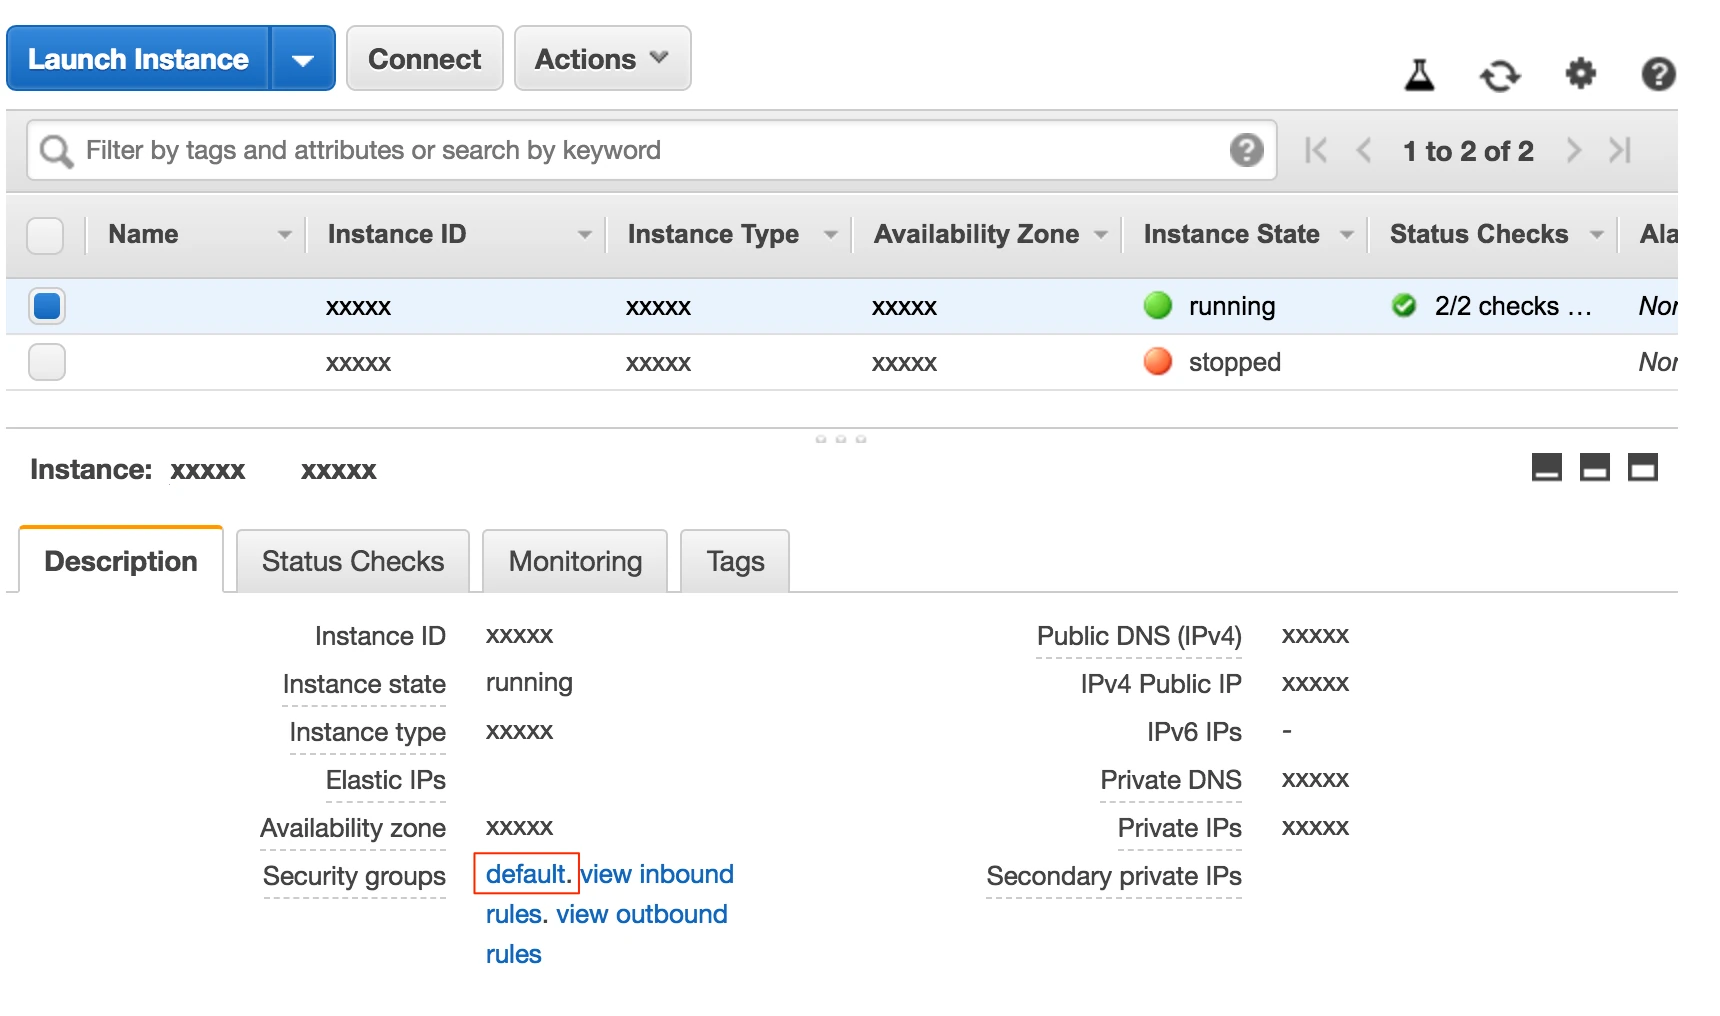
To configure an SSH server in AWS, open the EC2 console and select Running Instances:
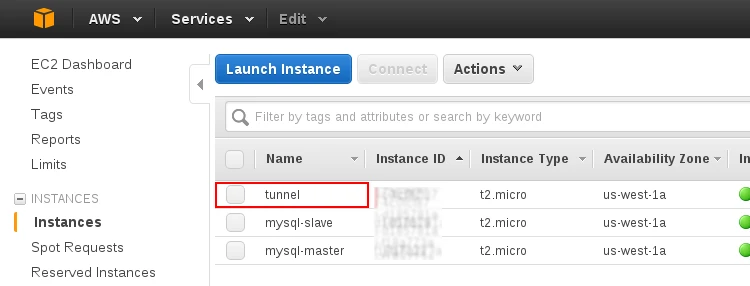
Select the instance you intend to use as an SSH tunnel:
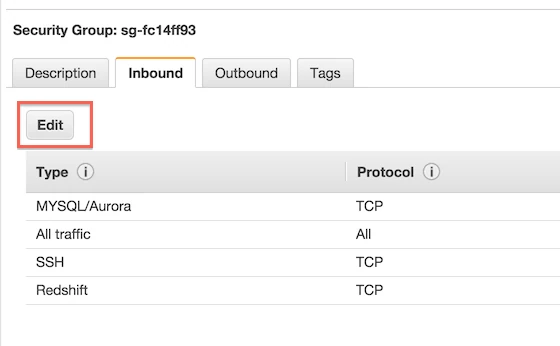
Select the Security groups and then select default:
Select the Inbound tab.
Click Edit.
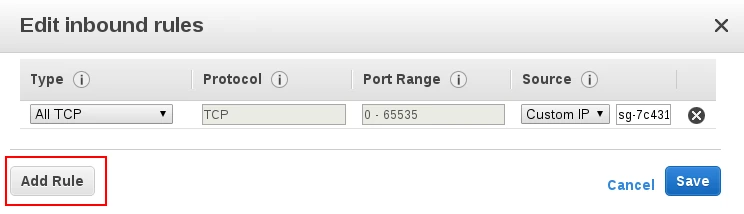
Fill in Fivetran's IP and your SSH port (do not use a load balancer).
For VPC or EC2 classic, add a security rule:
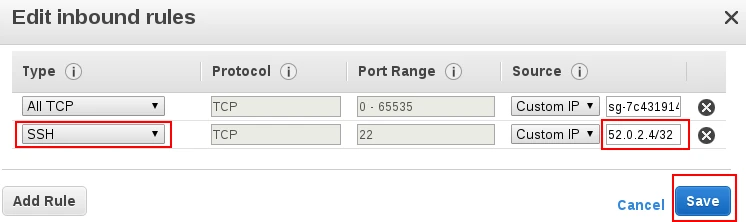
Select SSH, enter Fivetran's IP, and click Save:
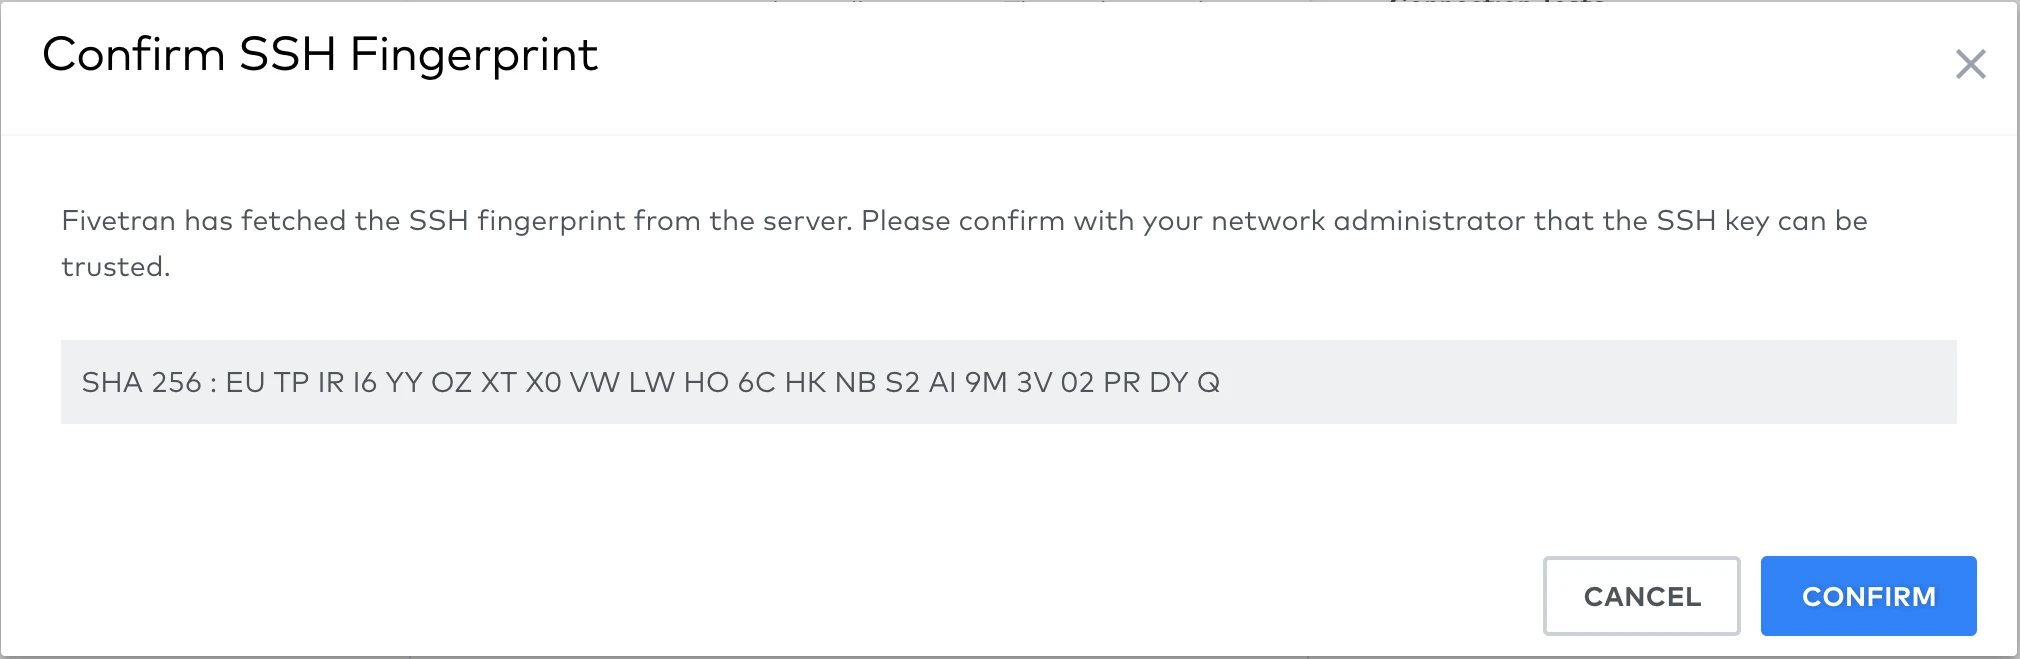
To complete setting up your database connection, follow the setup instructions for your specific database. You can confirm your server's SSH key by comparing the SHA 256 displayed when running the setup tests.
Windows: OpenSSH
Expand for instructions
Install OpenSSH
Learn more in Microsoft's OpenSSH for Windows overview documentation.
Install the sshd server.
Add-WindowsCapability -Online -Name OpenSSH.Server~~~~0.0.1.0Verify that the OpenSSH server is installed.
Get-WindowsCapability -Online | ? Name -like 'OpenSSH.Server*'If OpenSSH is installed, you'll see the following message:
Name : OpenSSH.Server~~~~0.0.1.0

State : Installed
Set the firewall to allow inbound TCP connections on port 22.
New-NetFirewallRule -Name sshd -DisplayName 'OpenSSH Server (sshd)' -Enabled True -Direction Inbound -Protocol TCP -Action Allow -LocalPort 22Start both the sshd service and the ssh-agent.
Start-Service sshd
Set-Service -Name sshd -StartupType 'Automatic'
Start-Service ‘ssh-agent’
Set-Service -Name ‘ssh-agent’ -StartupType 'Automatic'
Create Fivetran user and group
Windows does not allow a user and a group to have the same name.
Add a local Fivetran user.
net user fivetran <password> /add /comment:"User for establishing SSH connection to Fivetran service." /passwordchg:no /passwordreq:no /logonpasswordchg:noAdd a Fivetran group.
net localgroup fivetran-group /comment:"Group for establishing SSH connection to Fivetran service." /addIn Windows command prompt, switch to the SSH server directory.
cd C:\ProgramData\ssh\ && start notepad .\sshd_configAllow password authentication for the Fivetran user.
PasswordAuthentication yesAllow the Fivetran user to connect to the SSH server. Add the following line to the
sshd_configfile.AllowUsers fivetranIf your Windows build is 1809 or later, comment out the following lines in the
sshd_configfile:# Match Group administrators # AuthorizedKeysFile __PROGRAMDATA__/ssh/administrators_authorized_keysSave the
sshd_configfile.Restart the agent and the sshd service. If the following command fails, you can restart from the Task Manager (
Alt+Ctrl+Delete).Restart-Service ssh-agent; Restart-Service sshd
Fivetran supports only the SHA-2 RSA public key signature scheme for SSH connections. Ensure that your SSH server supports SHA-2 connectivity. The SHA-1 signature scheme is deprecated and no longer supported. For more information about the vulnerability, see the OpenSSH release notes.
Set up client
In your command line, go into the SSH server using Windows VM.
ssh fivetran@<Public IPv4 DNS>Enter your password.
Create an
.sshfolder in your home directory.mkdir .sshAdd an
authorized_keysfile.If your client is Windows PowerShell:
type nul > authorized_keys
echo <fivetran-ui-public-key> >> authorized_keys
icacls C:\Users\fivetran\.ssh\authorized_keys /inheritance:r
If your client is Linux:
touch authorized_keys
chmod 600 authorized_keys
echo <fivetran-ui-public-key> >> authorized_keys
If you're running PowerShell in elevated mode, your setup is complete. If you're not running PowerShell in elevated mode, follow the instructions below.
An elevated PowerShell prompt displays Administrator: Windows PowerShell on the top of the prompt's border.
Finish setup (non-elevated PowerShell only)
Allow public key authentication.
PubkeyAuthentication yesRemove password authentication.
PasswordAuthentication no
PermitEmptyPasswords no
Save the
sshd_configfile.Verify that inheritance has been disabled and remove
Administrator.
a. Right click on theauthorized_keysfile.
b. Select Properties.
c. Select the Security tab.
d. Select Advanced.
e. Verify that the bottom left reads Enable Inheritance, which means that inheritance is disabled.
f. RemoveAdministratorfrom the file security permissions.Restart the agent and the sshd service.
Restart-Service ssh-agent; Restart-Service sshd