
Microsoft Dynamics
Microsoft Dynamics 365 is a cloud-based suite of enterprise resource planning (ERP) and customer relationship management (CRM) applications designed to streamline business processes and improve customer interactions. Activations can sync your data to its integrated modules for sales, customer service, finance, operations, marketing, and more, enabling you to make data-driven decisions and enhance overall efficiency.
Getting Started
In this guide, we show you how to connect Microsoft Dynamics as an activation destination.
Prerequisites
- A Fivetran account. If you need one, create a Free Trial account now.
- A Microsoft Dynamics account with app approval enabled. Learn how to set up app approval in the FAQ section.
- The user who authenticates Activations must have the security permission role required for your environment:
- Production Dynamics instances: Service Writer
- Default environment: Admin
Read more in the Microsoft Power Platform database security documentation.
Limitations
This activation destination only supports Microsoft Dataverse entities.
Connect Microsoft Dynamics
- Select Activations, then navigate to Activation Destinations.
- Click New Activation Destination and select Microsoft Dynamics.
- Enter a Name and Domain for your destination connection.
Configure authentication
Select one of the following authentication types to connect your Dynamics 365 account to Activations:
- OAuth: This user-interactive method asks you to log in with your Microsoft Dynamics username and password.
- Service Principal: This non-interactive method uses the client credentials flow.
Authenticate using OAuth
- In Authorization, enter the domain for the instance and select Login.
- In the prompt window, enter the username and password for your Microsoft account.
- The Activation Destination tests run to verify succcessful set up.
- Go to App registrations and click + New registration.
Authenticate using Service Principal
Expand for instructions
Register application
1.In your Azure portal dashboard, click Microsoft Entra ID.
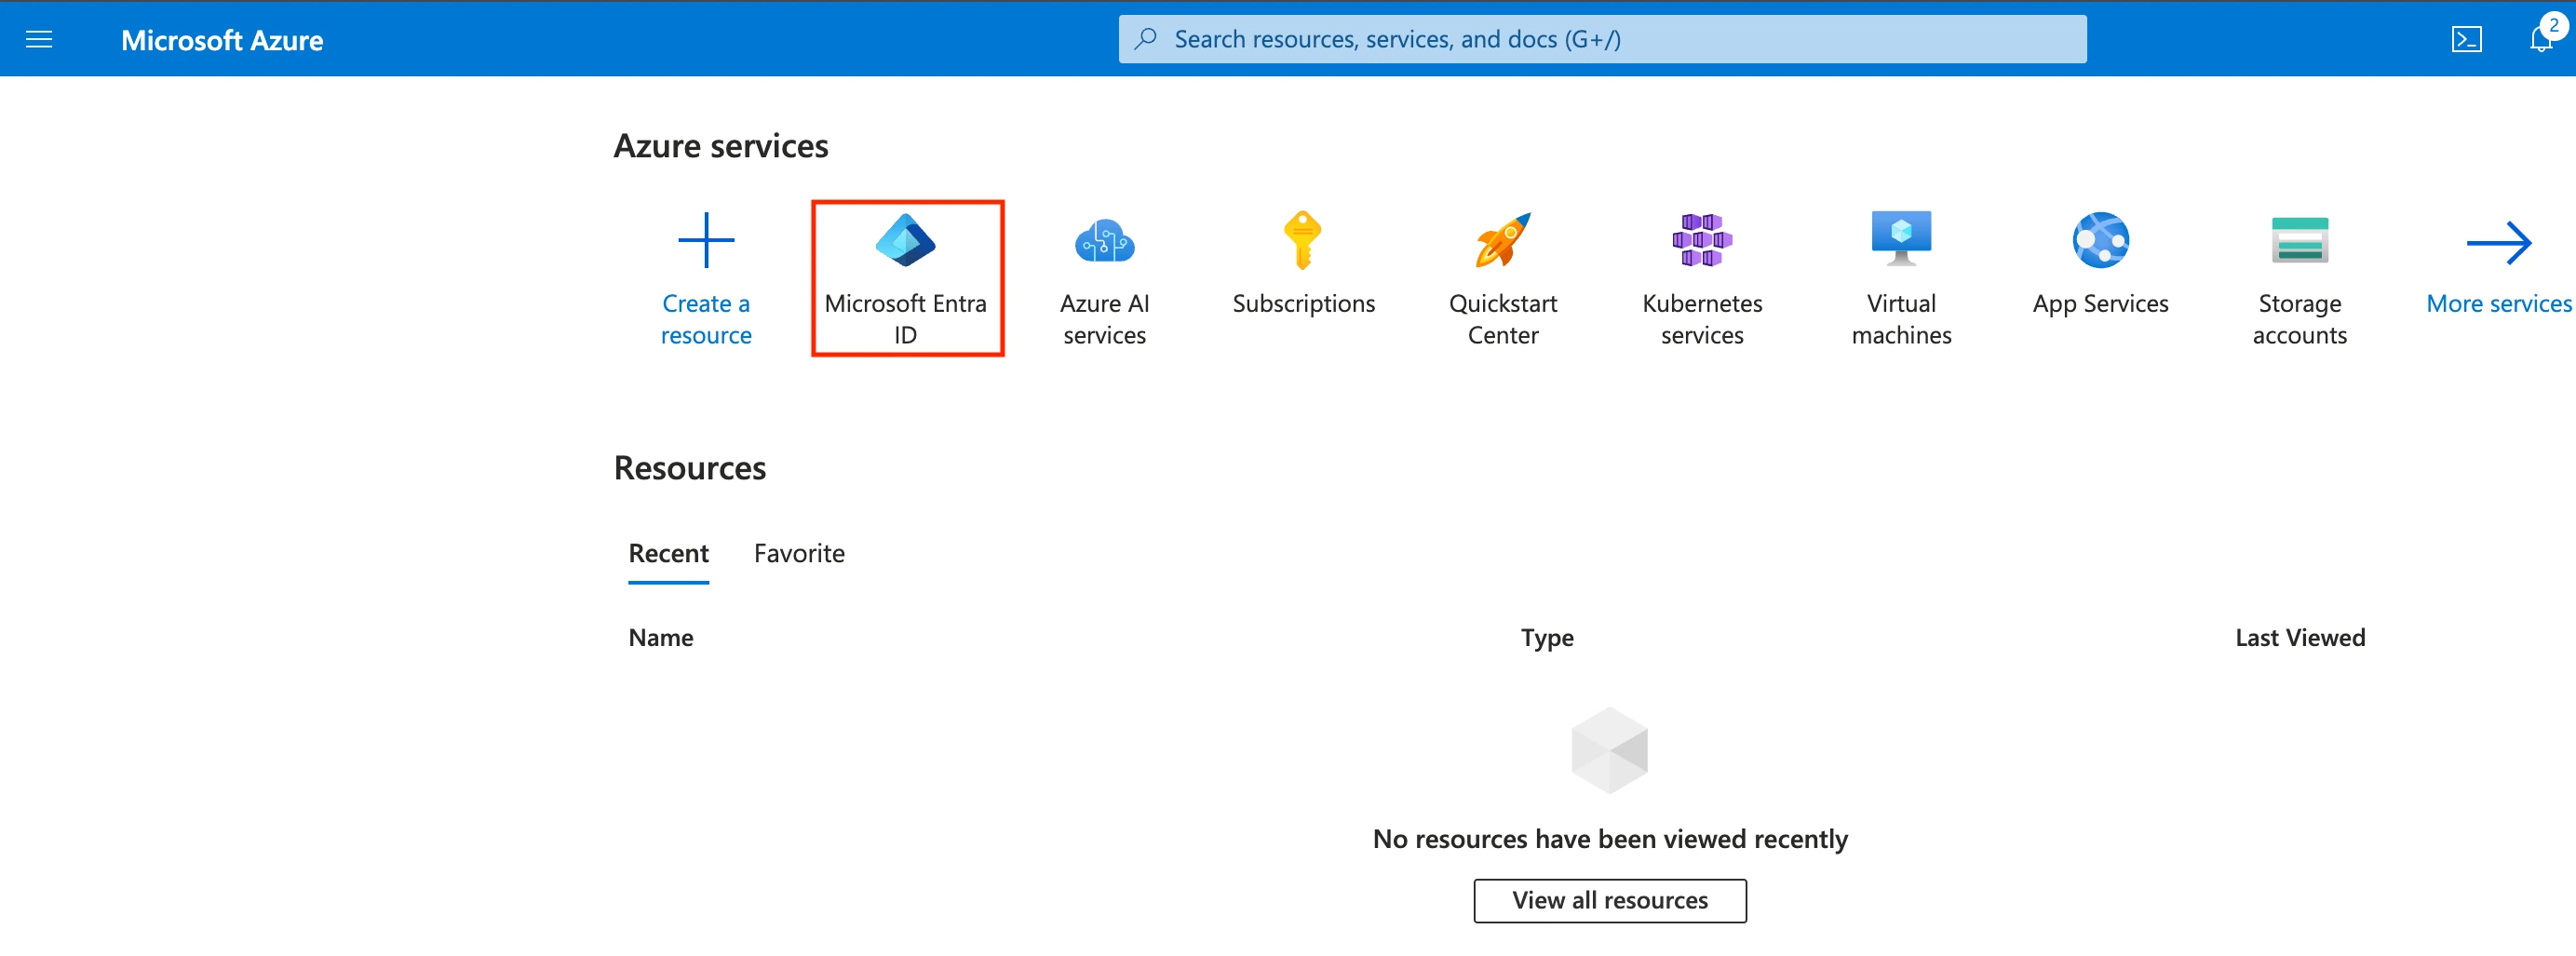
Go to App registrations and click + New registration.
Enter a Name for the application.
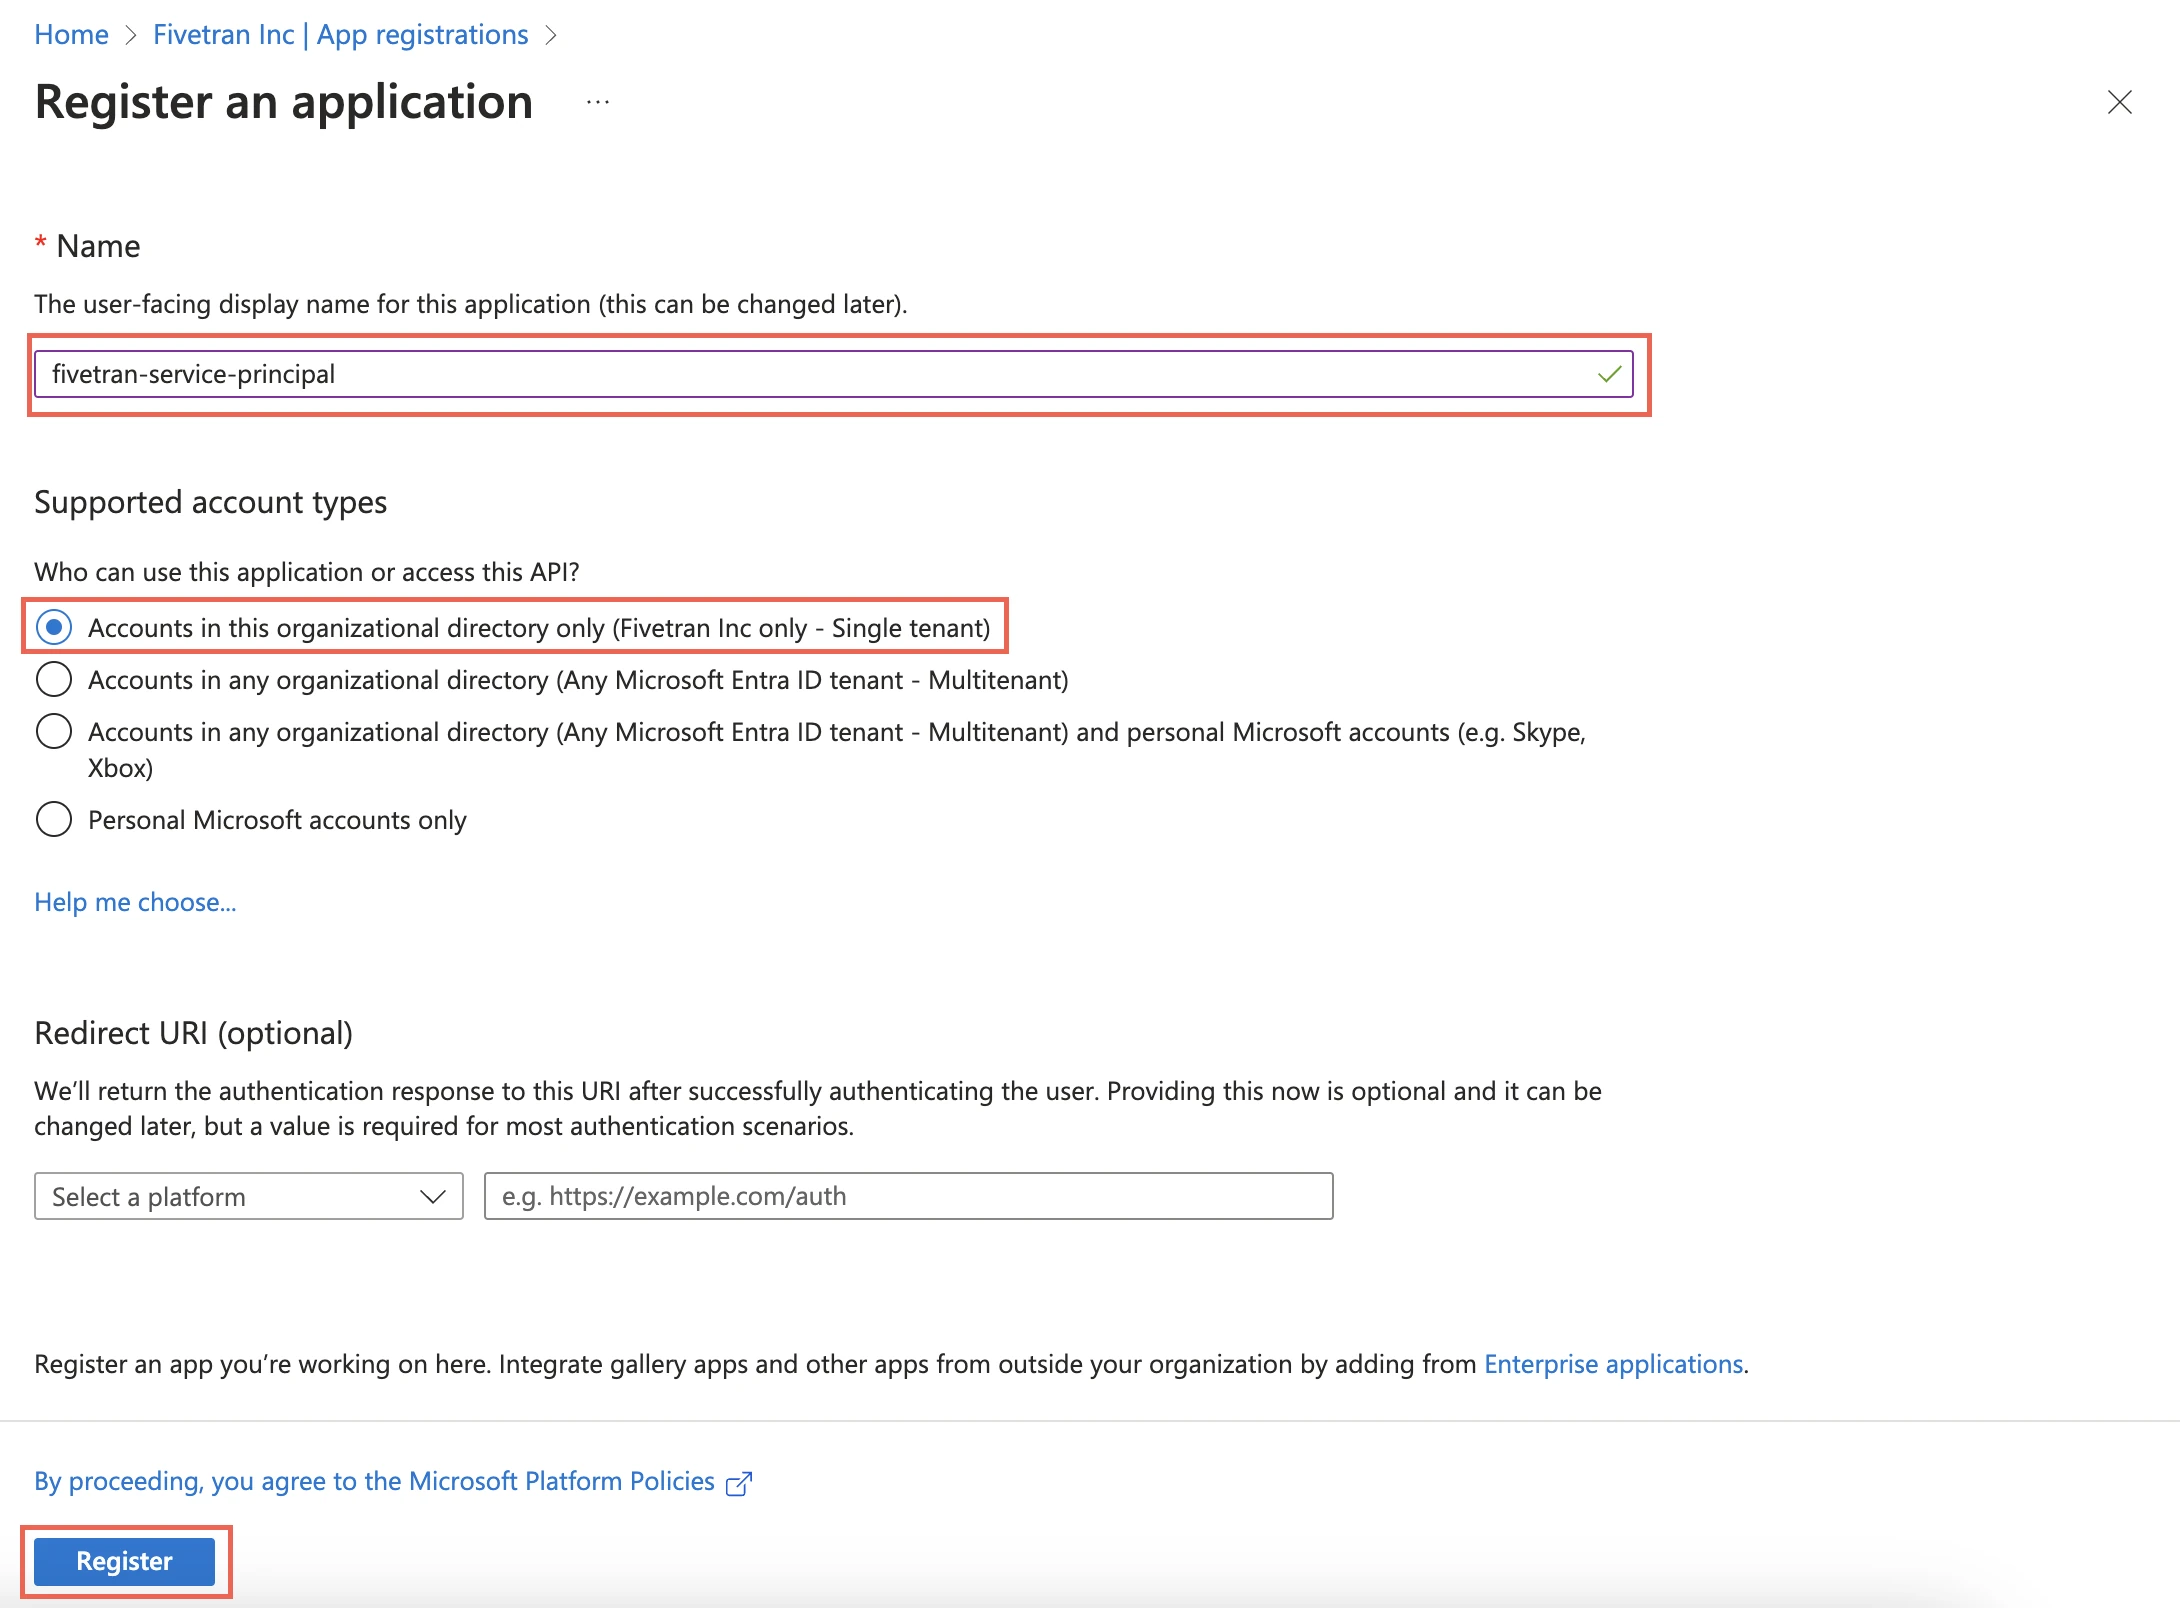
In the Supported account types section, select Accounts in this organizational directory only and click Register. For more information, see Microsoft's app sign indocumentation.
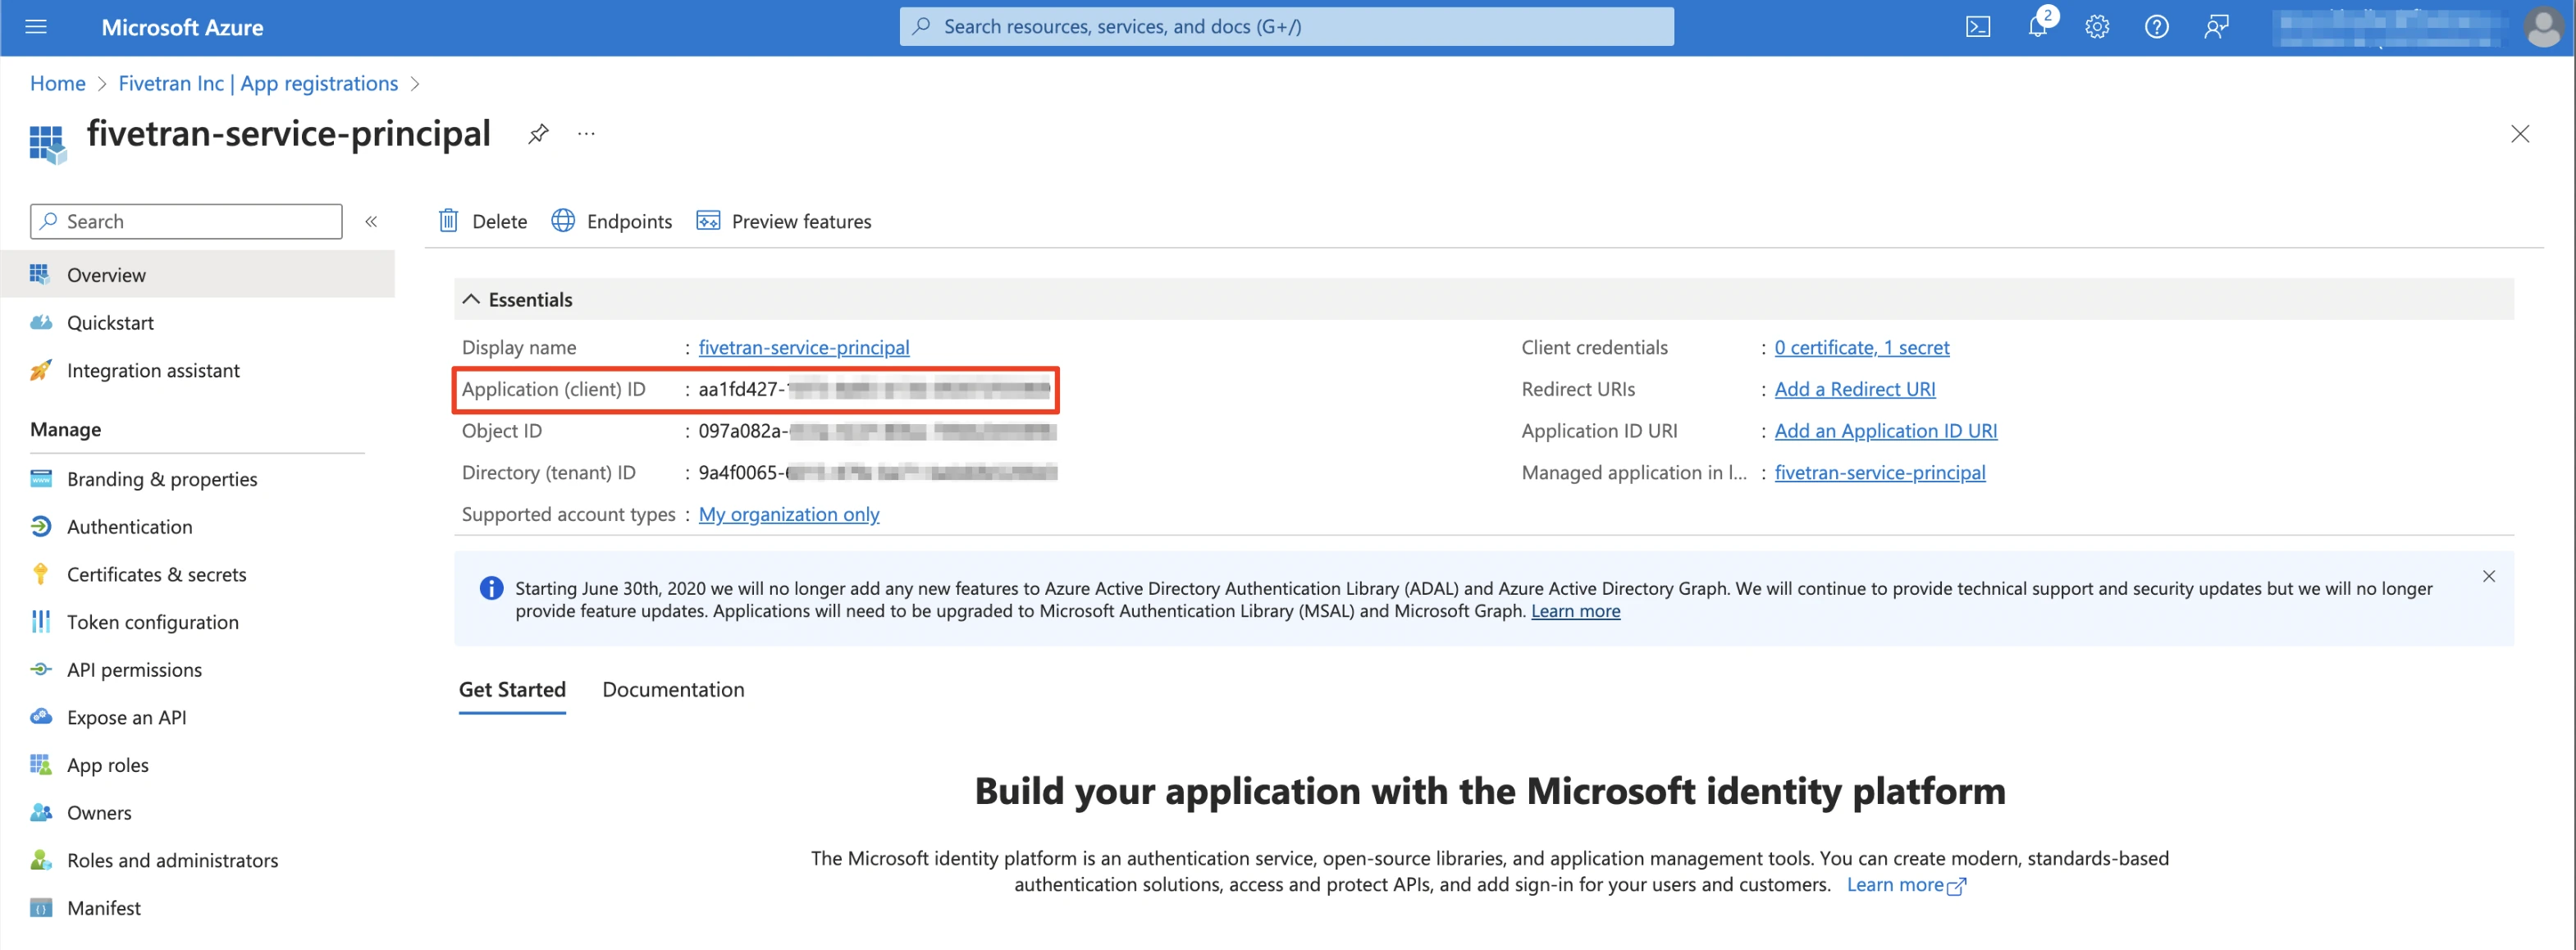
Make a note of the Application (client) ID. You will need it to configure Fivetran.
Add API permissions
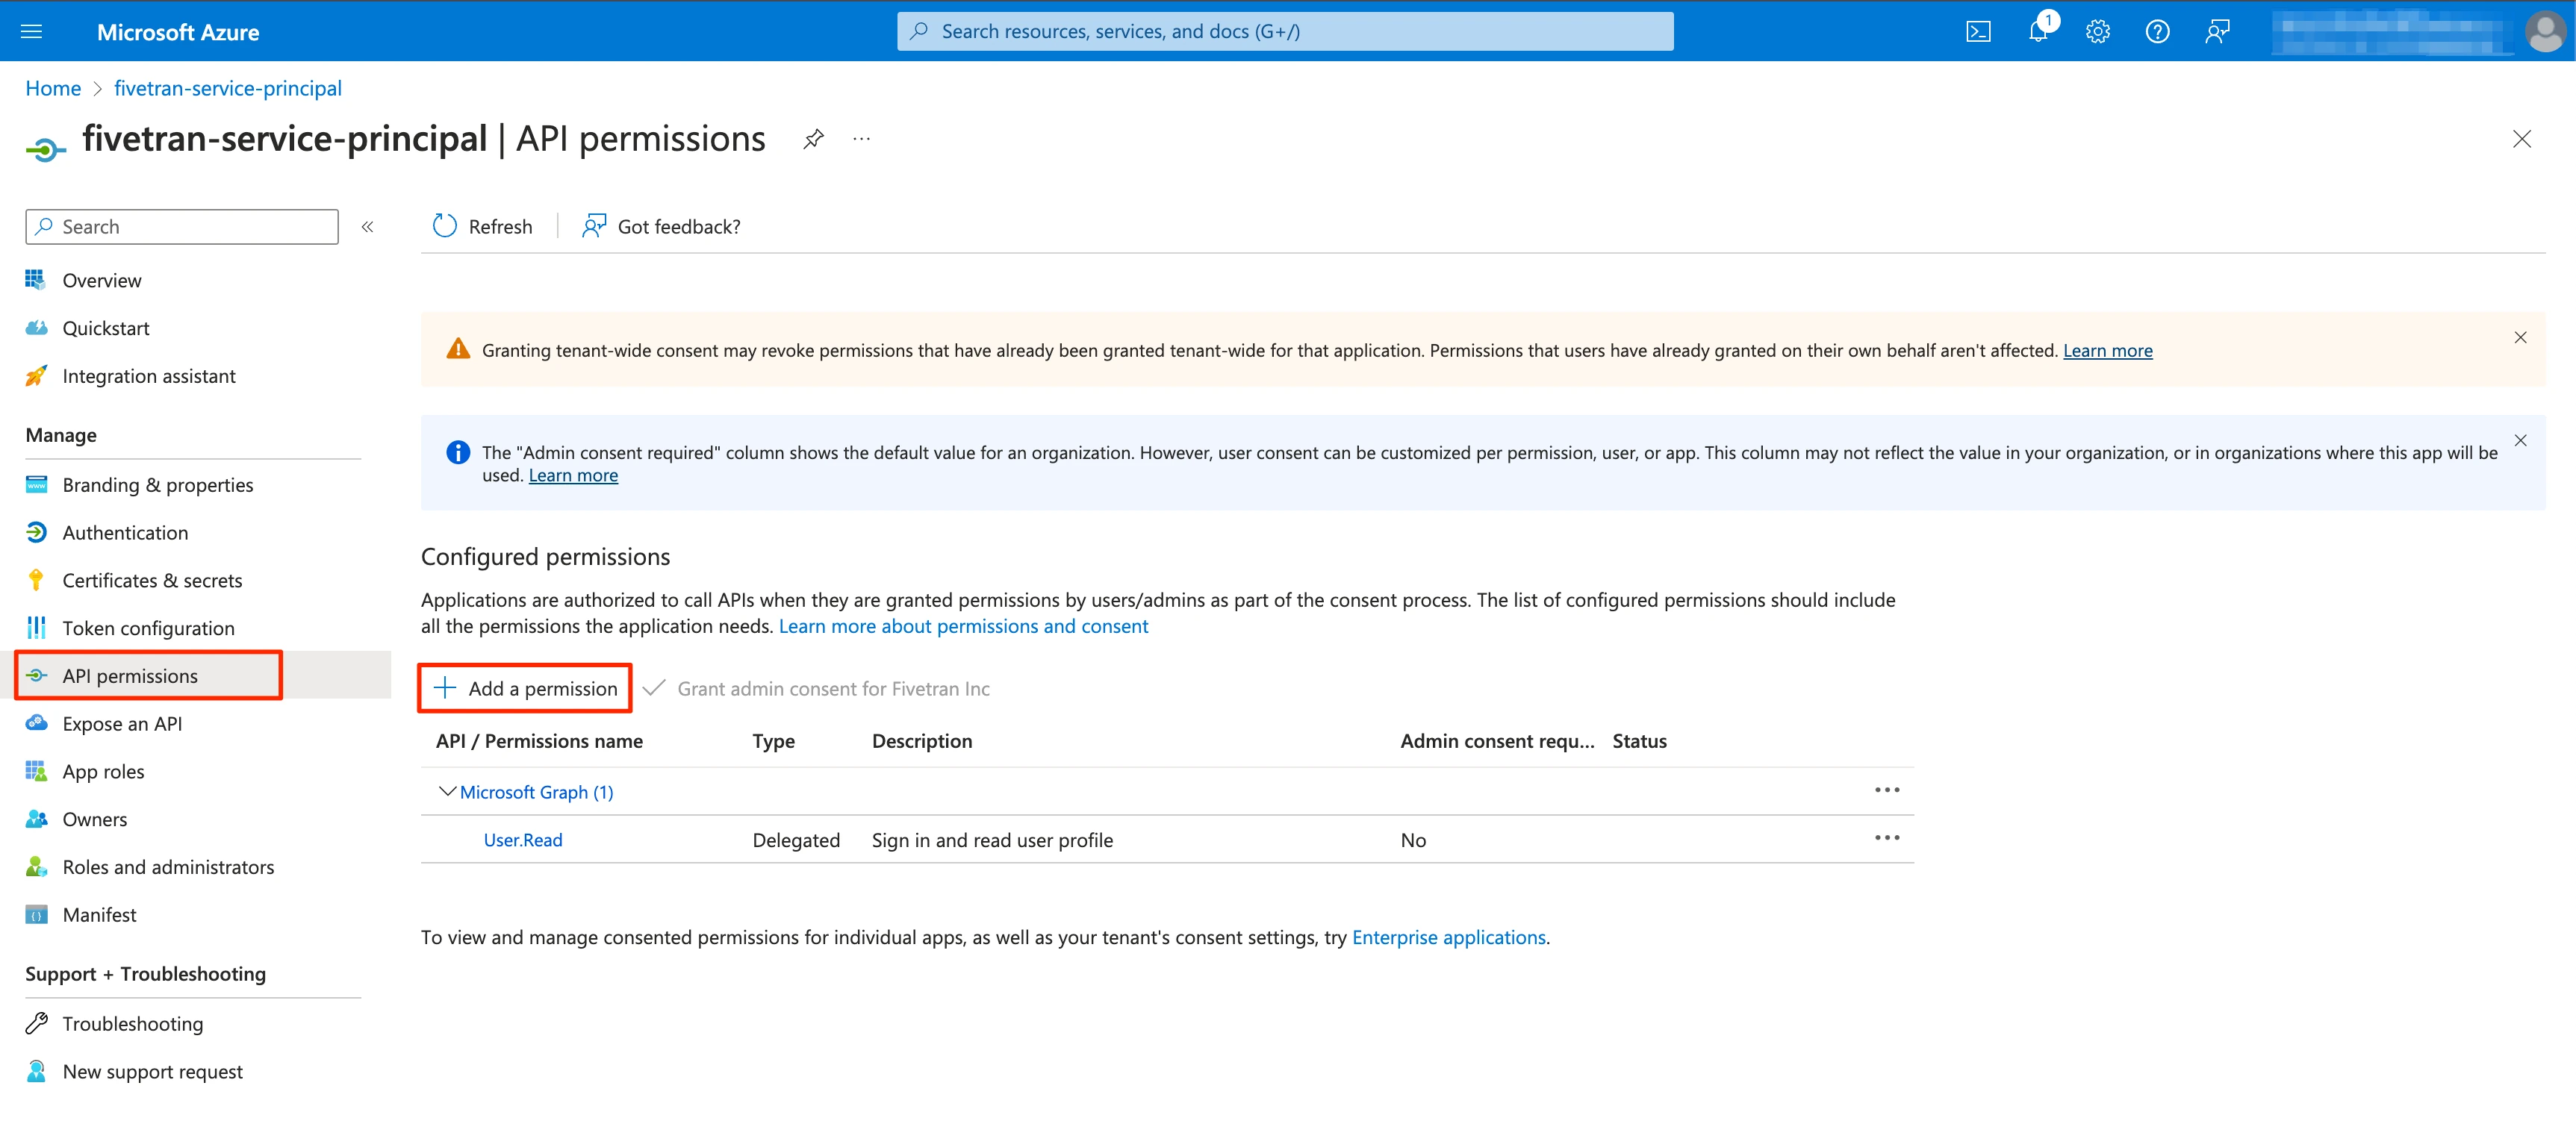
Select the application you registered in the Register application step.
On the navigation menu, select API Permissions.
Click Add a permission.
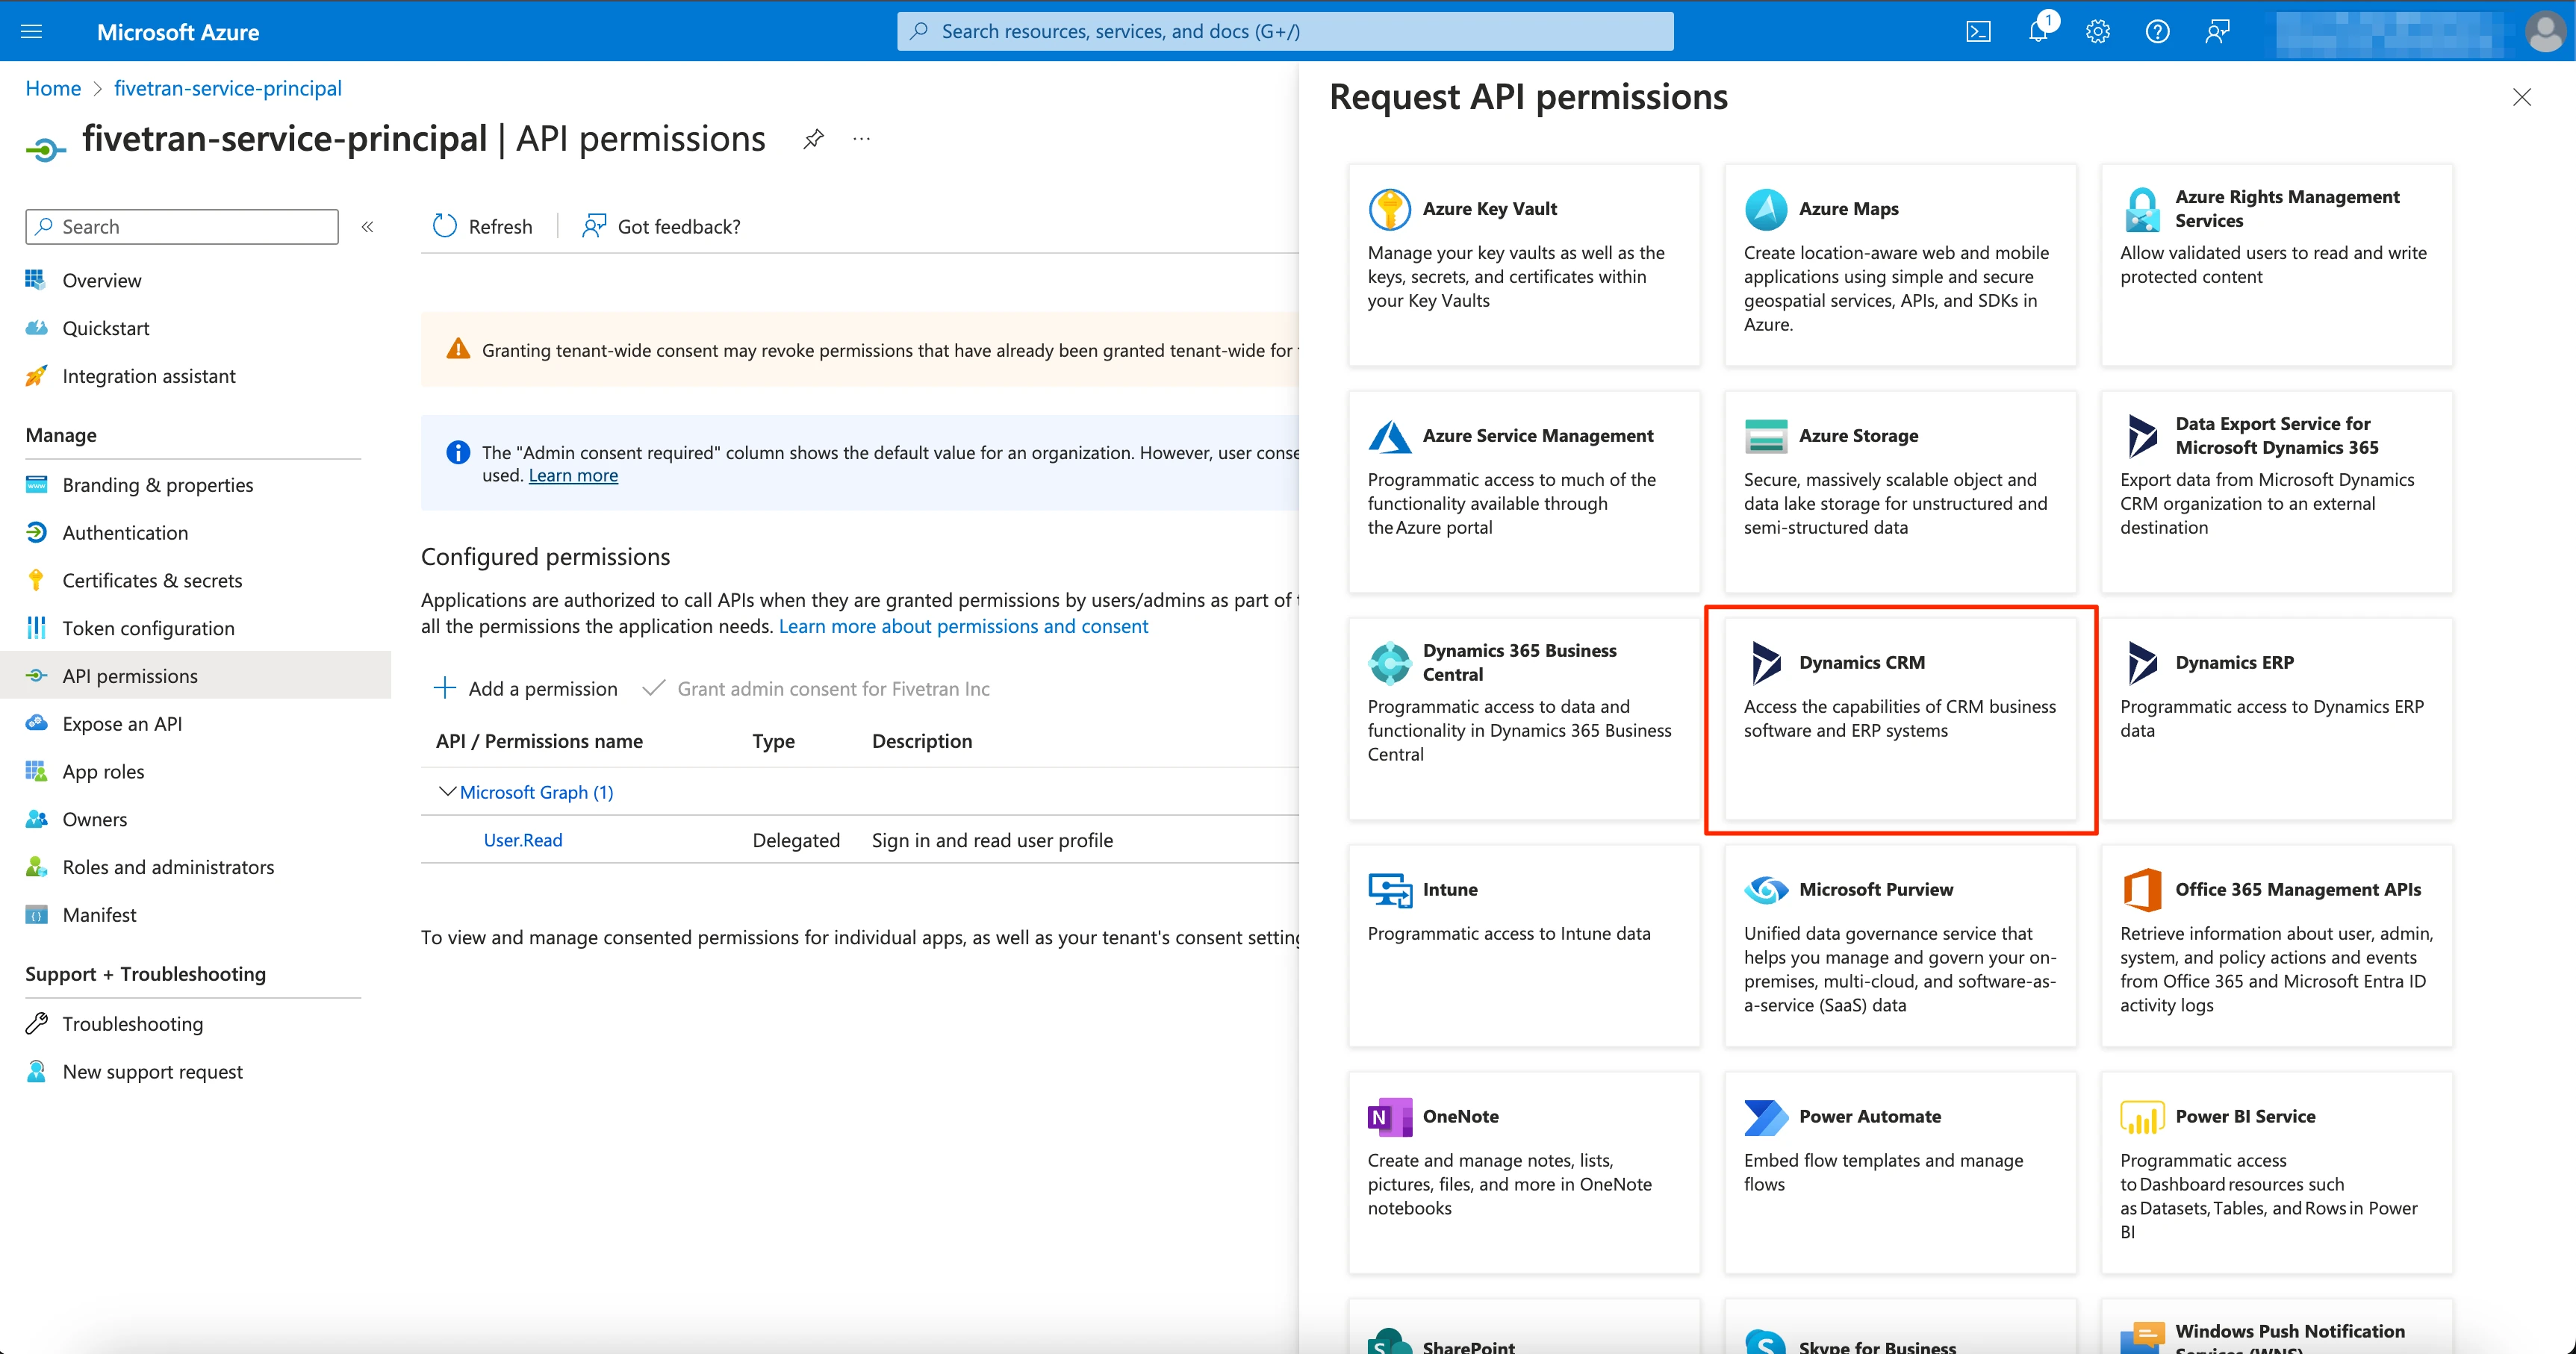
In the Request API permissions window, select Dynamics CRM .
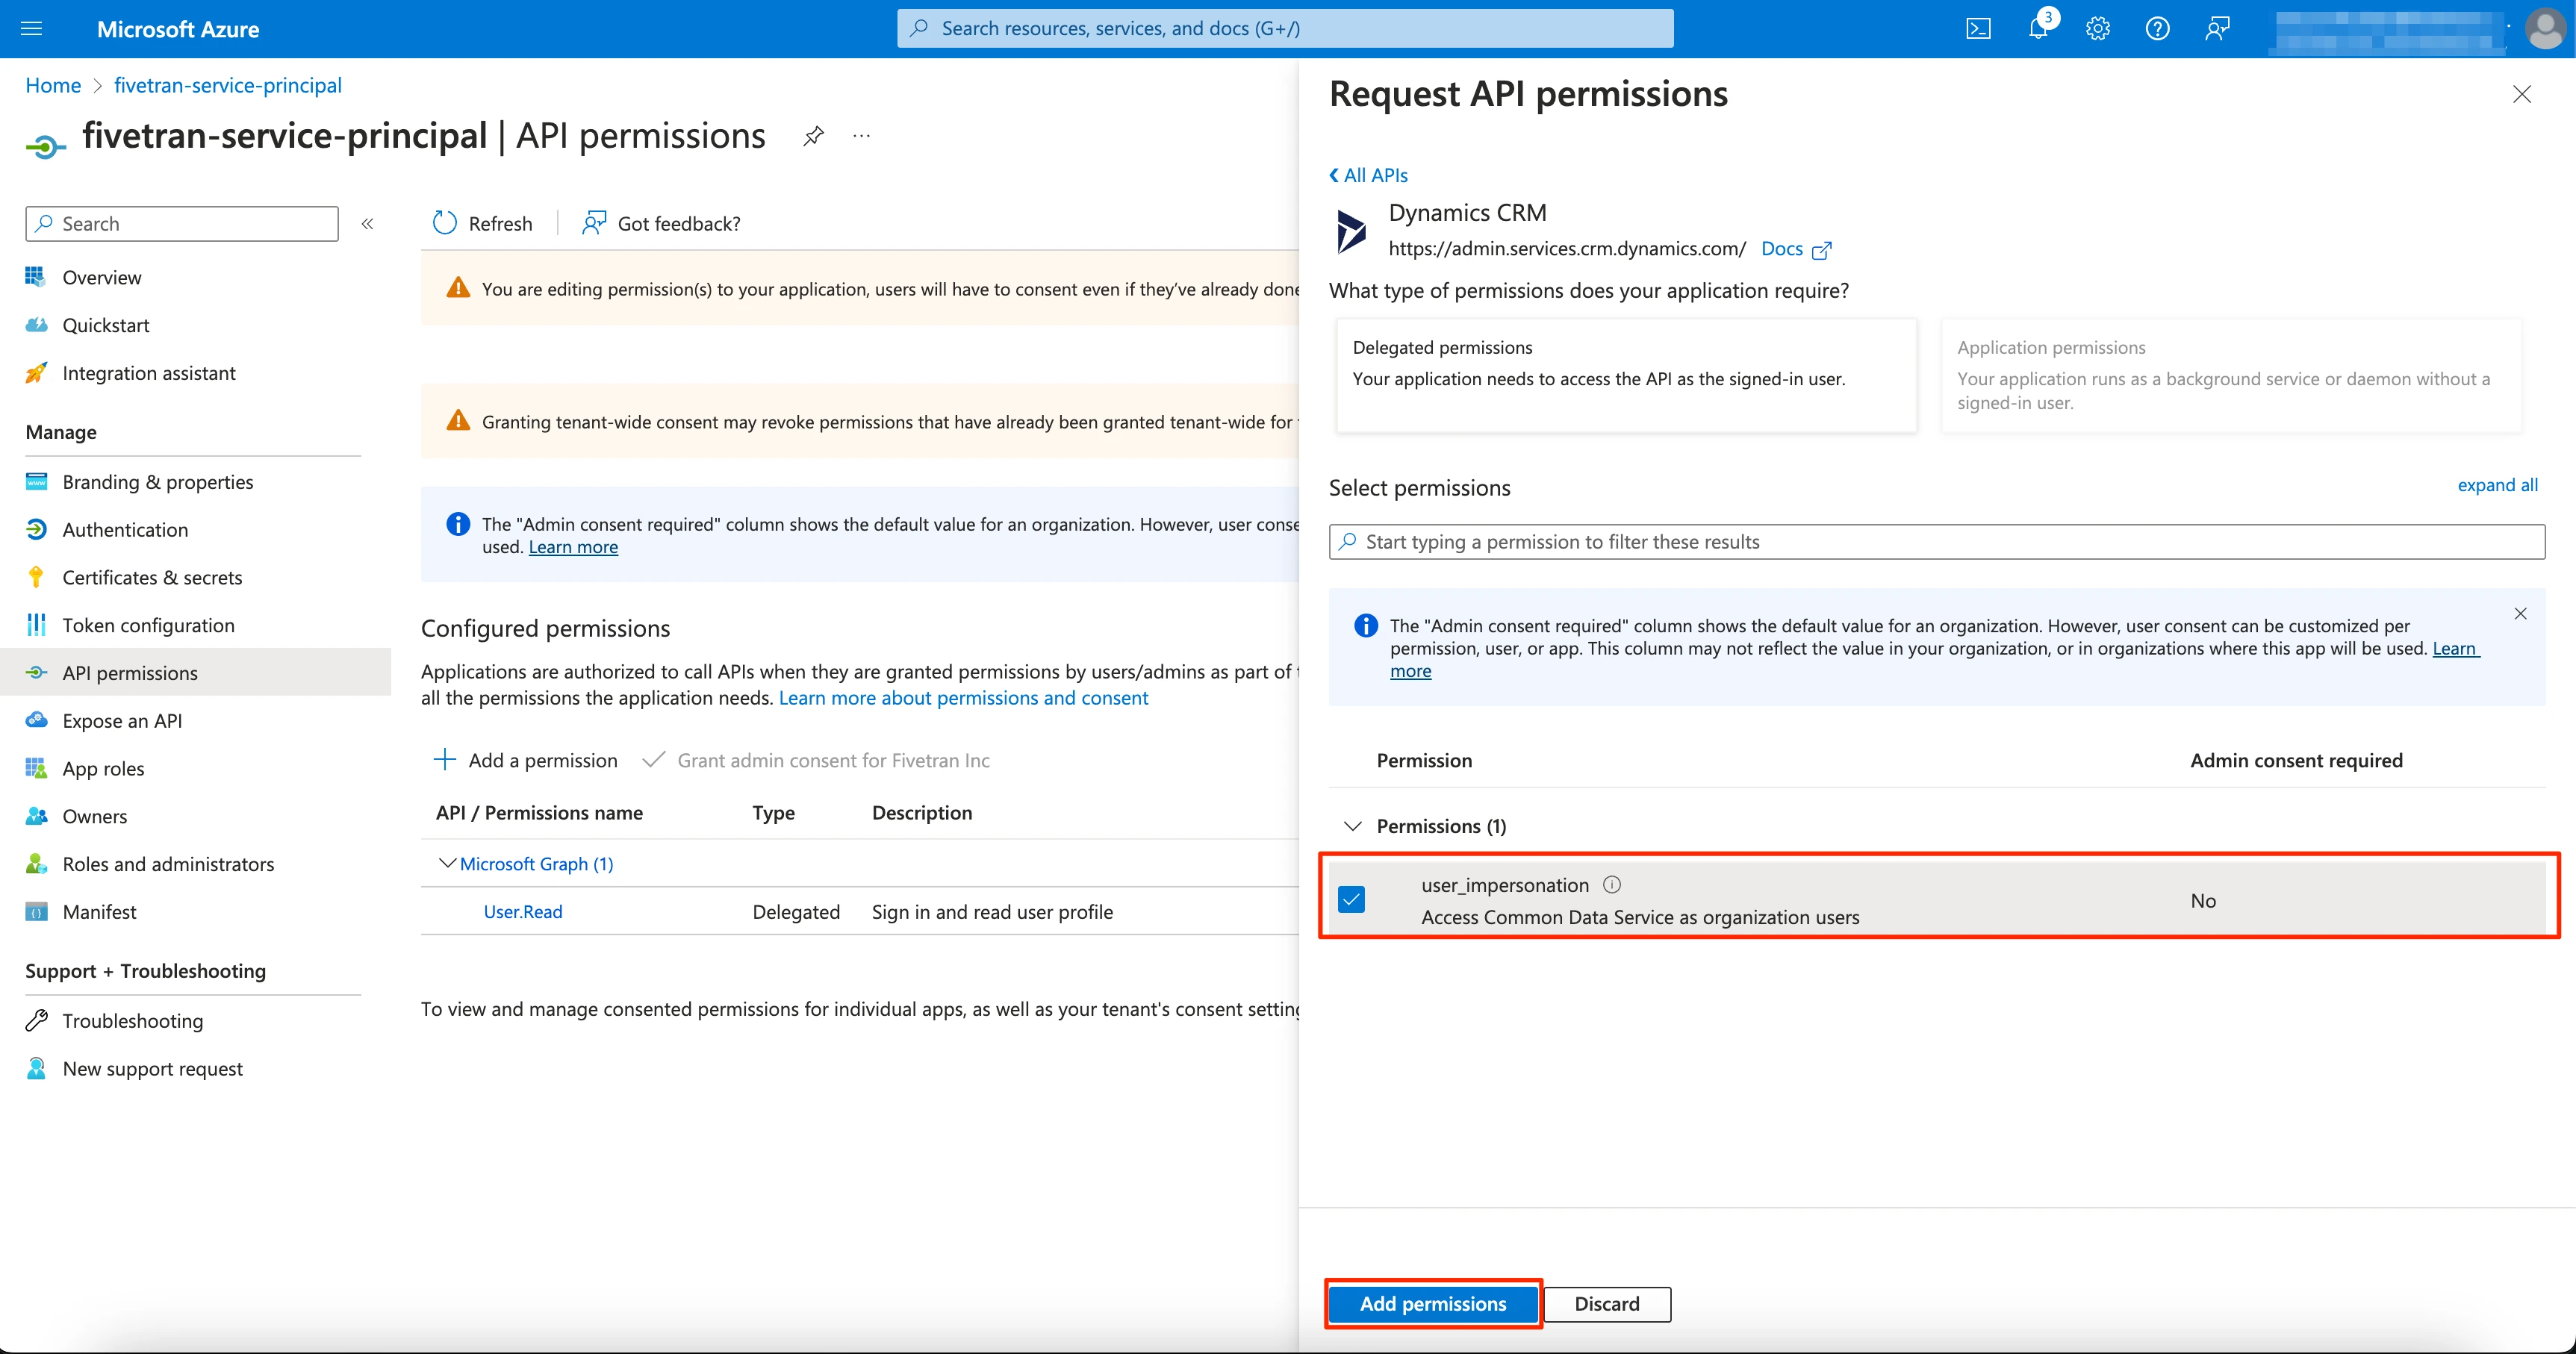
In the Permission section, select the user_impersonation checkbox and click Add permissions.
Create client secret
Return to the application you registered in the Register application step.
On the navigation menu, select Certificates & secrets.
Click + New client secret.
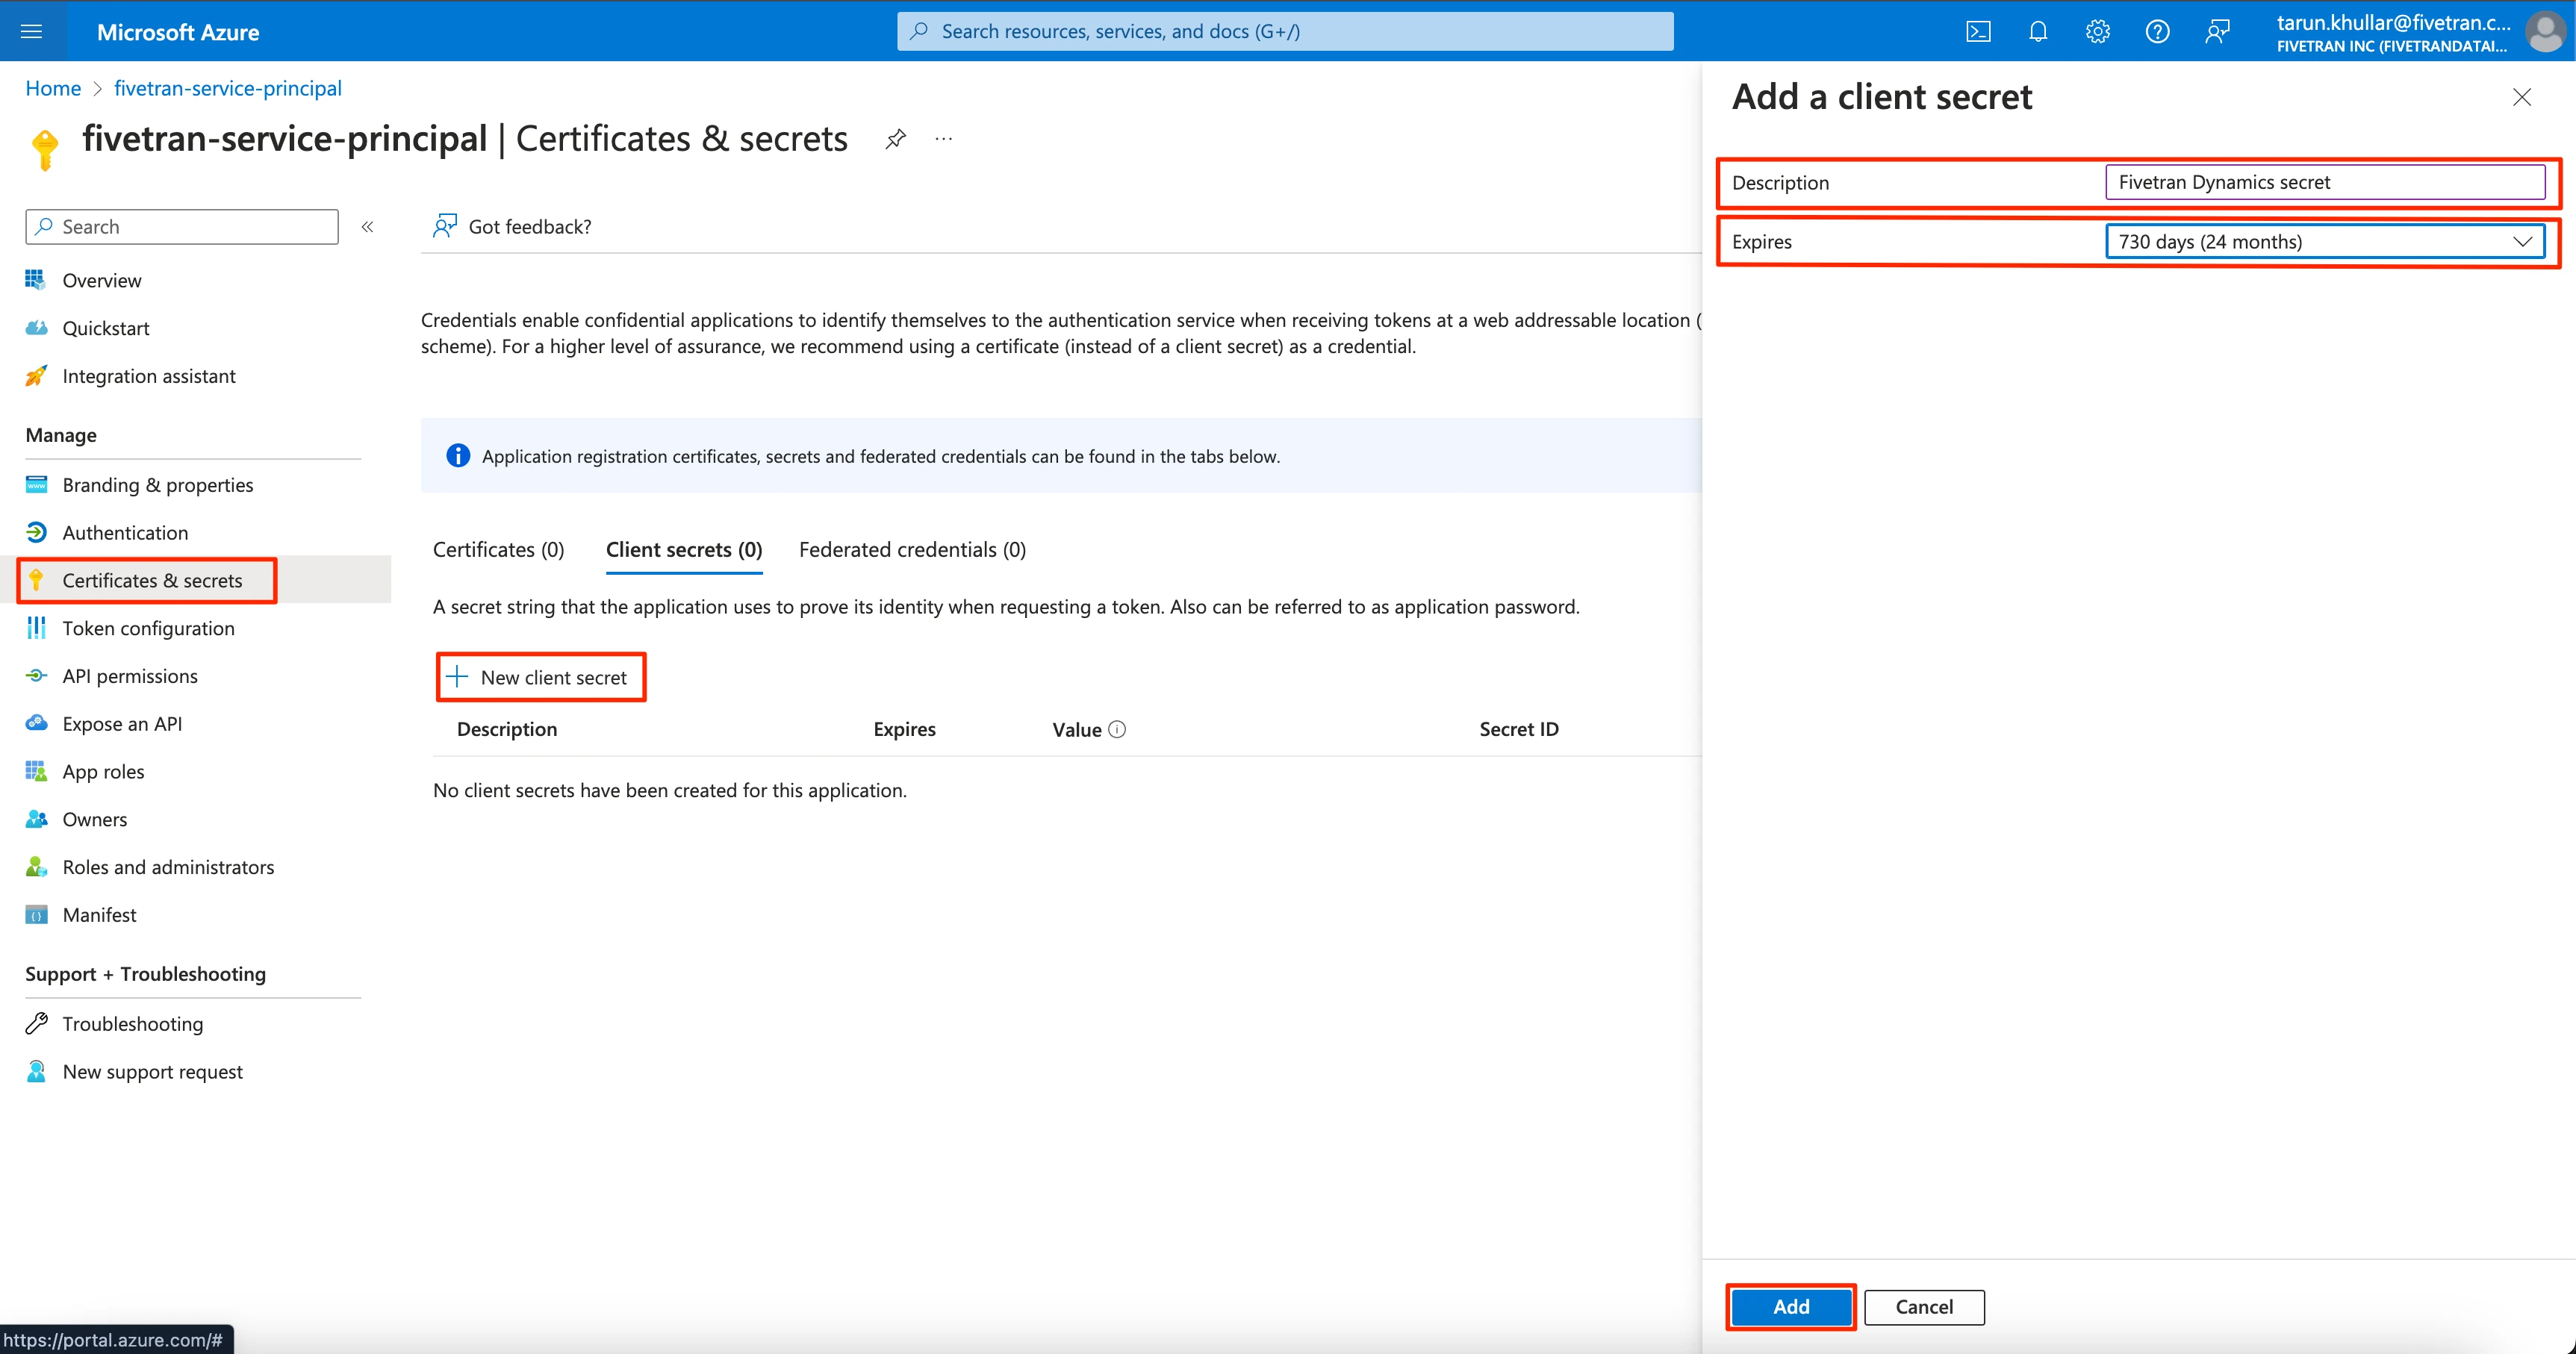
Enter a Description for your client secret.
In the Expires drop-down menu, select an expiry period for your client secret.
Click Add.
Make a note of the Value. You will need it to configure Fivetran.
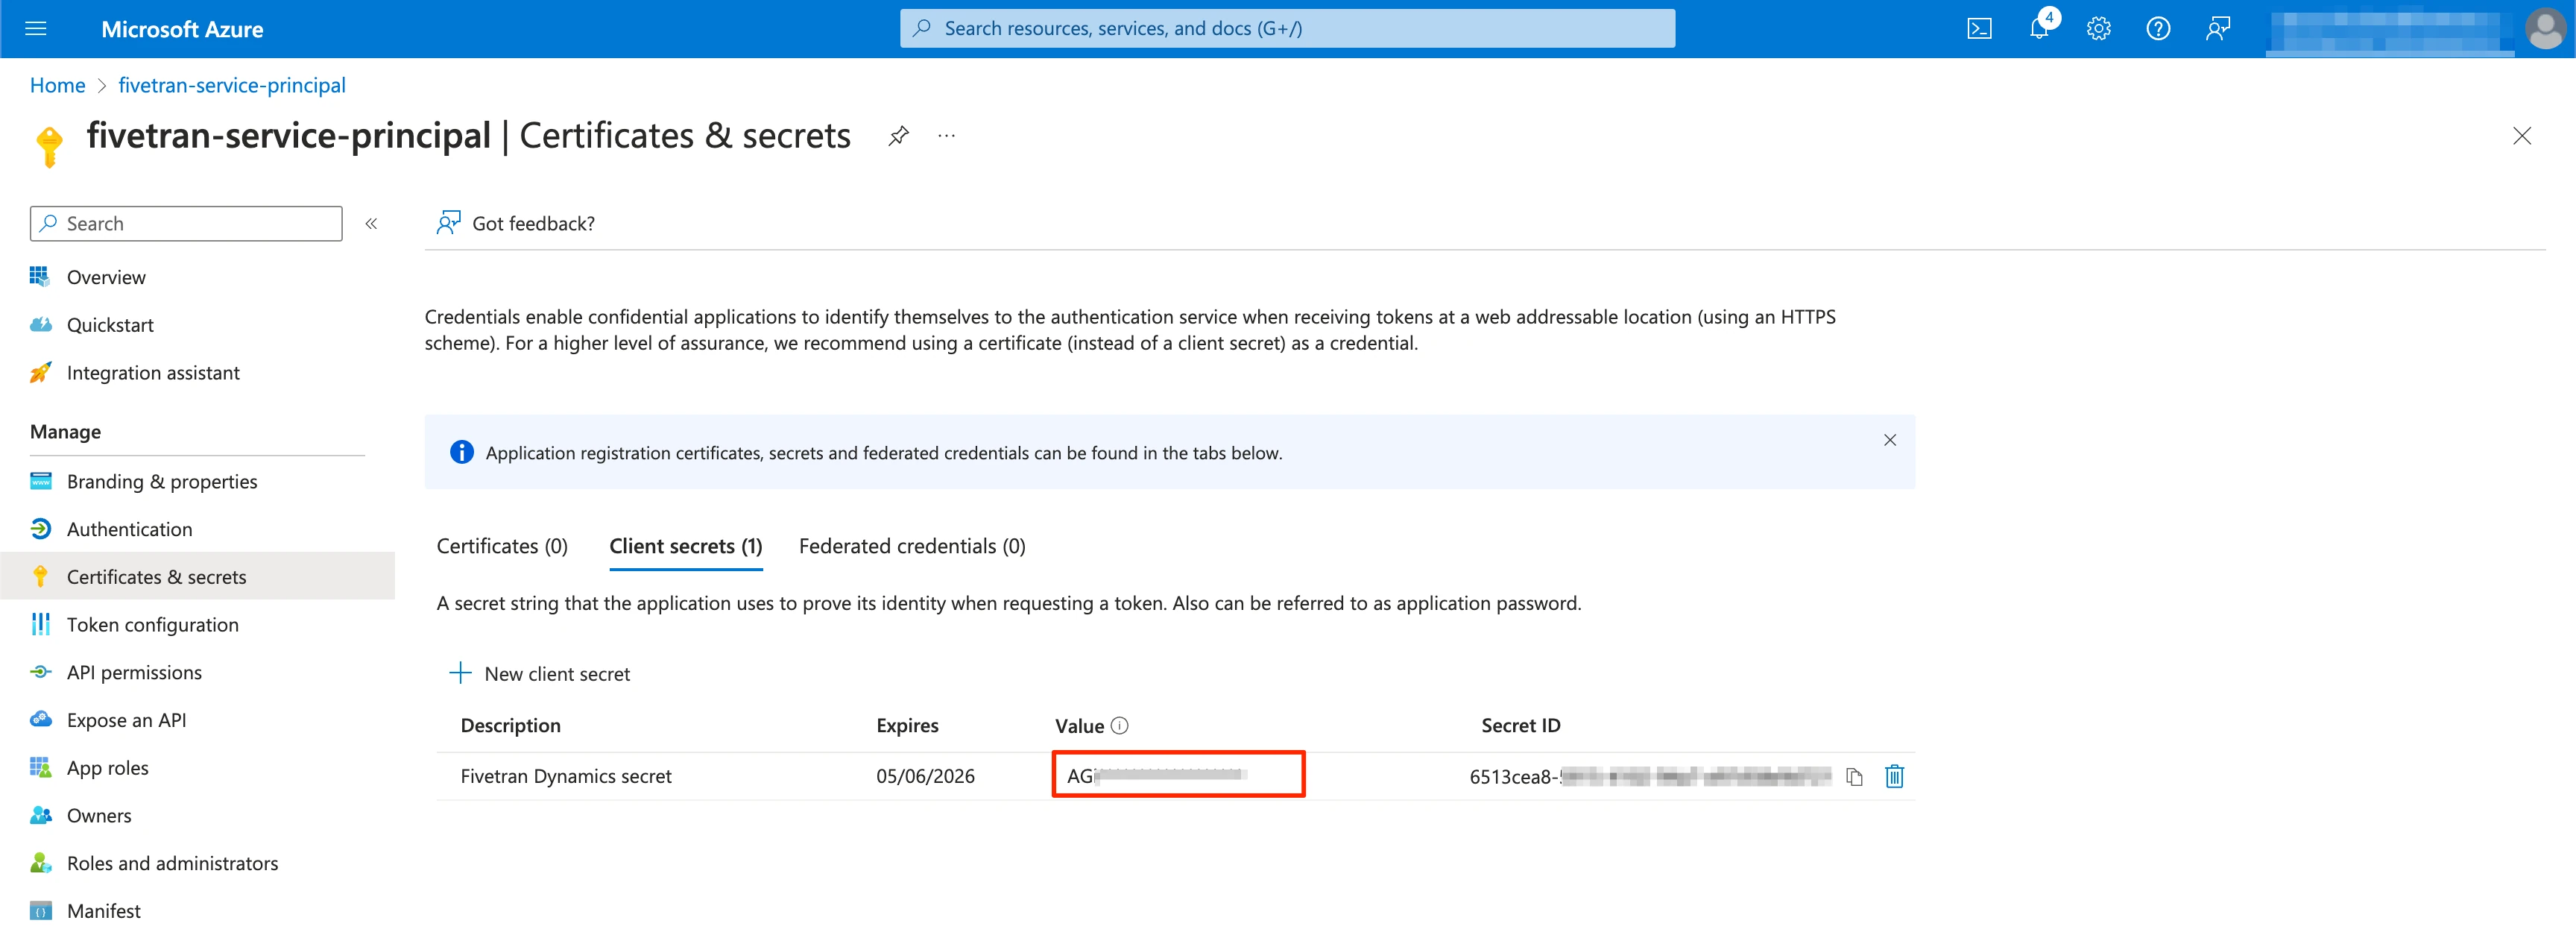
We recommend that you create a new client secret and update the credentials before the secret expires. Failing to do so may lead to sync failures.
Add registered app as application user
Log in to Power Platform admin center.
On the navigation menu, select Environments.
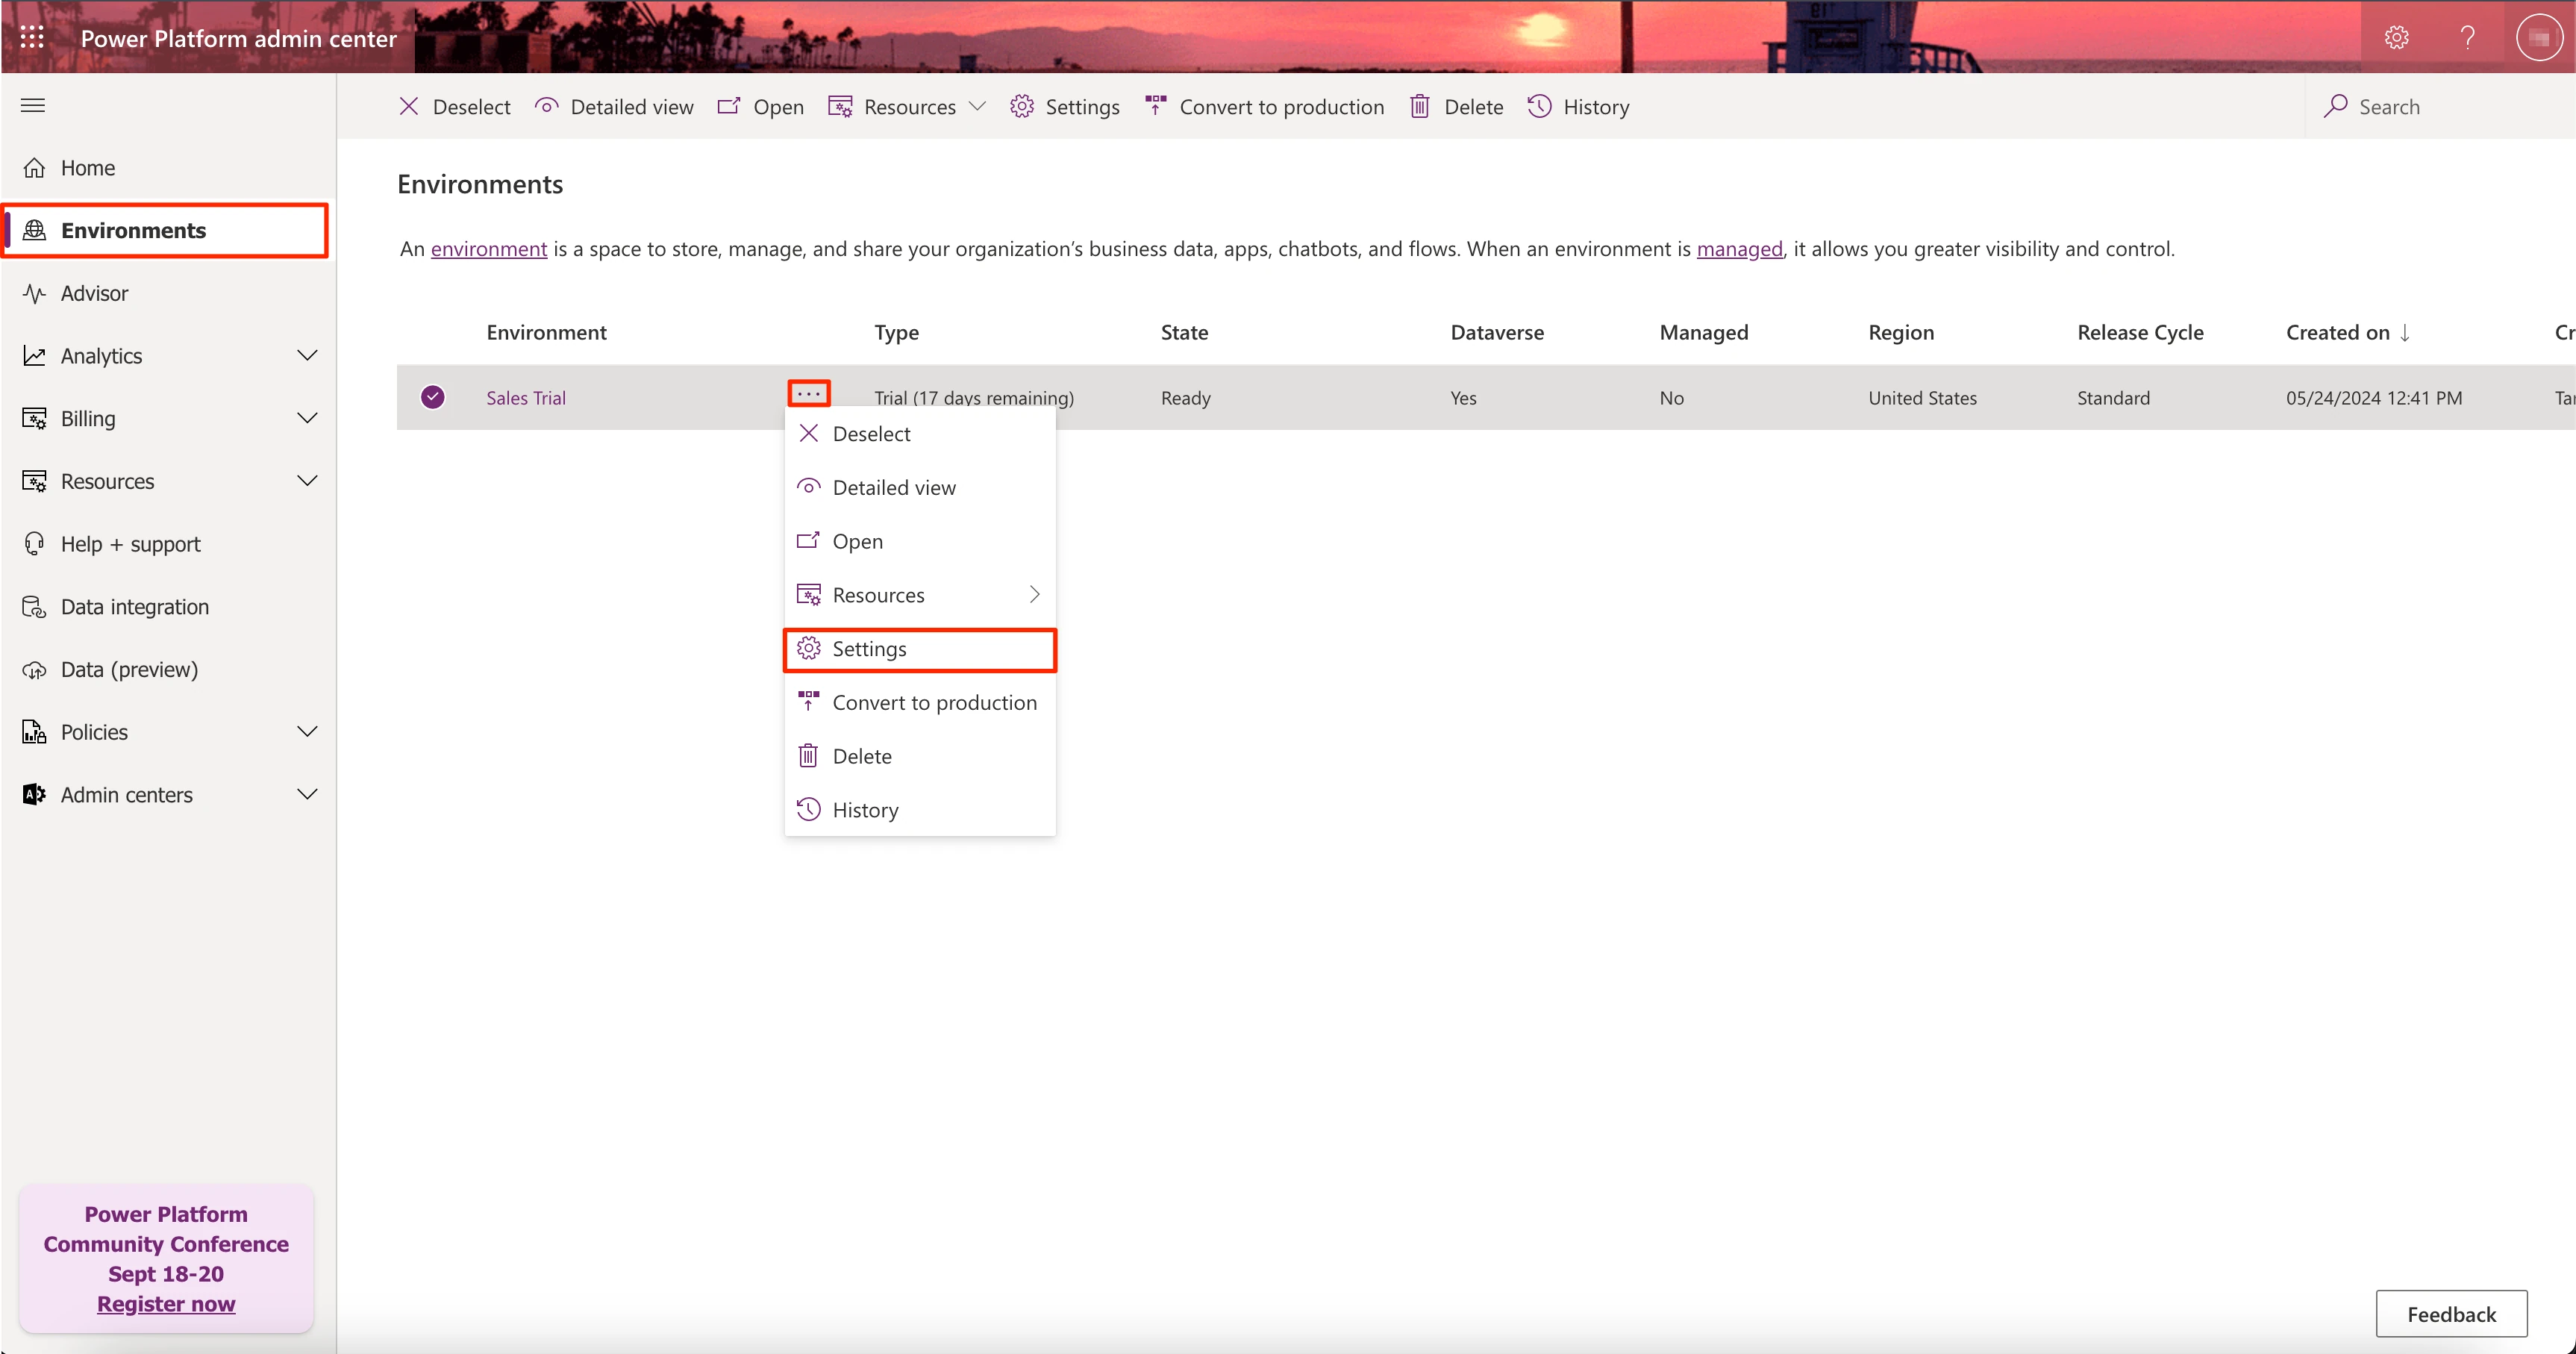
Select the environment for your Dynamics instance and click More Options menu > Settings.
In the Users + permissions section, click on Application users.
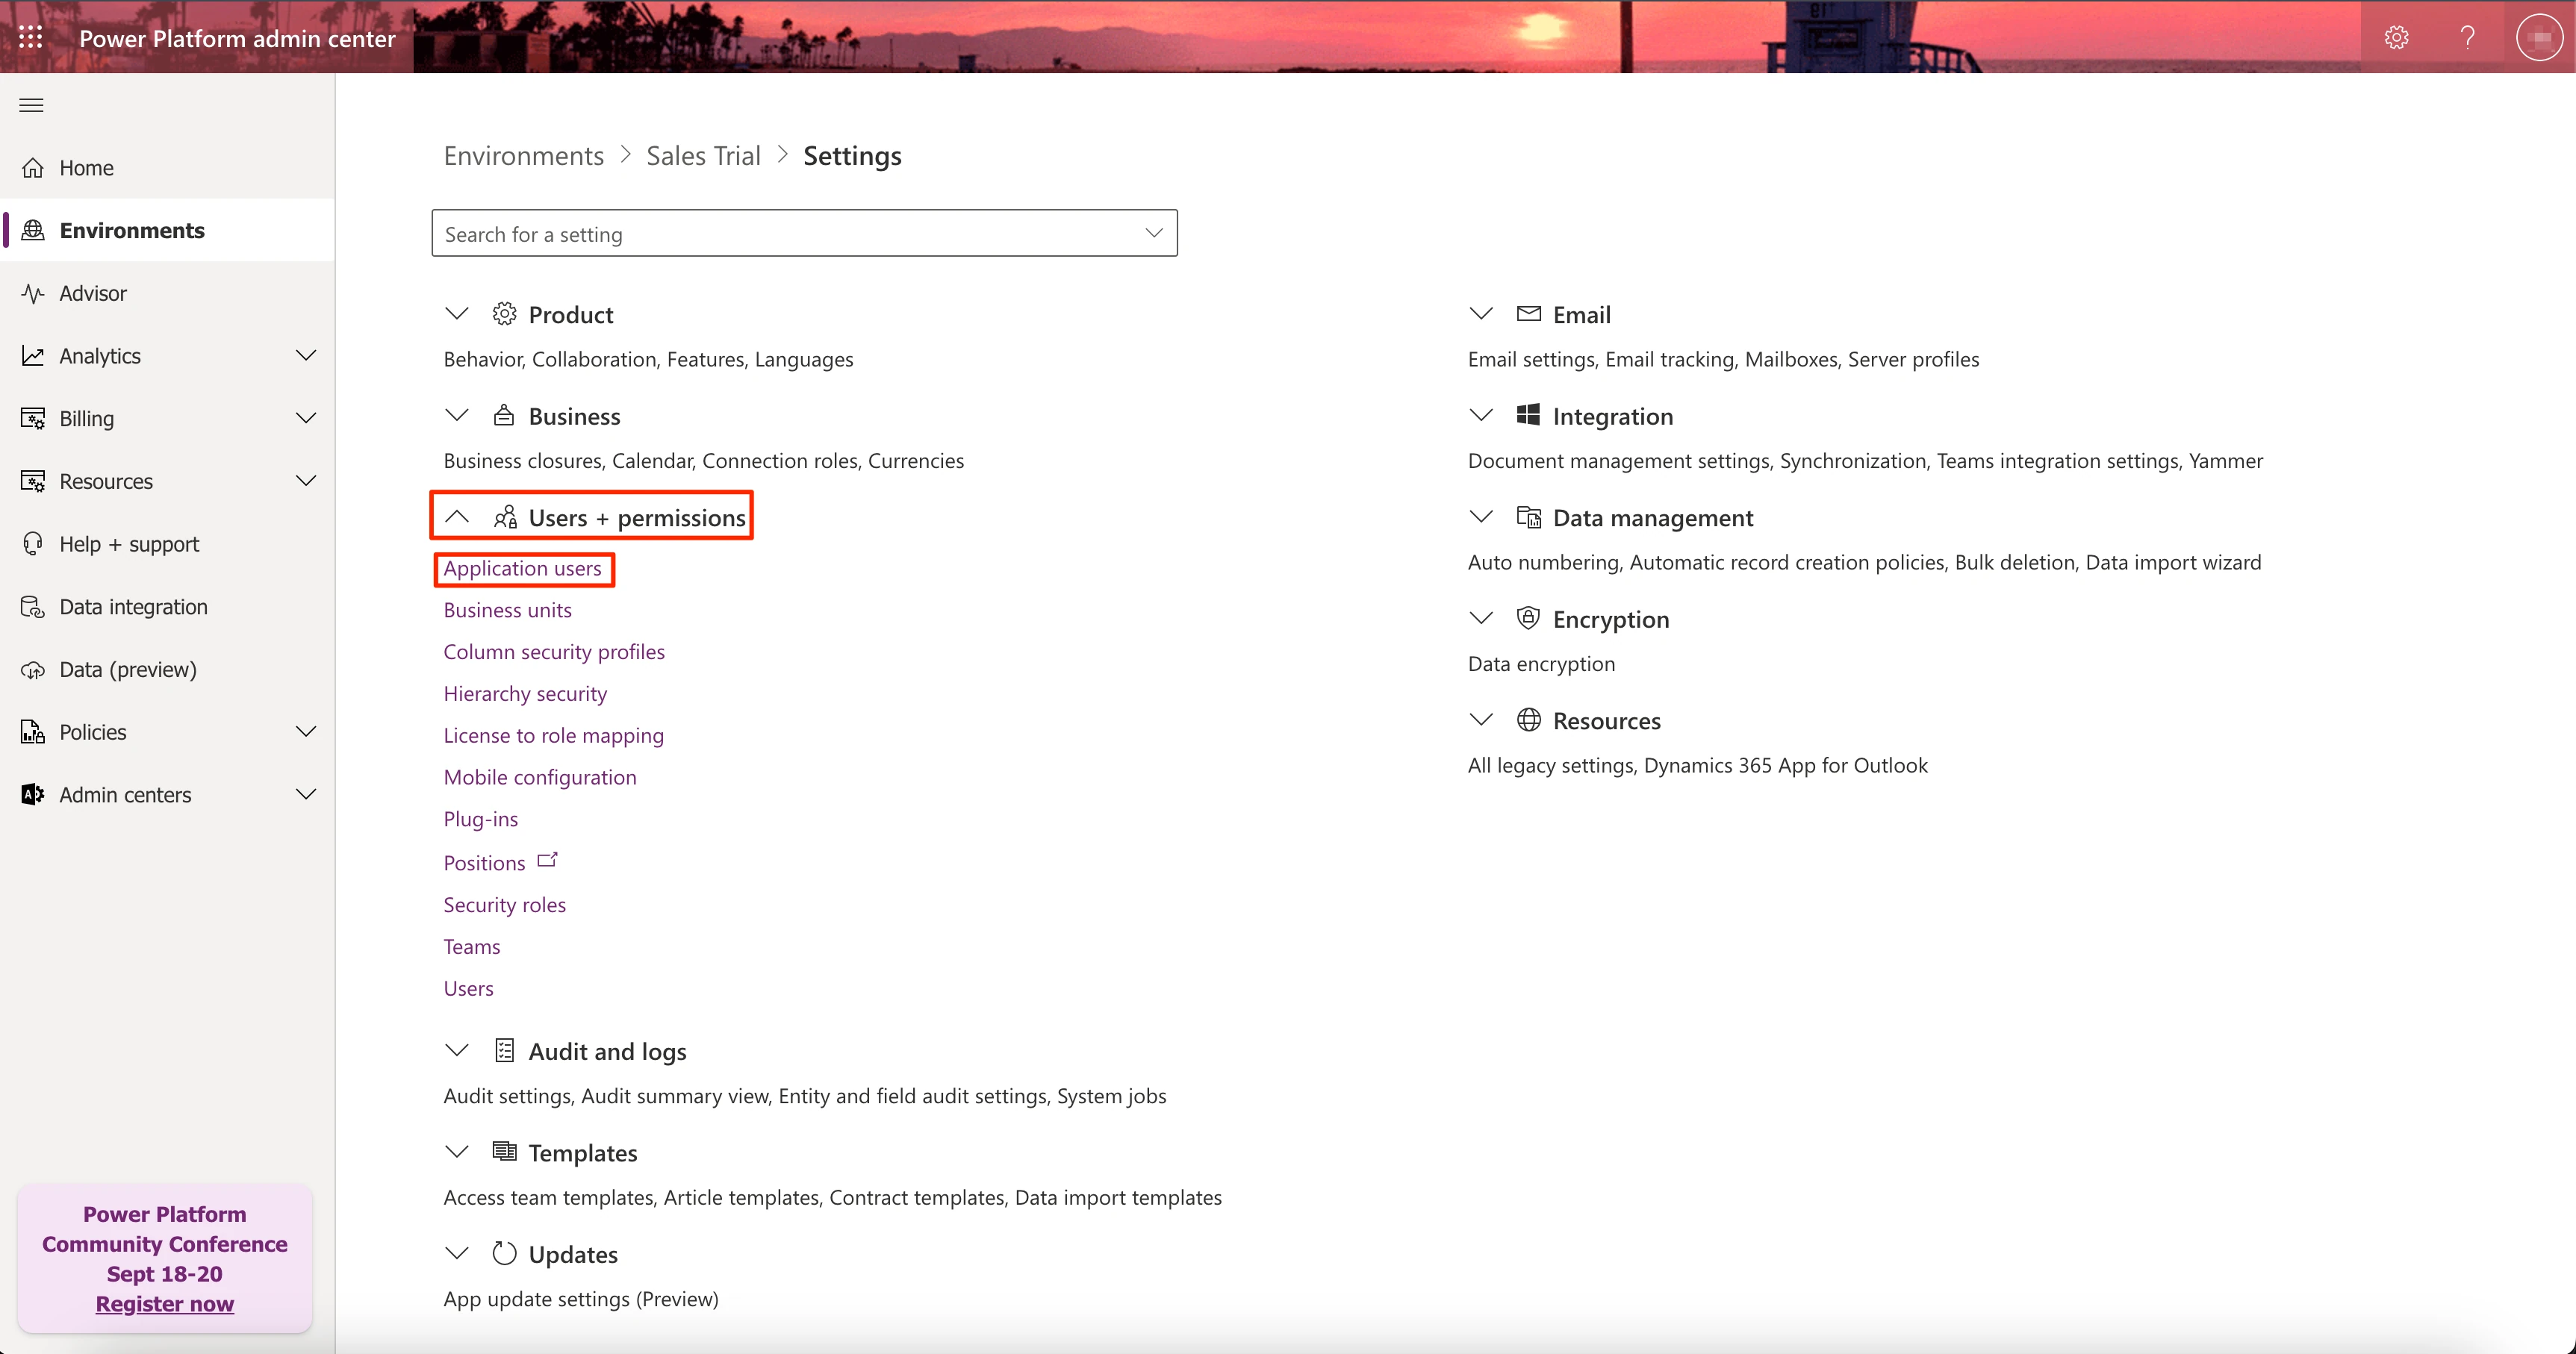
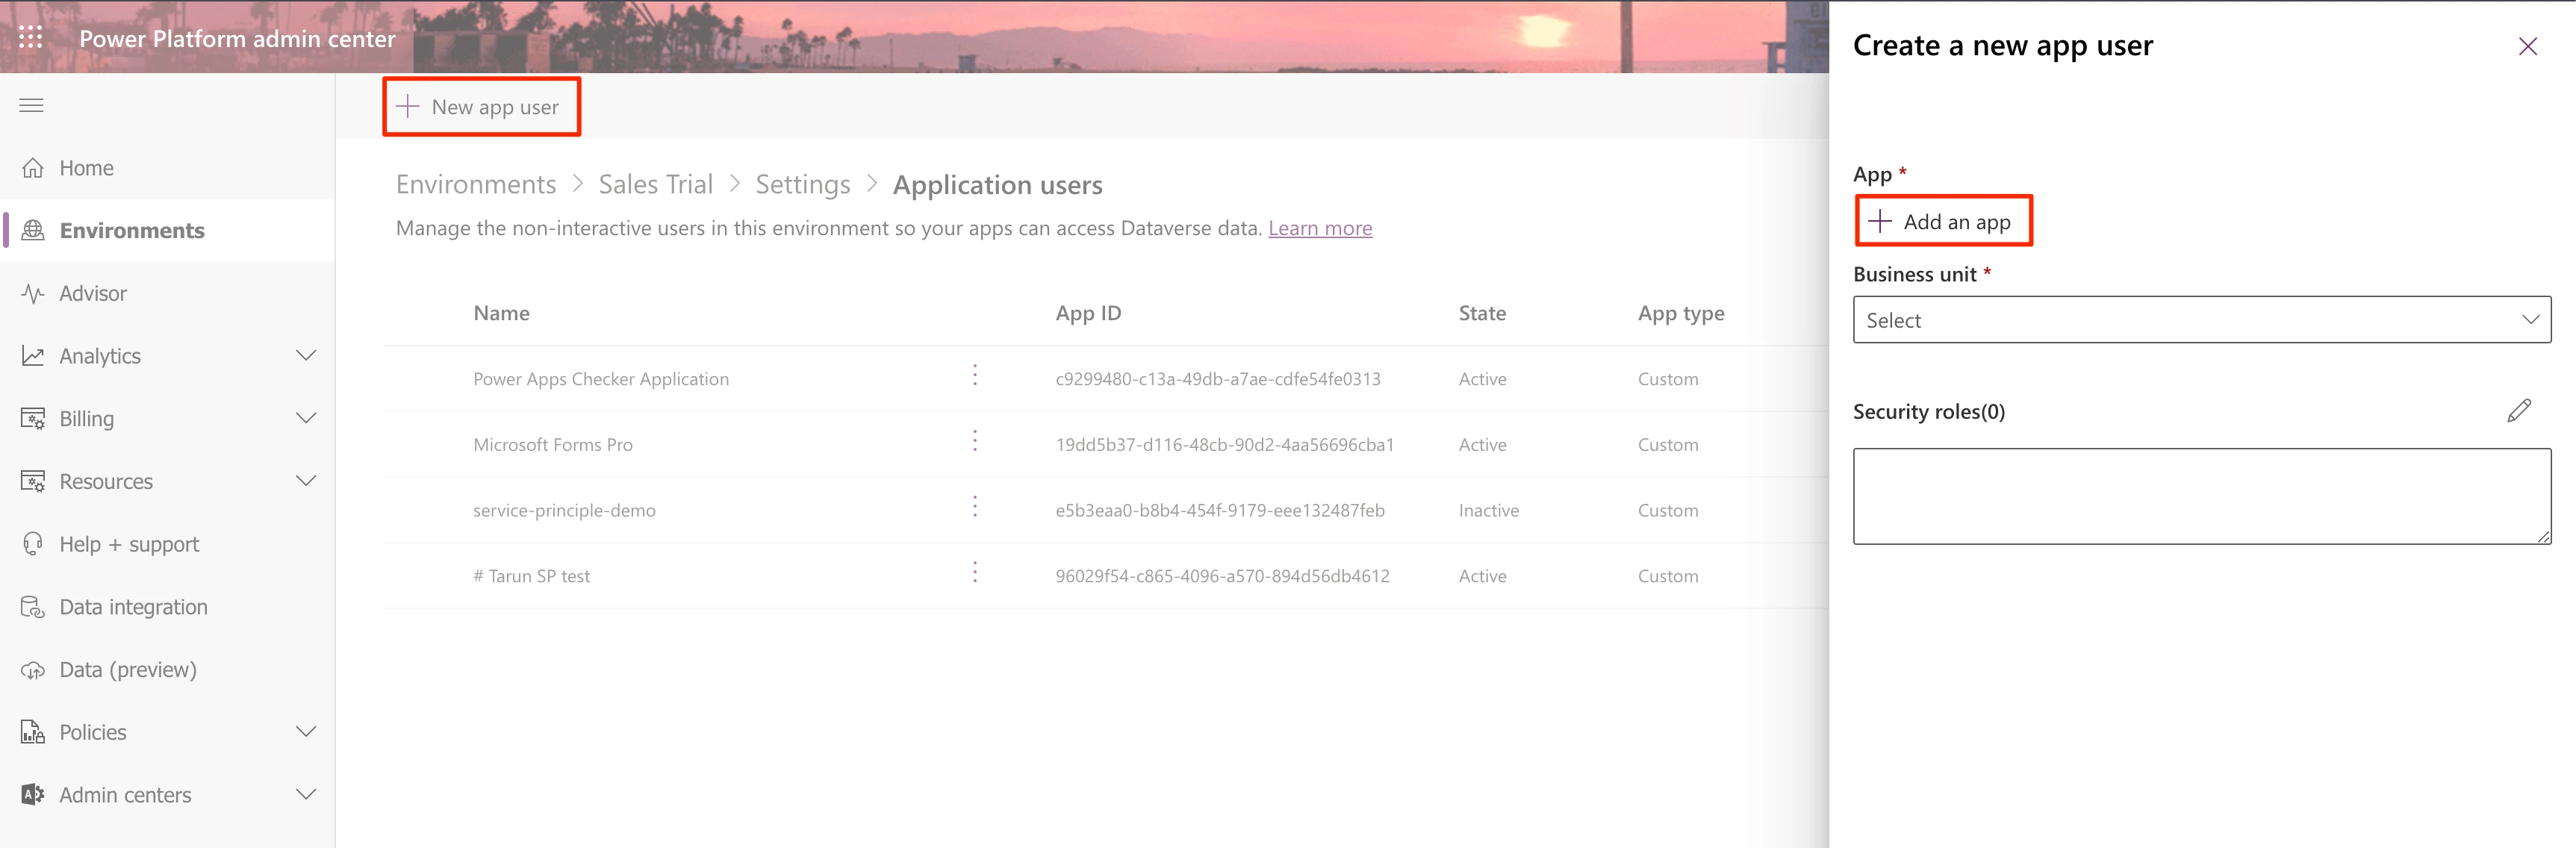
Click New App User > Add an app.
Search for the application that you registered. If you have duplicate application names, use the App ID you found in the Register application step.
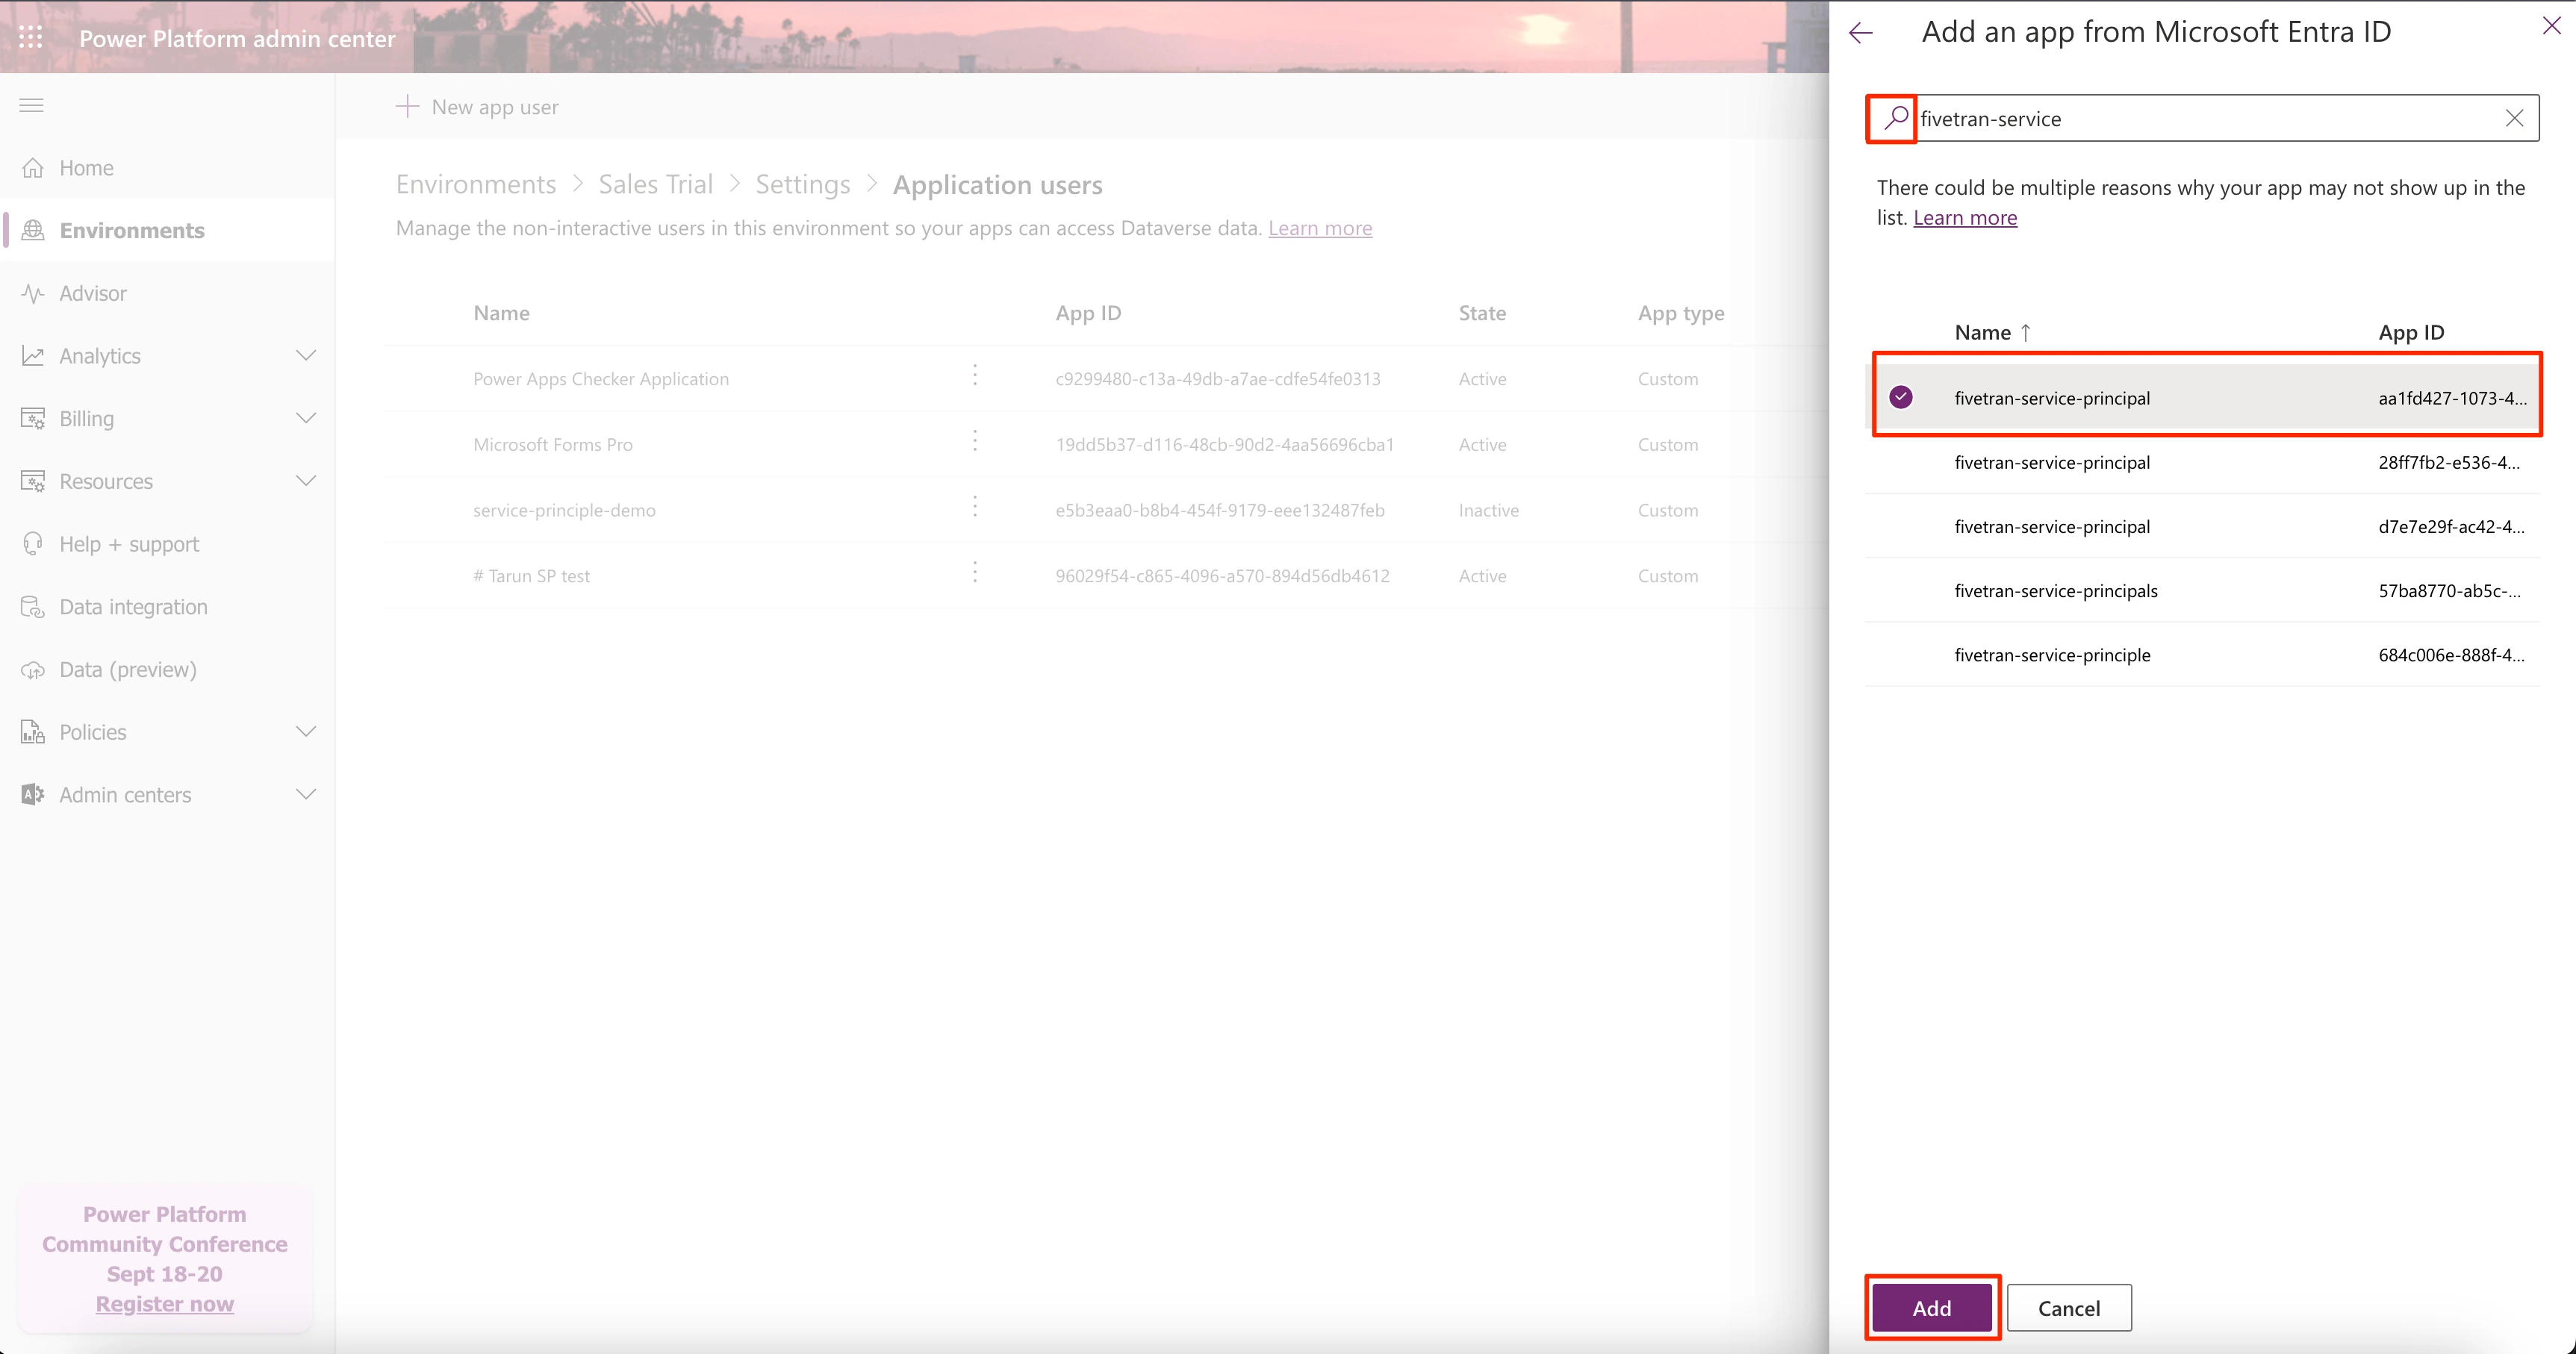
Select the app and click Add.
In the Business unit drop-down menu, select the value corresponding to the Dynamics 365 instance. This might be based on your Dynamics instance's URL. For example, if your dynamics instance URL is
org3d56b123.crm.dynamics.com, then your Business unit isorg3d56b123.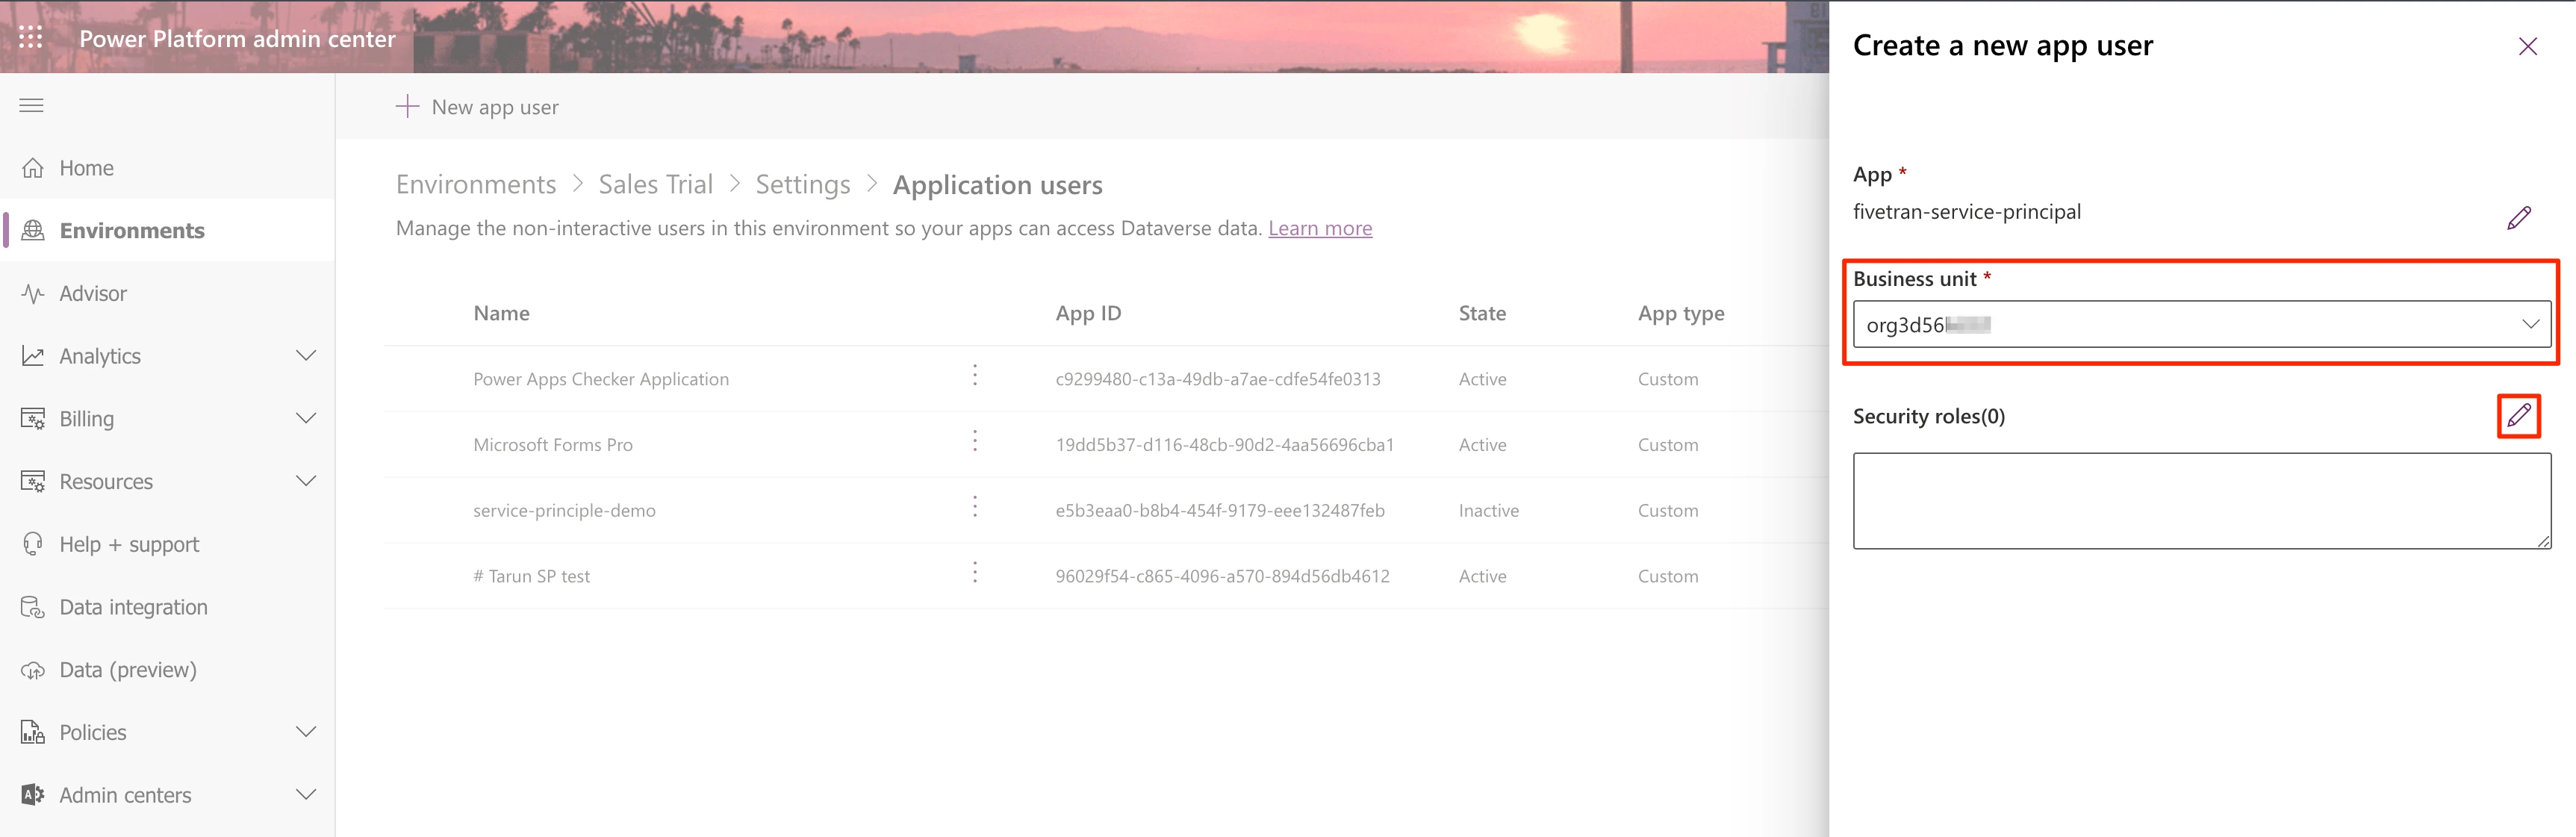
In Security roles field, click the Edit icon.
Select a predefined or custom role that has the appropriate Read and Write permissions, and then click Save.
Click Create. Once complete, you'll see your new connection in the Destinations list.

Supported objects
| Object Name | Supported? | Sync Keys |
|---|---|---|
| Entity name | ✅ | All single-column keys for the entity |
| Marketing Lists | ✅ | All single-column keys for the entity |
Activations supports all Microsoft Dynamic entities as objects to sync to. Learn more about defining keys for entities in Microsoft Dynamics:
- Define keys in Microsoft Dynamics
- Define keys in Power Apps (Power Apps is the platform that Dynamics is built on top of)
Lookups to other records
You can configure lookups from one Dynamics Entity to another in the same workspace by using each entity’s single-column key:

The lookup by key needs to single-column keys
When you have a null lookup, or a reference from which you want to disassociate a record, you must sync over null.
For a string example of a column in Snowflake:
IFF(lookup_ref = '', NULL, lookup_ref) as lookup_ref
Supported sync behaviors
| Behavior | Supported? | Objects |
|---|---|---|
| Update or Create, Update Only | ✅ | All |
Learn more about our sync behaviors in our Syncs documentation.
Let us know if you want Activations to support additional sync behaviors for Microsoft Dynamics.
FAQ
How do I set up the app approval flow for non-admin authorizing Microsoft users?
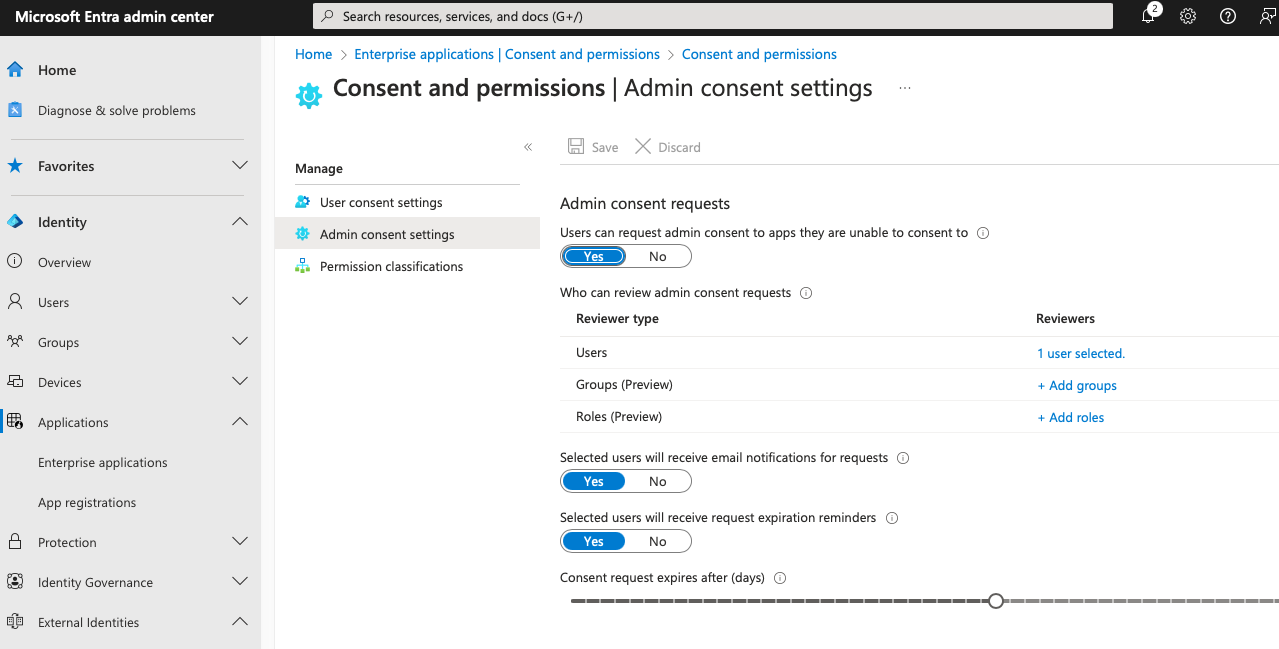
To use Activations with Dynamics, your Dynamics user must be able to request admin approval for apps. The following steps walk you through the approval workflow in Microsoft Entra.
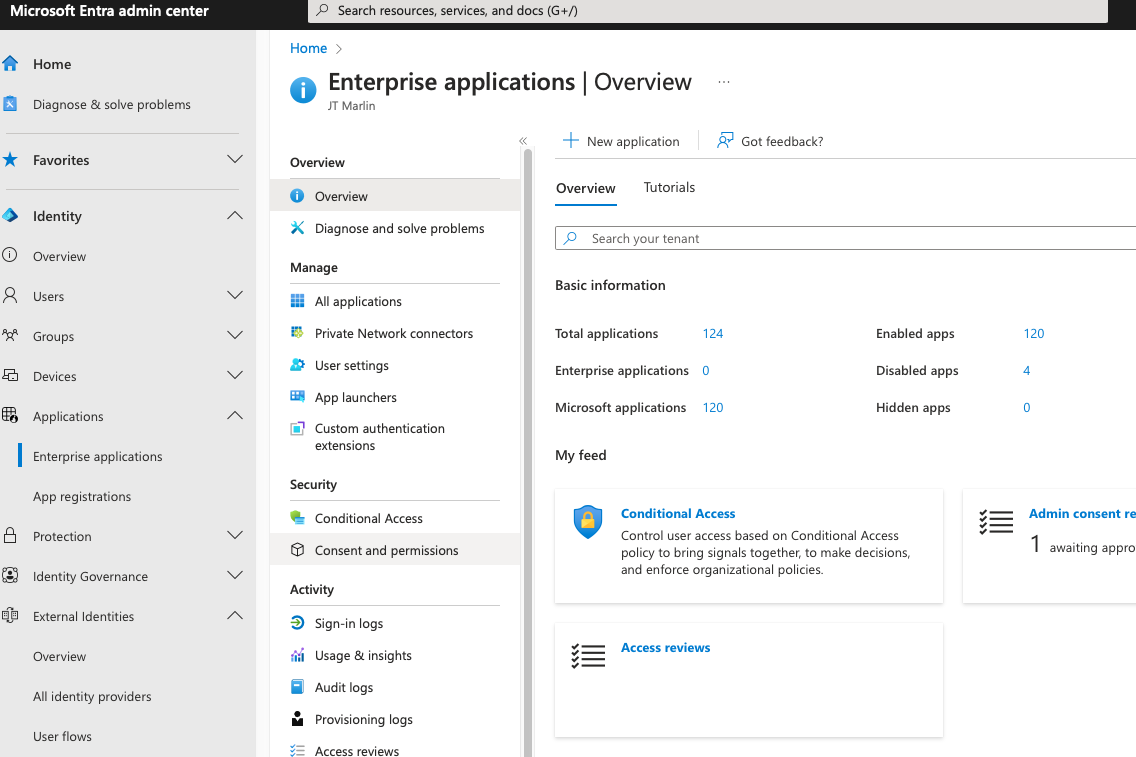
[ADMIN] Configure your Admin settings in Entra, so users can request admin consent to apps. This is found after navigating to Enterprise applications > Consent and permissions > Admin content settings.
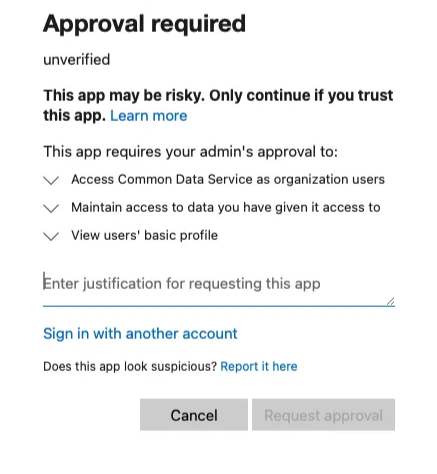
[USER] Add Microsoft Dynamics as a destination in Activations and go through the OAuth flow. At the end, you will be prompted to enter a justification and request for access.
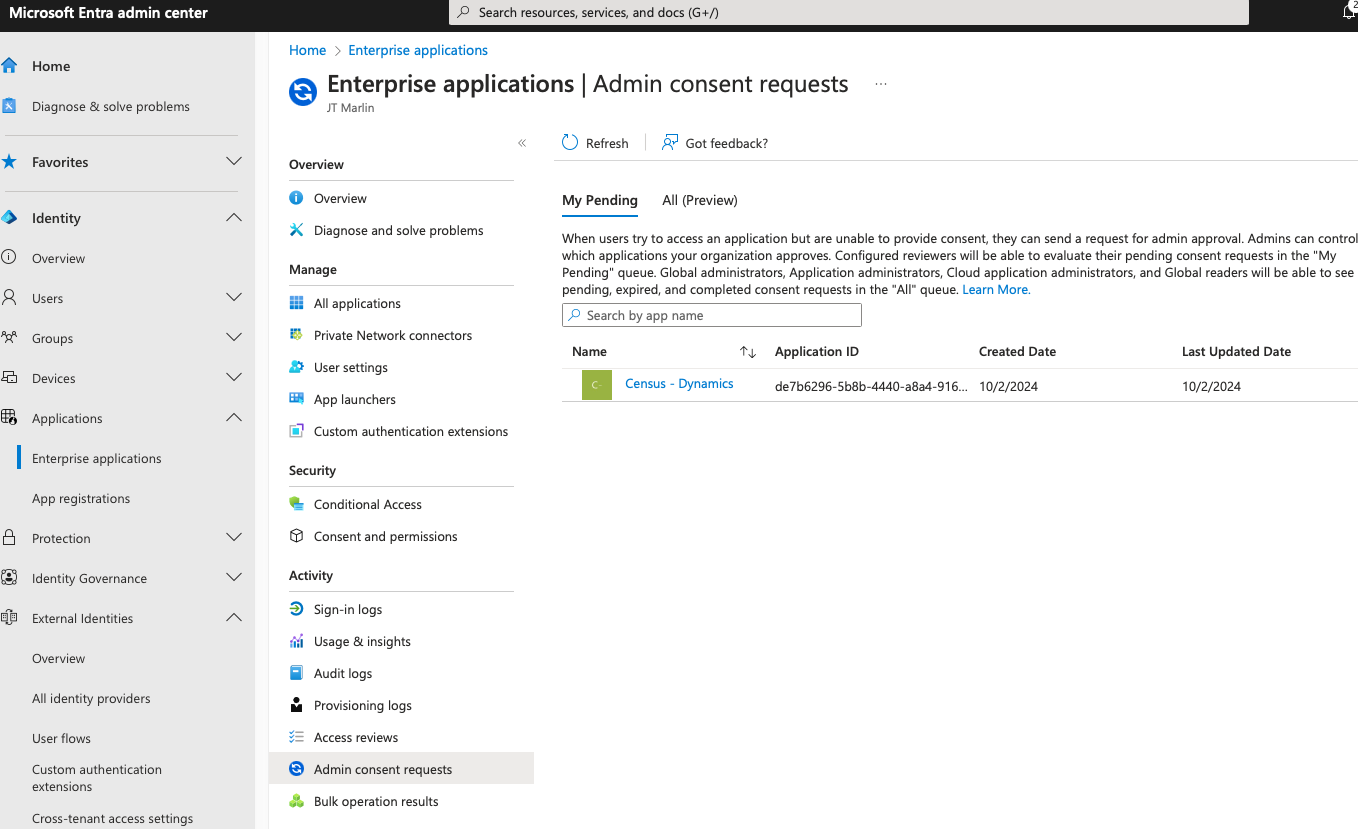
[ADMIN] Find the approval request in Entra. Approval requests can be found after navigating to Enterprise applications > Admin consent requests.
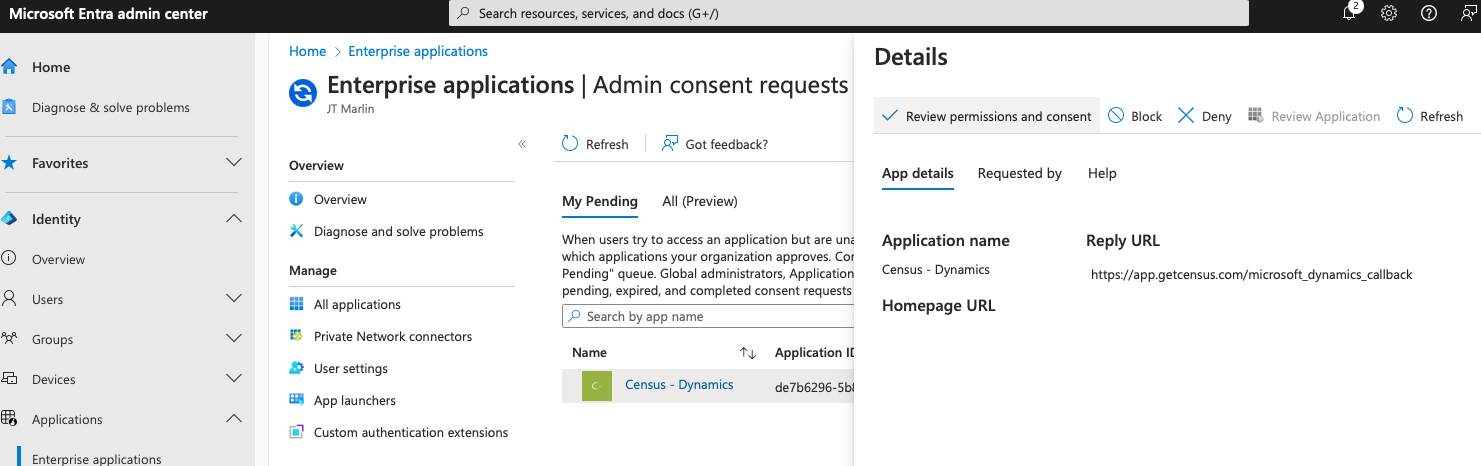
[ADMIN] Click on the approval request, then click on Review permissions and consent.
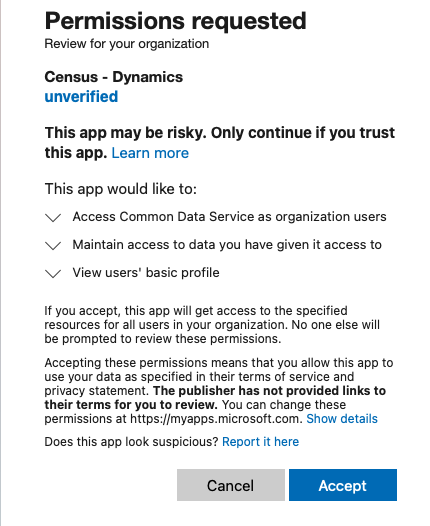
[ADMIN] A popup will prompt you to select a Microsoft Account. After selecting, approve the request.
[USER] Re-add the destination and complete the OAuth flow in Activations.
Need help connecting to Microsoft Dynamics?
You can reach out to our support team.