Ortto
This page describes how to use Activations with Ortto.
Getting started
This guide shows you how to use Activations to connect your Ortto account to your data warehouse and create your first sync.
Prerequisites
Before you begin, you'll need the following:
- Fivetran account: If you don't have this already, start with a free trial.
- Ortto account
- Have the proper credentials to access to your data source. See our docs for each supported data source for further information:
Step 1: Connect Ortto
Log into Activations and navigate to Destinations.
Click New Destination.
Select Ortto from the dropdown list.
Ortto uses API keys to authorize access to the API, so you will need to provide an API Key to Activations.
- You can create an API key in Ortto specifically for Activations. On the left-hand menu click More > Data Sources. On the Data Sources page click the New Data Source button then select Custom API (advanced). Give the source a name of your choosing and click Create. The API Key will be shown on the following page. Make sure to save it somewhere secure.
- Copy the API key and paste it into the API Key field in the Ortto setup in Activations.
- Select your Region: US, AU, or EU to match your Ortto account's regional endpoint. Existing connections default to US.
If you're unsure which region to select, check your Ortto account URL:
ap3api.comis US,au.ap3api.comis AU, andeu.ap3api.comis EU.- Ortto has custom rate limiting based on what plan you're on. Check the rate limits for your plan in Ortto's Rate limits documentation. Enter the limit for the 60s interval of your plan in the Rate limit per 60s field. If no limit is specified, we will default to the Pro plan (600 requests/min).
Step 2: Connect your data warehouse
The steps for connecting your data warehouse will depend on your technology. See the following guides:
Step 3: Create your model
When defining models, you'll write SQL queries to select the data you want to see in Ortto. This can be as simple as selecting everything in a specific database table or as complex as creating new calculated values.
- From inside your Fivetran account, navigate to the Models page.
- Enter a name for your model. You'll use this to select the model later.
- Enter your SQL query. If you want to test the query, use the Preview button.
- Click Save Model.
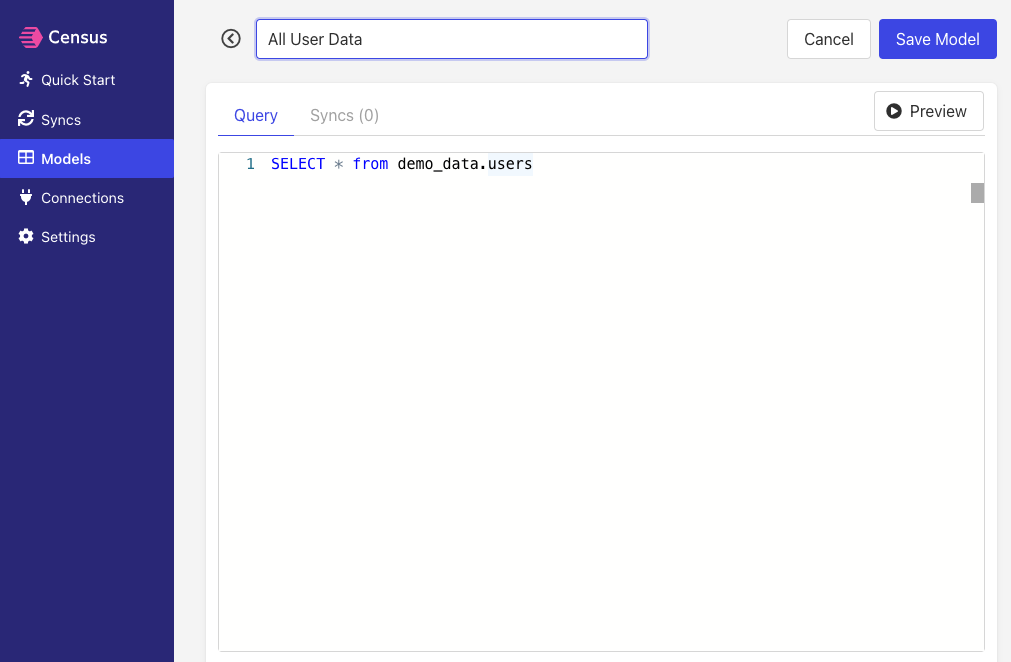
Basic SQL query for a new model
Step 4: Create your first sync
The sync will move data from your warehouse to Ortto. In this step, you'll define how that will work.
- From inside your Fivetran account, navigate to the Syncs page.
- Under What data do you want to sync?, choose your data warehouse as the Connection and your model as the Source.
- Under Where do you want to sync data to?, choose Ortto as the Connection and an Object in Ortto. (See Supported Objects.)
- Under How should changes to the source be synced?, choose Update or Create. (See Supported Sync Behavior.)
- Under How are source and destination records matched?, select a mapping key. (See Supported Objects for details.)
- Under Which properties should be updated?, select the fields you want to update by mapping a field in Ortto to a column in your model.
- Click Next. This will open the Confirm Details page where you can see a recap of your setup.
- If you want to start a sync immediately, set the Run a sync now? checkbox.
- Click Create Sync.
When configuring your sync, the page should look something like this:
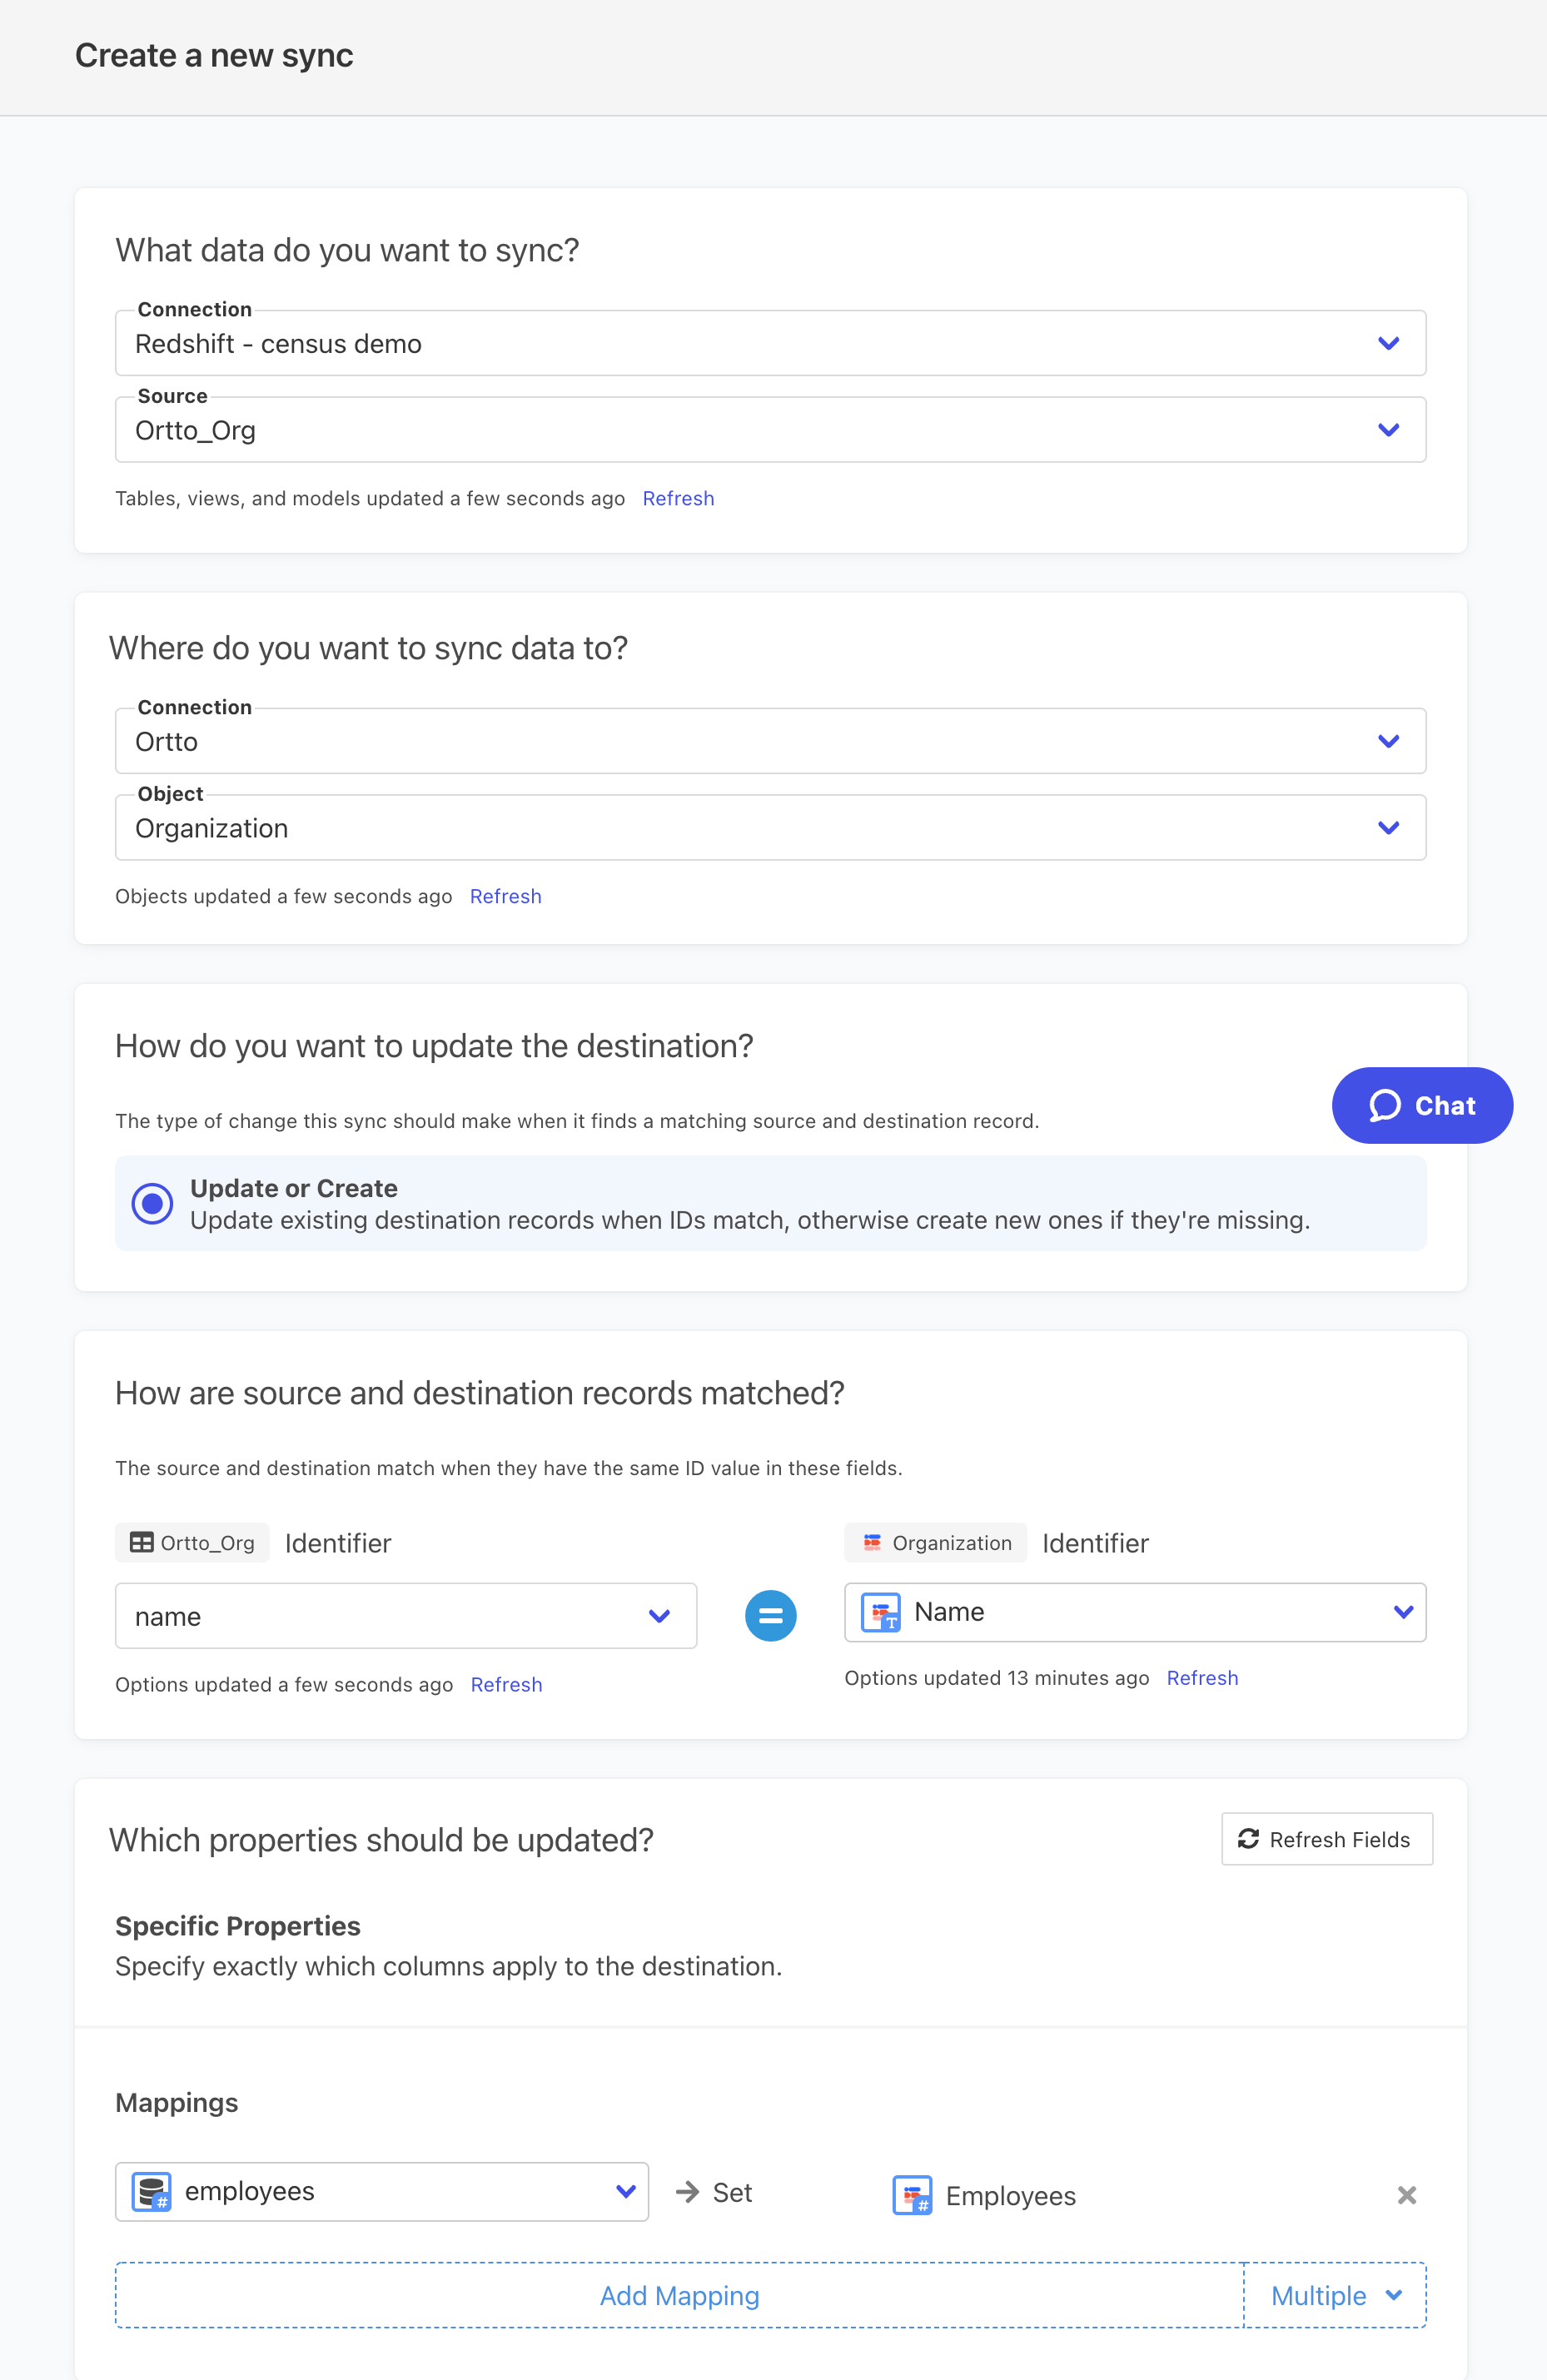
Sync setup for Ortto
Step 5: Confirm the synced data in Ortto
Once your sync is complete, it's time to check your data. Open Ortto and check that the records updated correctly.
If everything went well, that's it! You've started syncing data from your warehouse to Ortto! 🎉
And if anything went wrong, contact the support team to get some help.
Sync Speed
Sync speeds can be affected by API rate limiting from the destination app. Ortto has a number of different rate limiting criteria for their API depending on IP, Ortto tier, responses, and payloads. (See Ortto API Documentation for details.)
In most cases, you won't run into any issue with sync speed based on rate limiting unless:
- You're running an initial sync action that will update many records in Ortto.
- You have another integration or service that's making API calls to Ortto and using the same API key.
Supported objects
| Object Name | Supported? | Sync Keys |
|---|---|---|
| Organization | ✅ | Name, Website |
| Person | ✅ | Email, External ID |
Let us know if you want Activations to support additional objects for Ortto.
Supported Sync Behaviors
Learn more about all of our sync behaviors in our Syncs documentation.
| Behaviors | Supported? | Objects |
|---|---|---|
| Update or Create | ✅ | Organization, Person |
| Update Only | ✅ | Person |
Contact Support if you want Activations to support more Sync Behaviors for Ortto.