Intercom Setup Guide
Follow our setup guide to connect Intercom to Fivetran.
Prerequisites
To connect Intercom to Fivetran, you need an Intercom account with an active subscription.
Only use an HTTPS URL with TLS version 1.2 or above.
Setup instructions
In the connection setup form, enter the Destination schema name of your choice.
Select the Region for your Intercom workspace based on your Intercom App URL:
- US (United States): This is selected by default. No action needed if your Intercom URL is
app.intercom.io - EU (Europe): Select this option if your Intercom URL is
app.eu.intercom.io - AU (Australia): Select this option if your Intercom URL is
app.au.intercom.io
You cannot modify the region for a connection after you authorize it with a particular region. You must create a new connection to configure it with a different region.
- US (United States): This is selected by default. No action needed if your Intercom URL is
Click Authorize to authorize the API. You will be redirected to your Intercom account.
Log in to your Intercom account.
We recommend that you log in using Incognito mode to ensure you authorize the correct account.
Select your Intercom workspace from the drop-down menu.
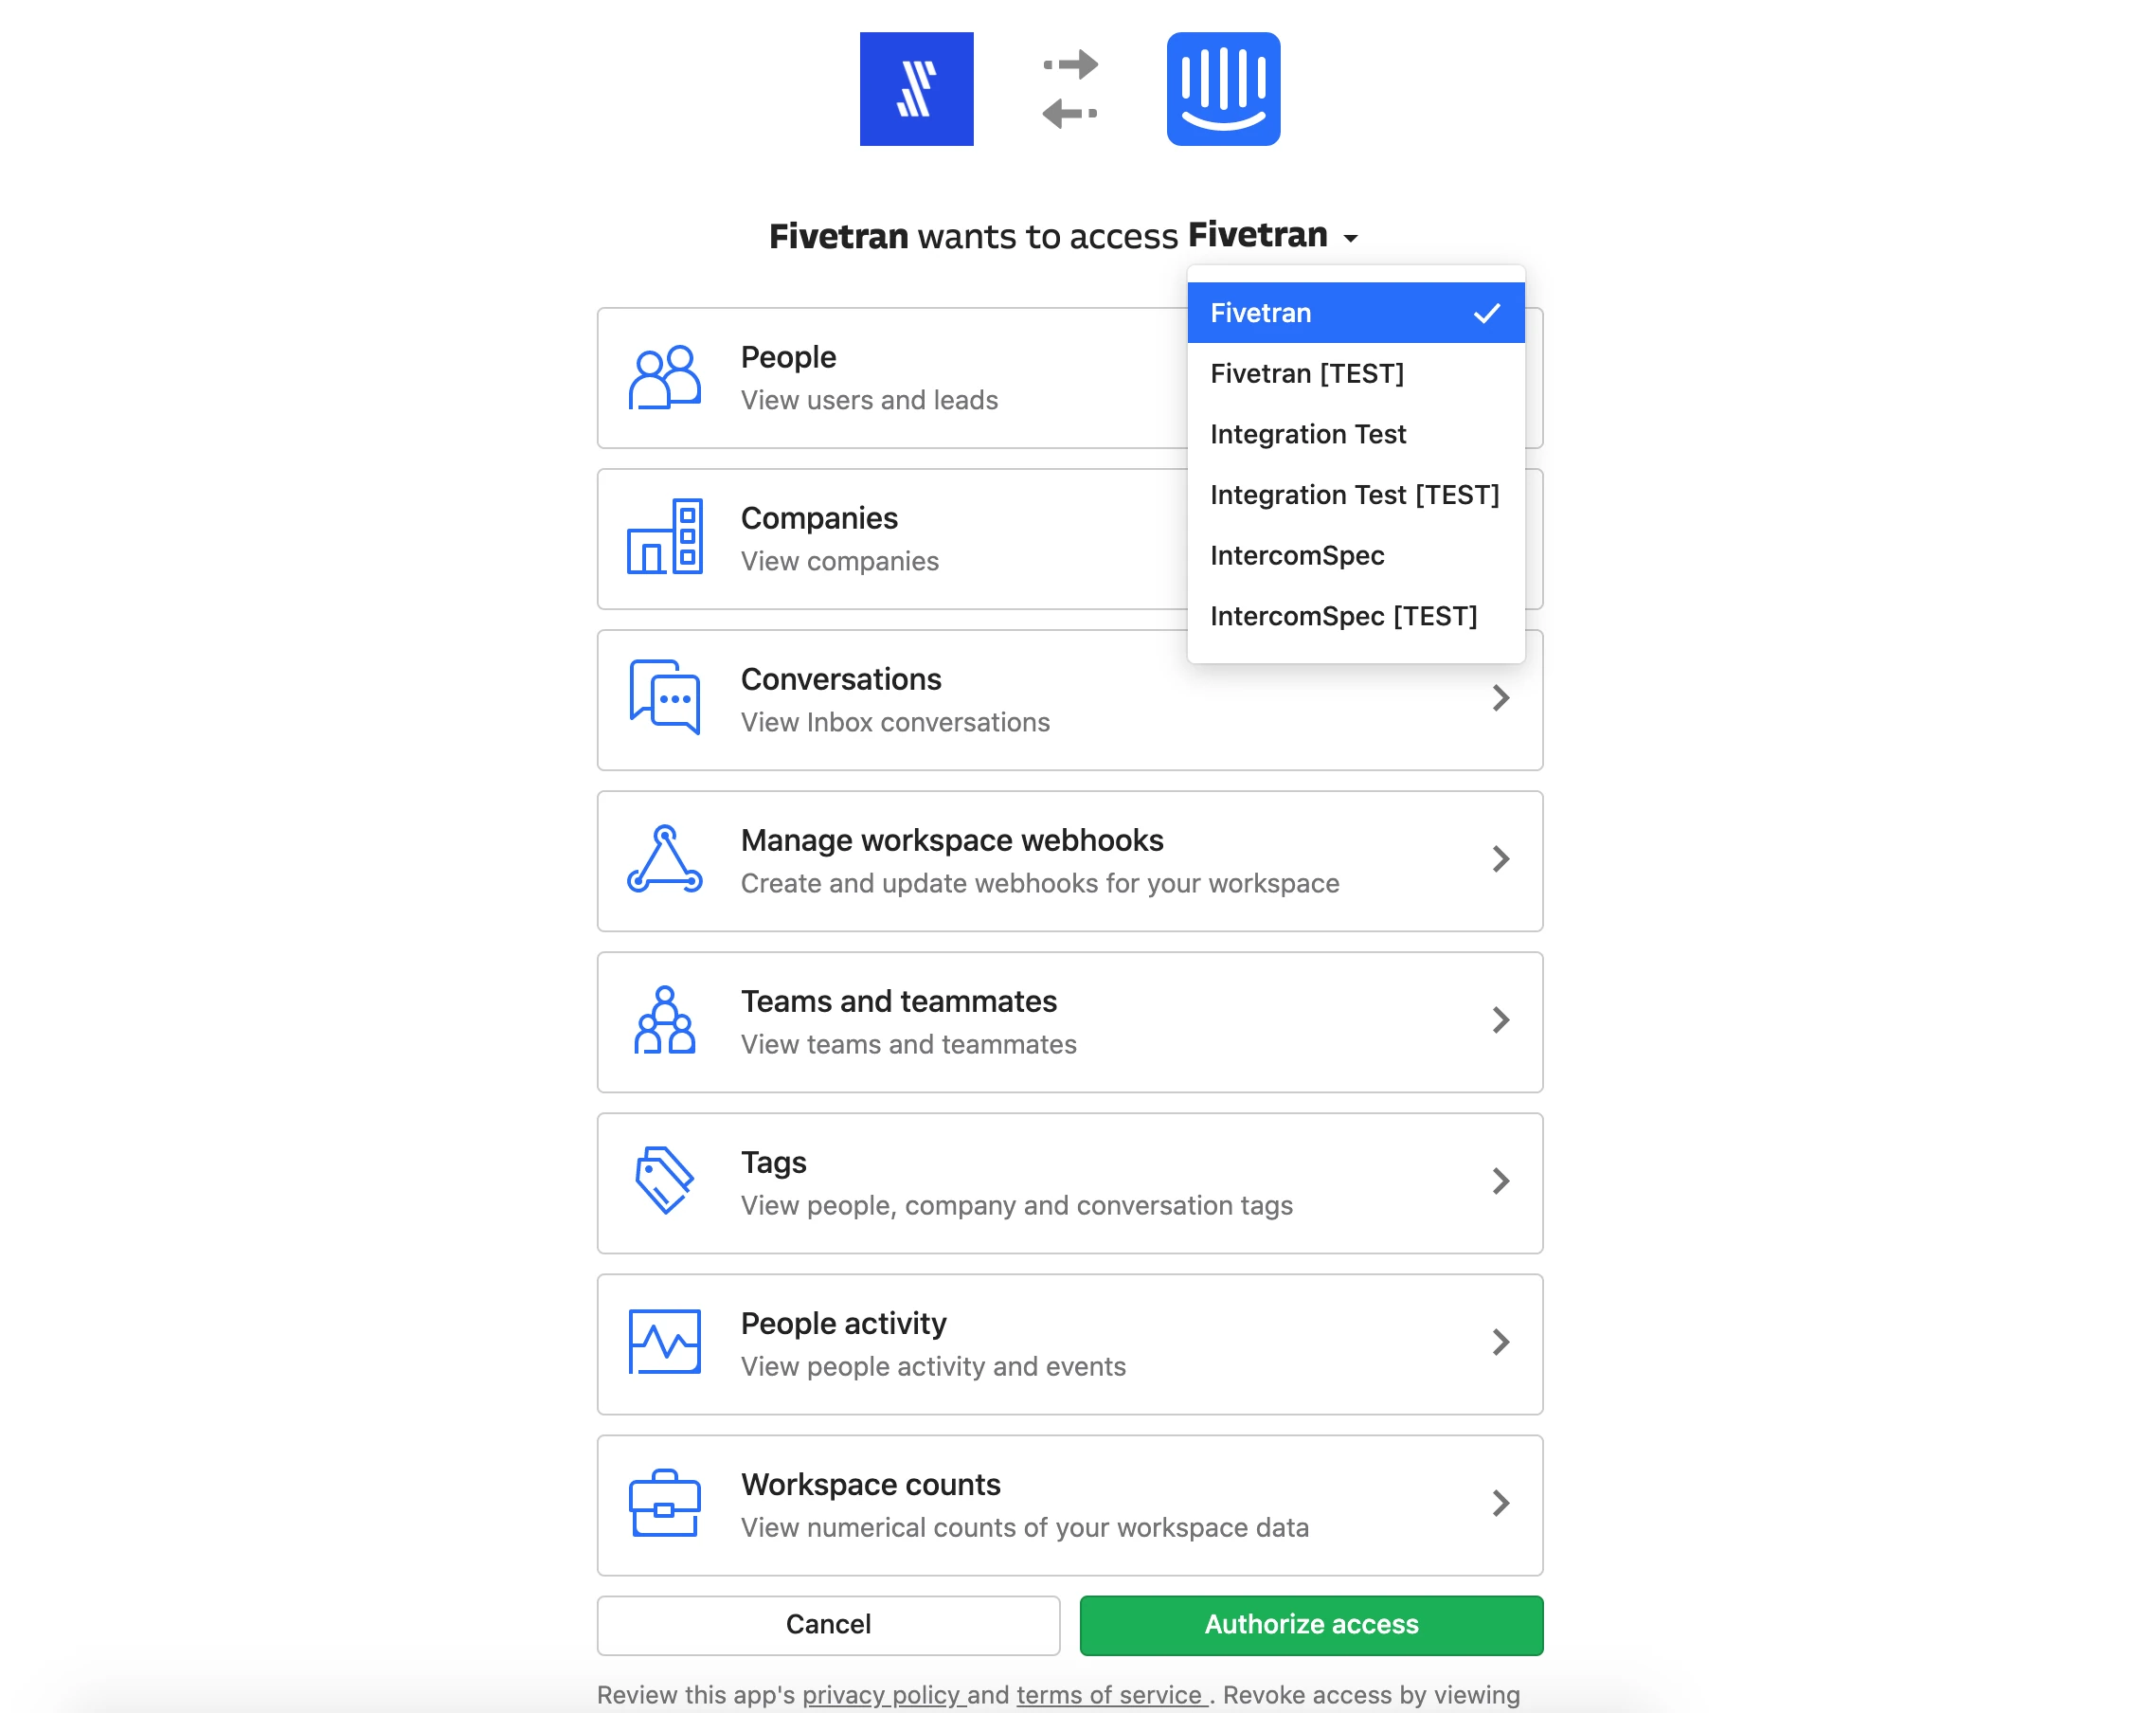
Click Authorize access to allow Fivetran to connect to your Intercom workspace.
Click Save & Test. Fivetran tests the connection and begins syncing your Intercom data.