Sailthru Setup Guide
Follow our setup guide to connect Sailthru to Fivetran.
Prerequisites
Before getting started, you need:
A Sailthru account
(Optional) A Sailthru Connect connection with Event Stream enabled.
To set up your S3 bucket policy, see Sailthru's documentation.
Setup instructions
Find API key and secret key
Log in to your Sailthru account.
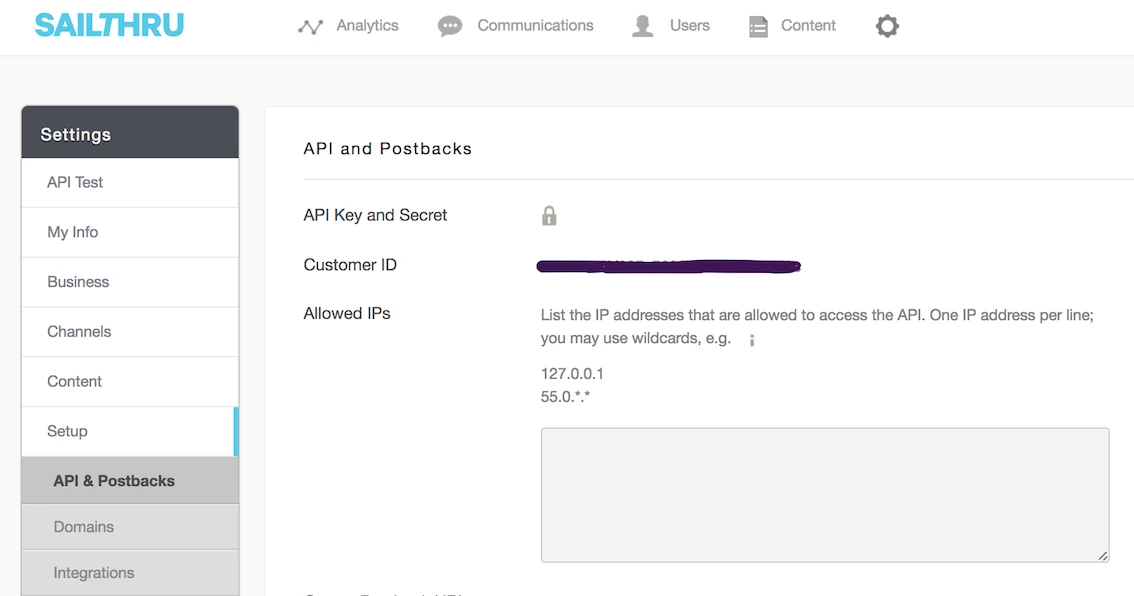
Go to Settings > My Info > Setup > API & Postbacks.

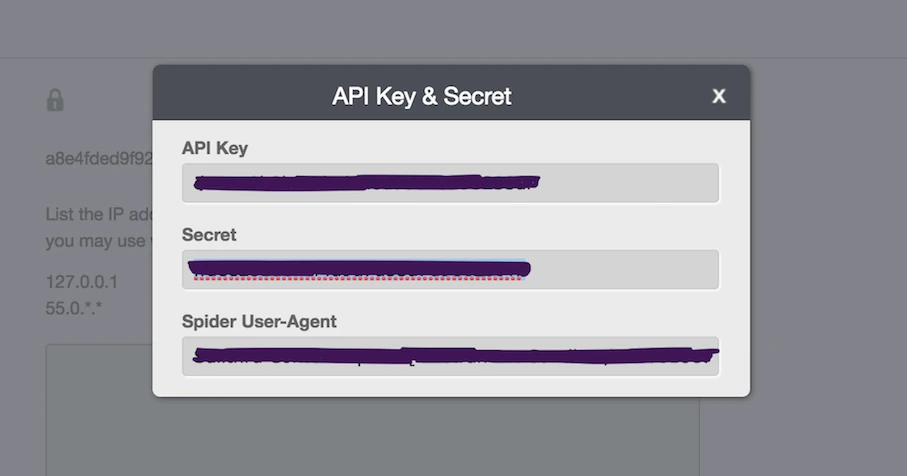
Click on the lock icon to show your API key and secret key.
Make a note of your API key and secret key. You will need them to configure Fivetran.

Safelist Fivetran's IPs
If you do not restrict any IPs (that is, your Allowed IPs field is empty), you can skip this step.
Close the API Key & Secret modal to return to API & Postbacks.
Go to the Allowed IPs text entry field.
An empty Allowed IPs field means IP restriction has not been enabled, and Sailthru is open to the world. If you change your setting from empty to listing only Fivetran's IPs, that will block access to services other than Fivetran.
Add Fivetran's IPs to the list of allowed IPs.
Begin Fivetran configuration
In the connection setup form, enter your chosen Destination schema name.
Enter the Sailthru API Key and Secret Key you found.
(Optional) In the Historical sync time frame drop-down menu, select the amount of historical data you want to include in your initial sync.
- If you choose Sync data from selected date, enter a date in the Historical Sync Limit Date field.
- (Optional) To sync Sailthru Connect data, set the Enable this if you want to sync Sailthru Connect toggle to ON and make a note the External ID. You will need it to set up Sailthru Connect.
(Optional) Set up Sailthru Connect
Create IAM policy
Log in to the Amazon IAM console.
On the navigation menu, click Policies.
In the Policies page, click Create policy.
Go to the JSON tab.
Copy the following policy and paste it in the JSON editor.
{
"Version": "2012-10-17",
"Statement": [
    {
      "Effect": "Allow",
      "Action": [
"s3:Get*",
"s3:List*"
      ],
      "Resource": "arn:aws:s3:::{your-bucket-name}/*"
    },
    {
      "Effect": "Allow",
      "Action": [
"s3:Get*",
"s3:List*"
      ],
      "Resource": "arn:aws:s3:::{your-bucket-name}"
    }
  ]
}
Click Next.
Click Create policy.
Create IAM role
- On the navigation menu, click Roles.
- In the Roles page, click Create role.
- In the Trusted entity type section, select AWS account.
- In the An AWS account section, select Another AWS account.
- In the Account ID field, enter
834469178297. - Select the Require external ID checkbox.
- In the External ID field, enter the external ID you found.
- Click Next.
- Select the checkbox for the IAM policy you created and click Next.
- Enter the Role name.
- Click Create role.
- In the Roles page, select the role you created.
- Make a note of the ARN. You will need it to configure Fivetran.
Finish Fivetran configuration
In the connection setup form, choose the Pack Mode for custom fields.
If you want to sync Sailthru Connect data, do the following:
i. Enter your S3 Bucket name.
ii. Enter the Role ARN of the IAM role you created.
The S3 Bucket and Role ARN fields appear only when you set the Enable this if you want to sync Sailthru Connect toggle to ON.
Click Save & Test. Fivetran will take it from here and sync your Sailthru data.